How did you get here?
If you have been following along to my blog posts and have an unRaid server sitting in your basement, office, or wherever you've managed to hide the growing collection of hard drives that started as "just one little server," you might as well put it to work.
One of my favourite uses for an unRaid server is Immich.
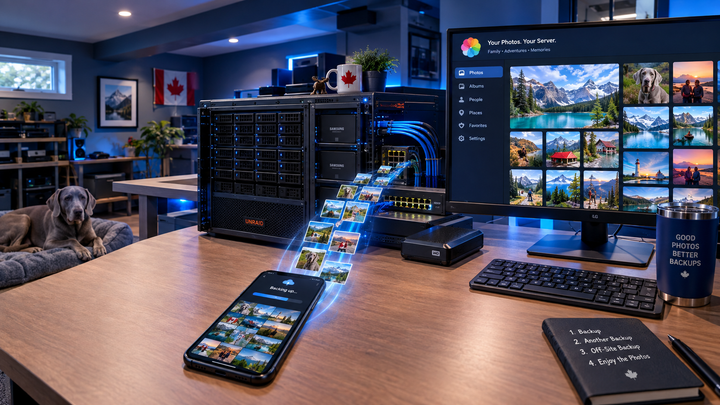
Immich is a self-hosted photo and video management platform that gives you many of the features you'd expect from Google Photos or Apple Photos: automatic phone backups, albums, searching, facial recognition, location information and a web interface, while keeping your photos on your own server with no monthly Google storage subscription and no uploading your family's entire photo collection to somebody else's cloud. Just:
Phone → Home Network → unRaid→ Your Storage
This guide walks through how to install Immich on unRaid , configure storage, create user accounts, install the Android app, automatically back up photos and videos, and most importantly, making sure your photos are actually backed up.
Important: Immich is a photo management application, not a complete backup strategy. Your unRaid server should not be the only place your important photos exist.
What is Immich?
Immich is an open-source, self-hosted photo and video management application.
The easiest way to describe it is your own Google Photos, running on your own server.
You install Immich on unRaid and then access your library from:
- A web browser
- Android
- iPhone and iPad
Your phone can automatically upload new photos and videos to your unRaid server. Immich can then organize and process those photos, allowing you to browse your collection by date, albums, people, locations and more. For a home server enthusiast, this is a pretty compelling setup. Instead of:
Phone
   ↓
Google Photos
   ↓
Google's servers
you can have:
Phone
   ↓
Home Wi-Fi
   ↓
Unraid
   ↓
Your storage
And if you add a proper backup strategy:
Phone
   ↓
Immich
   ↓
unRaid
   ├── Local backup
   └── Off-site backup
Now you have something much more useful than simply another Docker container.
Why run Immich on unRaid?
There are plenty of cloud photo services available. So why bother setting up your own? For me, there are several reasons.
- You control the storage: Your photos are stored on hardware you own.
- You control the accounts: You aren't dependent on a third-party cloud account for access to your family photo library.
- No additional cloud storage subscription: Once you've already purchased your Unraid hardware and storage, adding another family member doesn't require another monthly storage plan.
- You can expand your storage: Need another 12 TB drive? Add it to your Unraid setup.
- It works particularly well for families: Each family member can have their own account while still being able to share albums and photos.
- And perhaps most importantly: It's your's on Canadian soil and It's fun.
If you're already running unRaid , you probably don't need much convincing.
What you'll need
Before starting, you'll need:
- An unRaid server
- Available storage
- An Android or iPhone
- A reliable home network
- A little patience
- A backup plan
I strongly recommend giving your unRaid server a static IP address or DHCP reservation. For example:
Unraid:
192.168.0.111
Your address will obviously be different.
A reliable home network also makes a big difference when you're transferring hundreds of gigabytes of photos and videos.
If you're interested in the networking side of my setup, I've written about why I chose TP-Link Omada for my home network:
Upgrading My Home Network: Why I Chose TP-Link Omada
Decide where your Immich photos will live
Before installing Immich, decide where your photos are going to live. Don't install Immich and then blindly accept whatever storage location happens to be configured. Your photos are the important part of this entire setup. For example, you might create an unRaid share called:
immich
which could appear on the server as:
/mnt/user/immich
Your exact storage configuration will depend on how your unRaid server is configured. The important thing is that the storage is persistent. Your photos need to survive:
- Docker container updates
- Container recreation
- Unraid reboots
- Immich updates
- Hardware maintenance
The Docker containers should be replaceable, your photo library should not be.
Decide whether to use your array or SSD pool
unRaid gives you some flexibility here. You could store everything on your main array:
Unraid Array
└── immich
    ├── photos
    ├── videos
    └── application data
Or you could use an SSD pool for Immich's faster-working data while keeping the actual photo library on your larger array. For example:
SSD Pool
└── Immich application/database data

Array
└── Immich photo library
This can be a very good compromise.
For me I am using a separate SSD's for my photos (Immich) and one for my documents (Home Assistant). Its important data and I want it fast and easy to understand when setting up backups.
The SSD handles the stuff that benefits from fast storage while your large hard drives store the increasingly ridiculous collection of family photos and 4K videos.
Create the Immich share
In Unraid, go to:
- Shares → Add Share
Create a share called:
immich
Configure the share according to your storage strategy. For example:
Share name:
immich
If you have an SSD pool, you may choose to use it for Immich's application data.
The exact configuration will depend on your hardware and unRaid setup.
Understand docker storage paths
One of the easiest ways to get confused with Docker is forgetting that the container and unRaid see different paths. For example:
Unraid:
/mnt/user/immich
might be mapped into the container as:
/data
Immich sees:
/data
unRaid sees:
/mnt/user/immich
That's normal. What matters is that you understand which path represents your permanent storage.
Do not randomly change these mappings after you've started uploading your photo library or you may be in for a world of hurt.
Install Immich on unRaid
Open the Unraid web interface and go to Apps and Search for:
Immich
Immich consists of multiple services rather than simply being one Docker container. Depending on the current Immich release and installation method, you'll encounter components such as:
- Immich Server
- Immich Machine Learning
- PostgreSQL database
- Redis
- Supporting services
This is why I recommend using the current Unraid-compatible installation method rather than following an old tutorial that tells you to manually create several containers with configuration from three years ago. Immich has changed significantly over time.
Configure the storage
During installation, configure the Immich storage locations to point to your persistent unRaid storage. For example:
Host:
/mnt/user/immich

Container:
/data
The exact paths may differ depending on the current Immich installation method.
The important rule is to make sure the Immich library is stored outside the disposable Docker container layer. If the container disappears, your photos should remain.
Start Immich
Once you've configured everything, start the Immich containers. Go to:
- Docker
and verify that the Immich services are running.
The first startup may take a little longer than normal while Immich initializes its database and supporting services. Don't immediately panic because your photo server isn't ready in three seconds.
Open Immich
From another computer on your home network, open:
http://YOUR-UNRAID-IP:2283
For example:
http://192.168.0.99:2283
The actual port may differ depending on your configuration. Use the port shown in your unRaid Docker configuration. You should now see the Immich interface.
Congratulations. You have successfully created yet another service to maintain. 🤣
Create your administrator account
Create your first Immich account. Use a strong, unique password. Don't reuse:
- Your unRaid password
- Your email password
- Your Wi-Fi password
Your Immich account will eventually have access to your family's photo library, so treat it like an important account.
Create accounts for family members
One of the best features of Immich is that you can create individual accounts. For example:
Adam
Jodi
Kids
Each account can have its own photo library.
Instead of putting everyone's pictures into one giant account, you can maintain separate libraries while still sharing albums and photos. This works particularly well for a family.
Install the Immich Android app
Now we get to the part that makes Immich useful. On your Android phone, open the Google Play Store. Search for:
- Immich
Install the official Immich mobile application. Open the app. You'll need to enter the address of your Immich server. If you're only accessing Immich from inside your home network, it might look something like:
http://192.168.0.99:2283
Then log in with your Immich account. Your phone should now connect to your unRaid server.
Configure Android photo backup
In the Immich Android app, open the backup settings. You'll want to choose which folders should automatically upload. The most important folder is usually:
DCIM/Camera
You may also want:
Pictures
Screenshots
WhatsApp Images
Downloads
But don't blindly back up every folder on your phone. Otherwise you'll eventually discover that your Immich library contains 4,000 memes, screenshots of Amazon listings and pictures of your thermostat. Start with the folders that actually contain photos you care about.
Enable background backup
Enable automatic background backup. Android may restrict applications from running in the background to save battery. If Immich only backs up photos while the app is open, check your phone's battery settings. Look under something similar to:
- Settings → Apps → Immich → Battery
and make sure Immich isn't being aggressively restricted. The exact menus vary between Samsung, Google Pixel, OnePlus and other Android devices.
Test the backup
Before trusting Immich with your entire photo collection, test it.
- Take a new photo.
- Wait for Immich to upload it.
- Then open Immich from your computer.
- Find the photo.
- Test a video too.
Make sure:
Phone
   ↓
Immich App
   ↓
Unraid
   ↓
Photo Library
actually works.
Don't confuse Immich with a backup
This is probably the most important section of the entire article. Immich is not your backup. Immich is your photo management system.
If you have:
Phone
   ↓
Unraid
you have two copies. That's better than one. But your unRaid server can still fail. You need another copy. A better setup is:
Phone
   ↓
Immich
   ↓
Unraid
   ↓
Backup
And ideally:
Phone
   ↓
Unraid
   ├── Local backup
   └── Off-site backup
Now you're getting somewhere.
Back up your Immich photos
Your original photos and videos are the most important part of your Immich installation. Back up the directory containing your Immich library. That backup could go to:
- Another Unraid disk
- Another NAS
- External USB storage
- Another computer
- Cloud storage
- Off-site storage
The important thing is that it isn't sitting in the exact same place as the original.
I'll do a ZeroByte blog post at some point that will describe on how to get some reliable local, local external and remote backups configured and working.
Backup the Immich database
Don't forget the database. Your photos are only part of what Immich stores. The database contains important information about your library, including things such as:
- Users
- Albums
- Metadata
- Library information
- Face recognition information
- Other Immich data
Your backup strategy should therefore include both the photo library and the Immich database. If you ever need to rebuild Immich, having both will make the process significantly easier.
Unraid parity is NOT a backup
This deserves its own section because it's a common misconception.
If you have an Unraid parity disk, that's great. But parity is not the same thing as a backup. Parity can help protect you against certain drive failures. It doesn't protect you from:
- Accidentally deleting photos
- Corrupted files
- Ransomware
- Incorrect configuration
- Fire
- Theft
- Hardware destroying the entire server
- You accidentally deleting the wrong directory at 2 AM
Your important family photos deserve better than that.
Keep photos on your phone until you're comfortable
Once you've confirmed Immich is working, you can start using it to reclaim phone storage. But don't rush. For important photos, I prefer:
Phone
+
Immich
+
Backup
before deleting the original from the phone.
Once you know the backup process is reliable, you can start using Immich's storage-management features to clean up older photos from your phone.
Access Immich locally
If you're only interested in using Immich at home, you don't need to expose it to the internet. Your phone can connect over Wi-Fi:
Phone
   ↓
Home Wi-Fi
   ↓
Unraid
   ↓
Immich
When you're away from home, the phone can continue taking pictures. When you return home and reconnect to Wi-Fi, Immich can upload them. This is actually a very simple and secure way to start.
Add remote access later
If you want Immich to back up your phone while you're away from home, you can add remote access later. Options include:
- Tailscale
- WireGuard
- VPN
- Reverse proxy
- Cloudflare-based solutions
Personally, I prefer getting the local installation working first. There's no reason to introduce another layer of complexity until the basic system works. Because if something breaks, it's much easier to troubleshoot:
Phone → Wi-Fi → Immich
than:
Phone → Cellular → VPN → Firewall → DNS → Tunnel → Proxy → Docker → Immich
Ask me how I know.
Import your existing photos
If you already have thousands of photos sitting on another computer, NAS or hard drive, don't necessarily upload all of them through your phone.
If they're already on your unRaid server, you can use Immich's supported import/external-library features to bring them into your collection.
For example:
Existing Photos
       ↓
     Unraid
       ↓
     Immich
This is significantly more practical than sending hundreds of gigabytes through your phone.
Don't just dump files into random Immich directories.
Immich manages its library and database, so use the supported import/library process for the version you're running.
Watch your storage
Photos are relatively small. Videos are not. A family with multiple phones can generate an impressive amount of video. For example:
Photos       250 GB
Videos       1.2 TB
Screenshots   25 GB
--------------------
Total        1.475 TB
And that's before you start importing your old photo collection. Keep an eye on your Unraid storage. Your "little photo server" can become a multi-terabyte project surprisingly quickly.
Keep Immich updated
Immich is actively developed. That means regular updates and improvements. It also means you shouldn't blindly update it without checking what changed. Before an Immich update:
- Verify your photo backup is working.
- Verify your database backup is working.
- Check the current Immich release notes.
- Update the containers.
- Confirm all services start.
- Open the web interface.
- Test the mobile app.
- Verify your photos are still accessible.
A few minutes of caution is much cheaper than discovering that your photo server has been broken for three months.
My recommended Immich setup
For a typical unRaid home server, I'd aim for something like this:
                    INTERNET
                       │
                       │
                    Router
                       │
                 Home Network
                       │
        ┌──────────────┴──────────────┐
        │                             │
      Phone                         Unraid
        │                             │
        │ Wi-Fi                       │
        ▼                             ▼
  Immich Android App ──────────► Immich Server
                                      │
                                      ▼
                                Photo Library
                                      │
                         ┌────────────┴────────────┐
                         │                         │
                  Local Backup              Off-Site Backup
The important thing is the final part.
Immich manages your photos.
Your backup system protects them.
Those are two different jobs.
Common Immich on unRaid mistakes
- Installing everything on the Docker image: Don't. Your photo library needs persistent storage outside the disposable container layer.
- Using only Unraid parity as a backup: Parity isn't a replacement for backups.
- Deleting photos from your phone immediately: Test the entire backup chain first.
- Exposing Immich to the internet immediately: Get local access working first.
- Following an ancient Immich tutorial: Immich evolves quickly. Always check current documentation before making major changes.
- Forgetting the database: Your photo files aren't the entire Immich installation. Back up the database too.
Is Immich Better Than Google Photos?
That's going to depend on what you value. Google Photos is incredibly convenient and you don't have to maintain:
- Docker containers
- Storage
- Databases
- Backups
- Networking
- Updates
Immich trades some of that convenience for control.
- You control the hardware.
- You control the storage.
- You control the accounts.
- You control the backups.
- You own your data and for me that's being on Canadian soil.
And if you've already got an Unraid server sitting at home, you're already paying for the hardware.
For me, that's a pretty good trade.
Final Thoughts
Immich is one of those self-hosted applications that actually solves a problem. It's not just another dashboard to stare at while admiring your Docker containers.
- Your phone takes pictures.
- Immich automatically backs them up.
- unRaid stores them.
- Your backup system protects them.
- And you get your own private photo library without relying entirely on a third-party cloud provider.
Once it's working, you barely need to think about it and honestly, that's exactly what I want from a backup system.
It should be boring and boring is good.