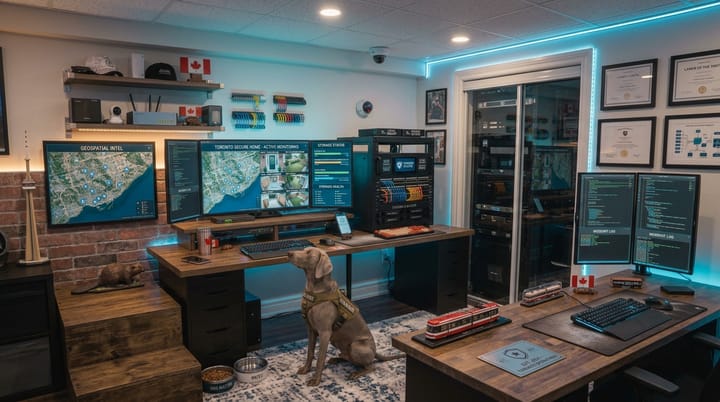
Build your own local security camera system with Frigate, unRaid and Reolink and keep your security footage at home in Canada 😄.
If you've read my previous post, Why Reolink PoE Cameras Are a Smarter Security Choice, you already know that I'm a big fan of Reolink PoE cameras.
- I wanted reliable cameras.
- I wanted wired connections instead of relying on Wi-Fi.
- I wanted Power over Ethernet so a single Ethernet cable could handle both power and network connectivity.
- And perhaps most importantly, I didn't want to pay a monthly subscription just to access cameras that I had already purchased.
- But there was another reason I chose this route. I wanted control over my own security footage and storage of that data with me.
My cameras are pointed at my house, my driveway, my backyard, my vehicles and, ultimately, my family. I wasn't particularly interested in sending all of that video to somebody else's cloud infrastructure just because it was the easiest way to set up an NVR.
I already had an unRaid server running at home. So the next logical step was to build my own NVR. That's where Frigate comes in.
Frigate is an open-source network video recorder designed around local recording and real-time object detection. It runs nicely in Docker, which makes it a natural fit for unRaid .
The end result is a security camera system that looks something like this:
Reolink PoE Cameras
        ↓
    Home Network
        ↓
      Unraid
        ↓
      Frigate
        ↓
 Local Recording + Detection
        ↓
   Home Assistant
- No mandatory cloud NVR.
- No monthly recording subscription.
- And no reason for my family's security footage to take a vacation to an American data centre.
Sorry, cloud. This one is staying home in Canada
Why Frigate instead of a cloud NVR?
There are plenty of commercial security camera systems available, they're easy to set up and that's their biggest advantage.
Plug in the camera, install an app, create an account and you're done. The downside is that you're often giving up control. Depending on the system, your video may be:
- Uploaded to a cloud service
- Stored outside your home
- Subject to a subscription
- Processed by a third party
- Dependent on an Internet connection
- Subject to the company's retention policies
For some people, that's perfectly acceptable.
For me, it isn't necessary.
- I already have a server.
- I already have storage.
- I already have a network.
- I already run Docker containers.
So why wouldn't I use the hardware I already own?
Why I chose Reolink PoE cameras
This article is really part two of my Reolink camera setup. If you haven't already read it, check out:
Why Reolink PoE Cameras Are a Smarter Security Choice
I chose Reolink because the cameras give me the combination I was looking for:
- PoE connectivity
- Local network access
- RTSP support on compatible models
- Good image quality
- No mandatory monthly NVR subscription
- A wide selection of cameras
- Reasonable pricing
The PoE part is particularly important to me. Instead of having a camera that relies on Wi-Fi and a separate power cable, I can run one Ethernet cable. That gives me: Power + network + reliability in one cable and once the camera is connected to my network, Frigate can consume its video stream.
What you need
You don't need an enormous enterprise security system to get started. At a minimum, you'll need:
- A Reolink PoE camera
- Ethernet cable
- PoE switch or PoE injector
- unRaid server
- Storage for recordings
- Frigate Docker container
I'd also recommend:
- A UPS for your unRaid server and network equipment
- Hardware acceleration if your unRaid hardware supports it
- MQTT if you're using Home Assistant
- A dedicated camera VLAN if your network supports it
You can start with one camera and it's actually what I'd recommend. Get one working properly before you start adding five more.
How the system works
The basic architecture is surprisingly simple.
                 ┌──────────────┐
                 │   Reolink    │
                 │    Camera    │
                 └──────┬───────┘
                        │
                     Ethernet
                        │
                 ┌──────▼───────┐
                 │   PoE Switch │
                 └──────┬───────┘
                        │
                    Home LAN
                        │
                 ┌──────▼───────┐
                 │    Unraid    │
                 │    Server    │
                 └──────┬───────┘
                        │
                 ┌──────▼───────┐
                 │    Frigate   │
                 └──────┬───────┘
                        │
             ┌──────────┴──────────┐
             │                     │
        Local Storage         Object Detection
             │                     │
             └──────────┬──────────┘
                        │
                  Home Assistant
The camera produces the video, Frigate receives it, unRaid stores it, Frigate performs detection, Home Assistant can react to the events and it's all happening on my network.
Give your Reolink camera a predictable IP address
Before installing Frigate, I recommend giving each camera a predictable IP address.
I prefer using a DHCP reservation on my router rather than manually configuring static addresses on every camera.
For example:
Front Door     192.168.0.201
Driveway       192.168.0.202
Backyard       192.168.0.203
Garage         192.168.0.204
Your addresses will obviously be different. The important thing is that they don't randomly change. There's nothing worse than spending an evening configuring an NVR and discovering the camera received a new IP address after rebooting.
Configure your Reolink camera
Log into the Reolink camera and configure the network services required for your particular model. Depending on the camera, you may need:
- RTSP
- HTTP
- ONVIF
The exact options vary between Reolink models. This is important because not every Reolink camera should be configured exactly the same way in Frigate. Frigate's documentation has specific guidance for different generations of Reolink cameras. So don't blindly copy a configuration from a three-year-old forum post. Check your exact camera model and, obviously, change the default camera password. Don't put an IP camera on your network using:
admin
admin
That's not security, that's a welcome mat.
Install Frigate on unRaid
Now we can actually install Frigate. Open your Unraid dashboard. Go to:
- Apps
Search for:
Frigate
Find the Frigate Docker container in Community Applications and click:
- Install
Frigate runs as a Docker container, which makes unRaid a very convenient platform for hosting it.
Create the Frigate appdata directory
I recommend keeping Frigate's configuration in your Unraid appdata share. For example:
/mnt/user/appdata/frigate
Map that directory to:
/config
inside the Frigate container. Your mapping should look approximately like:
Host Path:
 /mnt/user/appdata/frigate

Container Path:
 /config
The exact location isn't important.
Keeping Docker application configuration in appdate is what matters.
Create a location for camera recordings
Now we need somewhere to store all that video. I recommend keeping the actual camera recordings separate from the Frigate configuration. For example:
/mnt/user/frigate
Map that to:
/media/frigate
inside the container. You should therefore end up with something approximately like:
/mnt/user/appdata/frigate → /config
/mnt/user/frigate         → /media/frigate
The amount of storage you need depends on the number of cameras, resolution, bitrate, frame rate and retention period. And trust me, security cameras are very good at eating hard-drive space.
Configure Frigate's web interface
Frigate provides a web interface for managing and viewing your cameras. The default web interface uses port:
8971
Configure the Docker container to expose that port. For example:
Host Port:      8971
Container Port: 8971
Protocol:       TCP
Once the container is running, you can access Frigate using your unRaid server's IP address and port. For example:
https://192.168.0.10:8971
Obviously, substitute your actual unRaid IP address.
Start Frigate
Go back to:
- Docker
Find:
- Frigate
and start the container and give it a minute to initialize. Then open the Frigate WebUI. If everything worked, you'll see the Frigate interface. Congratulations, you now have an NVR. It just doesn't know about your cameras yet.
Configure Your First Camera
This is where I recommend taking things slowly. Don't configure every camera at once. Start with your most important camera. For me, that would probably be the front door. Current versions of Frigate provide an Add Camera wizard that makes the initial setup considerably easier. Select:
- Add Camera
You'll need information such as:
Camera IP:
192.168.0.201

Username:
admin

Password:
YOUR_CAMERA_PASSWORD
You'll also need the appropriate stream information for your Reolink model.
Reolink stream configuration
This is the part where things can get a little complicated. Reolink has released a lot of different camera models over the years, and they don't all behave identically. Some cameras work well with RTSP and some newer cameras may be better suited to other stream methods supported by Frigate. Frigate's Reolink documentation should be your source of truth for the specific camera you're using.
For an RTSP-compatible camera, you'll generally be working with an address similar to:
rtsp://USERNAME:[email protected]:554/...
The exact path depends on the Reolink camera.
Don't copy the ... and expect it to work.Find the correct stream URL for your particular model. This is one of those situations where five minutes of reading the documentation can save an hour of troubleshooting.
This was painful my first time creating and configuring the first camera, but it got much easier after that.
Main stream vs substream
This is one of the most important concepts when setting up Frigate. Your Reolink camera may provide multiple streams. For example:
Main stream
- Higher resolution
- Better image quality
- More bandwidth
- More processing
- More storage
Substream
- Lower resolution
- Lower bandwidth
- Less processing
- Perfect for object detection
Let's say your camera is recording 4K video. I don't necessarily want Frigate's object detector analysing every pixel of a 4K stream. I mainly need it to answer: Is there a person there? A lower-resolution stream is often more than adequate for that. So I can use:
- High-resolution stream → recording
and:
- Lower-resolution stream → detection
This is one of the biggest advantages of properly configuring Frigate.
Configure go2rtc
Frigate includes go2rtc, which can provide live viewing and restreaming. The idea is that Frigate can connect to the camera once and then provide a local restream for other services. For example:
go2rtc:
  streams:
    front_door:
      - rtsp://USERNAME:[email protected]:554/...
Frigate can then use:
rtsp://127.0.0.1:8554/front_door
The exact configuration depends on your camera. The advantage is that you're not unnecessarily opening multiple independent connections to your camera.
Test the Camera
This is the part where I recommend stopping.
- Don't configure object detection.
- Don't configure Home Assistant.
- Don't add four more cameras.
Just make sure the first camera works.
Check:
- Live video
- Recording
- Stream stability
- Resolution
- Frame rate
- CPU usage
- Network traffic
Let it run for a while and if it's stable, move on, and if it isn't stable, fix it now.
Trust me, troubleshooting one camera is much easier than troubleshooting five cameras.
Configure hardware acceleration
Now we can make Frigate more efficient. Video decoding can use a considerable amount of CPU, particularly when you're dealing with several high-resolution cameras. If your unRaid server has compatible hardware, you can configure Frigate to use hardware-accelerated video decoding.
I have an NVIDIA card installed in my unRaid server and it allows me to use that workhorse for the acceleration.
For example, Intel CPUs with integrated graphics can often use Intel Quick Sync.
On Unraid, this commonly involves passing:
/dev/dri
through to the Frigate container. The exact configuration depends on your hardware.
Check CPU usage
This is one of the reasons I like unRaid. You can actually see what your server is doing. Check your CPU usage before and after enabling hardware acceleration. If Frigate is using an unreasonable amount of CPU just decoding camera streams, something needs attention.
If CPU usage is reasonable? Great, move on. Don't optimize something that isn't causing a problem.
Enable object detection
Now we get to the really interesting part. Frigate isn't just an NVR. It can identify objects in your camera feeds. For example:
objects:
  track:
    - person
    - car
    - dog
    - cat
You can then create events based on those objects. Instead of getting a motion detected you can get a person detected at the front door. That's considerably more useful.
Configure recording retention
Now decide how long you actually want to keep video. This is an important decision because continuous recording consumes storage quickly. You might decide that you want:
Continuous recordings:
7 days

Important events:
30 days
Or perhaps something completely different. It depends on:
- Number of cameras
- Resolution
- Bitrate
- Frame rate
- Available storage
- Your personal requirements
Personally, I don't need six months of footage showing the same driveway. I want enough history to investigate an incident. After that, delete it because that data will add up quickly and you'll need more drives.
Add your other Reolink cameras
Once your first camera is stable, add the others. For example:
Front Door
Driveway
Backyard
Garage
Side Yard
Add them one at a time. Test each one. Then move on.
It might seem slower, but it's much easier to figure out which camera is causing a problem when you only changed one thing.
Add MQTT
If you're using Home Assistant, MQTT is where Frigate really starts becoming part of the smart home. Frigate can publish events using MQTT. For example:
mqtt:
  enabled: true
  host: 192.168.0.100
  user: frigate
  password: YOUR_PASSWORD
Use the IP address and credentials for your own MQTT broker. Once this is configured, Home Assistant can react to Frigate events.
Frigate + Home Assistant
This is where my security cameras become much more useful. I've already got Home Assistant running my smart home, so I don't want the cameras to be another isolated system. I want everything talking to each other.For example:
Person detected
       ↓
     Frigate
       ↓
      MQTT
       ↓
 Home Assistant
       ↓
 ┌─────┼─────────────┐
 ↓     ↓             ↓
Lights Notification Camera Display
A person approaches the front door, Frigate detects them, Home Assistant receives the event, the exterior lights can turn on, I can get a notification, and I can even have a display show the camera feed. Now we're talking.
Local processing
This is probably the biggest reason I went this route. The camera footage doesn't need to leave my network. The Reolink camera sends video to my unRaid server. Frigate records it, Frigate performs detection, Home Assistant reacts to events, it's all local.
Reolink
   ↓
Home Network
   ↓
Unraid
   ↓
Frigate
   ↓
Local Storage
The Internet isn't required for the basic security camera system to function.
What happens when the internet goes down?
This is one of the questions I think people should ask about security cameras. If your Internet connection disappears, does your security system still work?
- With my local setup, the cameras can continue communicating with Frigate over my LAN.
- The recording system doesn't suddenly disappear because my ISP has an outage.
That's exactly what I want from a security system.
If my Internet goes down at 2:00 AM, I don't want my cameras sitting there useless.
Keeping my data in Canada
This is where my slightly obsessive Canadian side comes out. I don't have anything against American technology companies, I use plenty of them but I don't see why my home security footage needs to be stored in a data centre somewhere in the United States. Think about what your cameras can capture. They can see:
- Your family
- Your children
- Your vehicles
- Your home
- Your backyard
- Your neighbours
- Visitors
- Deliveries
- Your daily routines
That's a lot of information and I would rather keep that information under my control. I don't need to upload every second of my life to "the cloud" especially when the cloud is really just somebody else's computer.
There is something incredibly satisfying about looking at my setup and realizing that my security camera footage can stay right here.
- In Canada.
- On my server.
- In my house.
- I bought the cameras.
- I bought the server.
- I bought the storage.
- I maintain the network.
- I pay the electricity bill.
Why wouldn't I control the footage? That's one of the things I really like about self-hosting. It puts the control back where I think it belongs with me.
Don't expose Frigate directly to the internet
This deserves its own warning.
Don't simply port-forward Frigate to the Internet.
Your security camera system doesn't need to be publicly accessible. If you want to access Frigate remotely, use a properly secured VPN or another secure remote-access solution.
The irony of building a privacy-focused local NVR and then opening its administration interface to the entire Internet would be difficult to miss.
Keep it local. Secure it properly.
Amazon.ca: The hardware I recommend
I've created an Amazon.ca storefront where I keep the equipment I recommend for my homelab, home network and other projects.
I try to recommend products I've personally used, tested or thoroughly researched rather than simply throwing random Amazon products onto a page.
If you're building a Frigate system, the categories I'd start with are:
- Reolink PoE cameras
- PoE switches
- Ethernet cables
- Surveillance hard drives
- UPS systems
- Network equipment
- Homelab hardware
You can find my recommended products in my Amazon.ca store.
Affiliate disclosure: Some of the links on this site are affiliate links. If you purchase something through one of my links, I may receive a small commission at no additional cost to you. I only recommend products that I believe are worth considering.
The final setup
Once everything is configured, my setup looks something like this:
                         INTERNET
                            │
                       ┌────▼────┐
                       │ Router  │
                       └────┬────┘
                            │
                       HOME NETWORK
                            │
                     ┌──────▼──────┐
                     │  PoE Switch │
                     └──────┬──────┘
                            │
             ┌──────────────┼──────────────┐
             │              │              │
        Reolink PoE    Reolink PoE    Reolink PoE
          Camera         Camera         Camera
             │              │              │
             └──────────────┼──────────────┘
                            │
                       ┌────▼────┐
                       │ Unraid  │
                       └────┬────┘
                            │
                       ┌────▼────┐
                       │ Frigate │
                       └────┬────┘
                            │
             ┌──────────────┼──────────────┐
             │              │              │
          Recording     Detection        MQTT
             │              │              │
             │              │              ▼
             │              │       Home Assistant
             │              │
             └──────────────┴──────────────┘
- The cameras stay on my network.
- The recordings stay on my unRaid server.
- The object detection happens locally.
- Home Assistant gets the events.
- And I don't have to pay somebody every month for the privilege of watching my own cameras.
My homelab philosophy
There's a simple philosophy behind a lot of the projects I write about here:
If I can run it myself, why not?
Not because cloud services are inherently bad. Not because I think I can build something better than every technology company on the planet and definitely not because I enjoy troubleshooting Docker containers at midnight.
- But I like knowing where my data is, in my home in Canada.
- I like owning my hardware.
- I like avoiding unnecessary subscriptions.
- And I really like the idea that my home can continue doing useful things even when the Internet isn't working.
That's why I'm building this stuff. One Docker container, one Ethernet cable and one questionable weekend project at a time. Self-hosted, locally stored, Canadian home and boring every step of the way.