November 12, 2024: Update to install mitigation system, supplies needed and install process.
In the realm of home safety, there's a silent intruder that often goes unnoticed, yet poses a significant threat to our well-being: radon gas. Radon is a colorless, odorless, and tasteless radioactive gas that can seep into homes, potentially leading to serious health risks. In this blog post, we'll delve into the basics of radon, its entry into homes, methods of testing, and effective measures for mitigation.
October 23, 2024: A new study out of Alberta is sharing concerning new data about radon levels that could be the difference between life and death. CTV News video below.
What is Radon?
Radon is a naturally occurring radioactive gas that results from the breakdown of uranium in soil, rock, and water. It belongs to the noble gas family and is chemically inert, meaning it doesn't readily react with other substances. However, its radioactive nature makes it a health concern when it accumulates in confined spaces, such as homes.
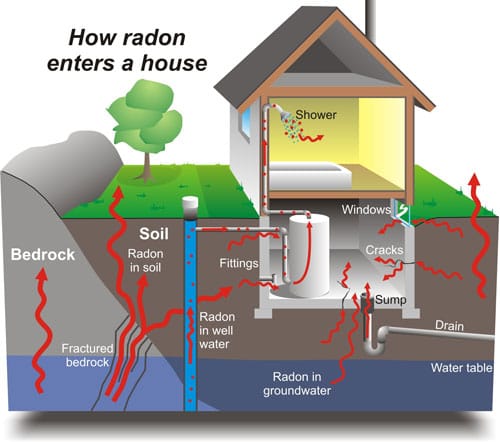
How Does Radon Enter Your Home?
The primary entry points for radon into homes are through the soil, as it emanates from the ground. Radon can infiltrate through cracks in the foundation, gaps around service pipes, construction joints, and even through well water. Once inside, radon can accumulate to high levels, posing a risk to occupants.
Testing for Radon
Given its elusive nature, radon testing is crucial to determine its presence and concentration in your home. You can use do-it-yourself radon test kits, available at hardware stores or on Amazon (link provides a listing of radon tests), t or hire a professional radon testing service for more accurate results.
Short-term tests are typically conducted for 2 to 7 days, providing a quick snapshot of radon levels. For a more comprehensive understanding, long-term tests ranging from 90 days to a year can be employed. It's essential to conduct tests in the lowest livable areas of the home, such as basements and ground floors, where radon concentrations are likely to be highest.
The following is the test I have purchased and using. It allows for on-demand viewing of the Radon levels.
Airthings View Radon 2989 - Radon Monitor (Radon, Humidity, Temp) with WiFi & Calm Tech Display
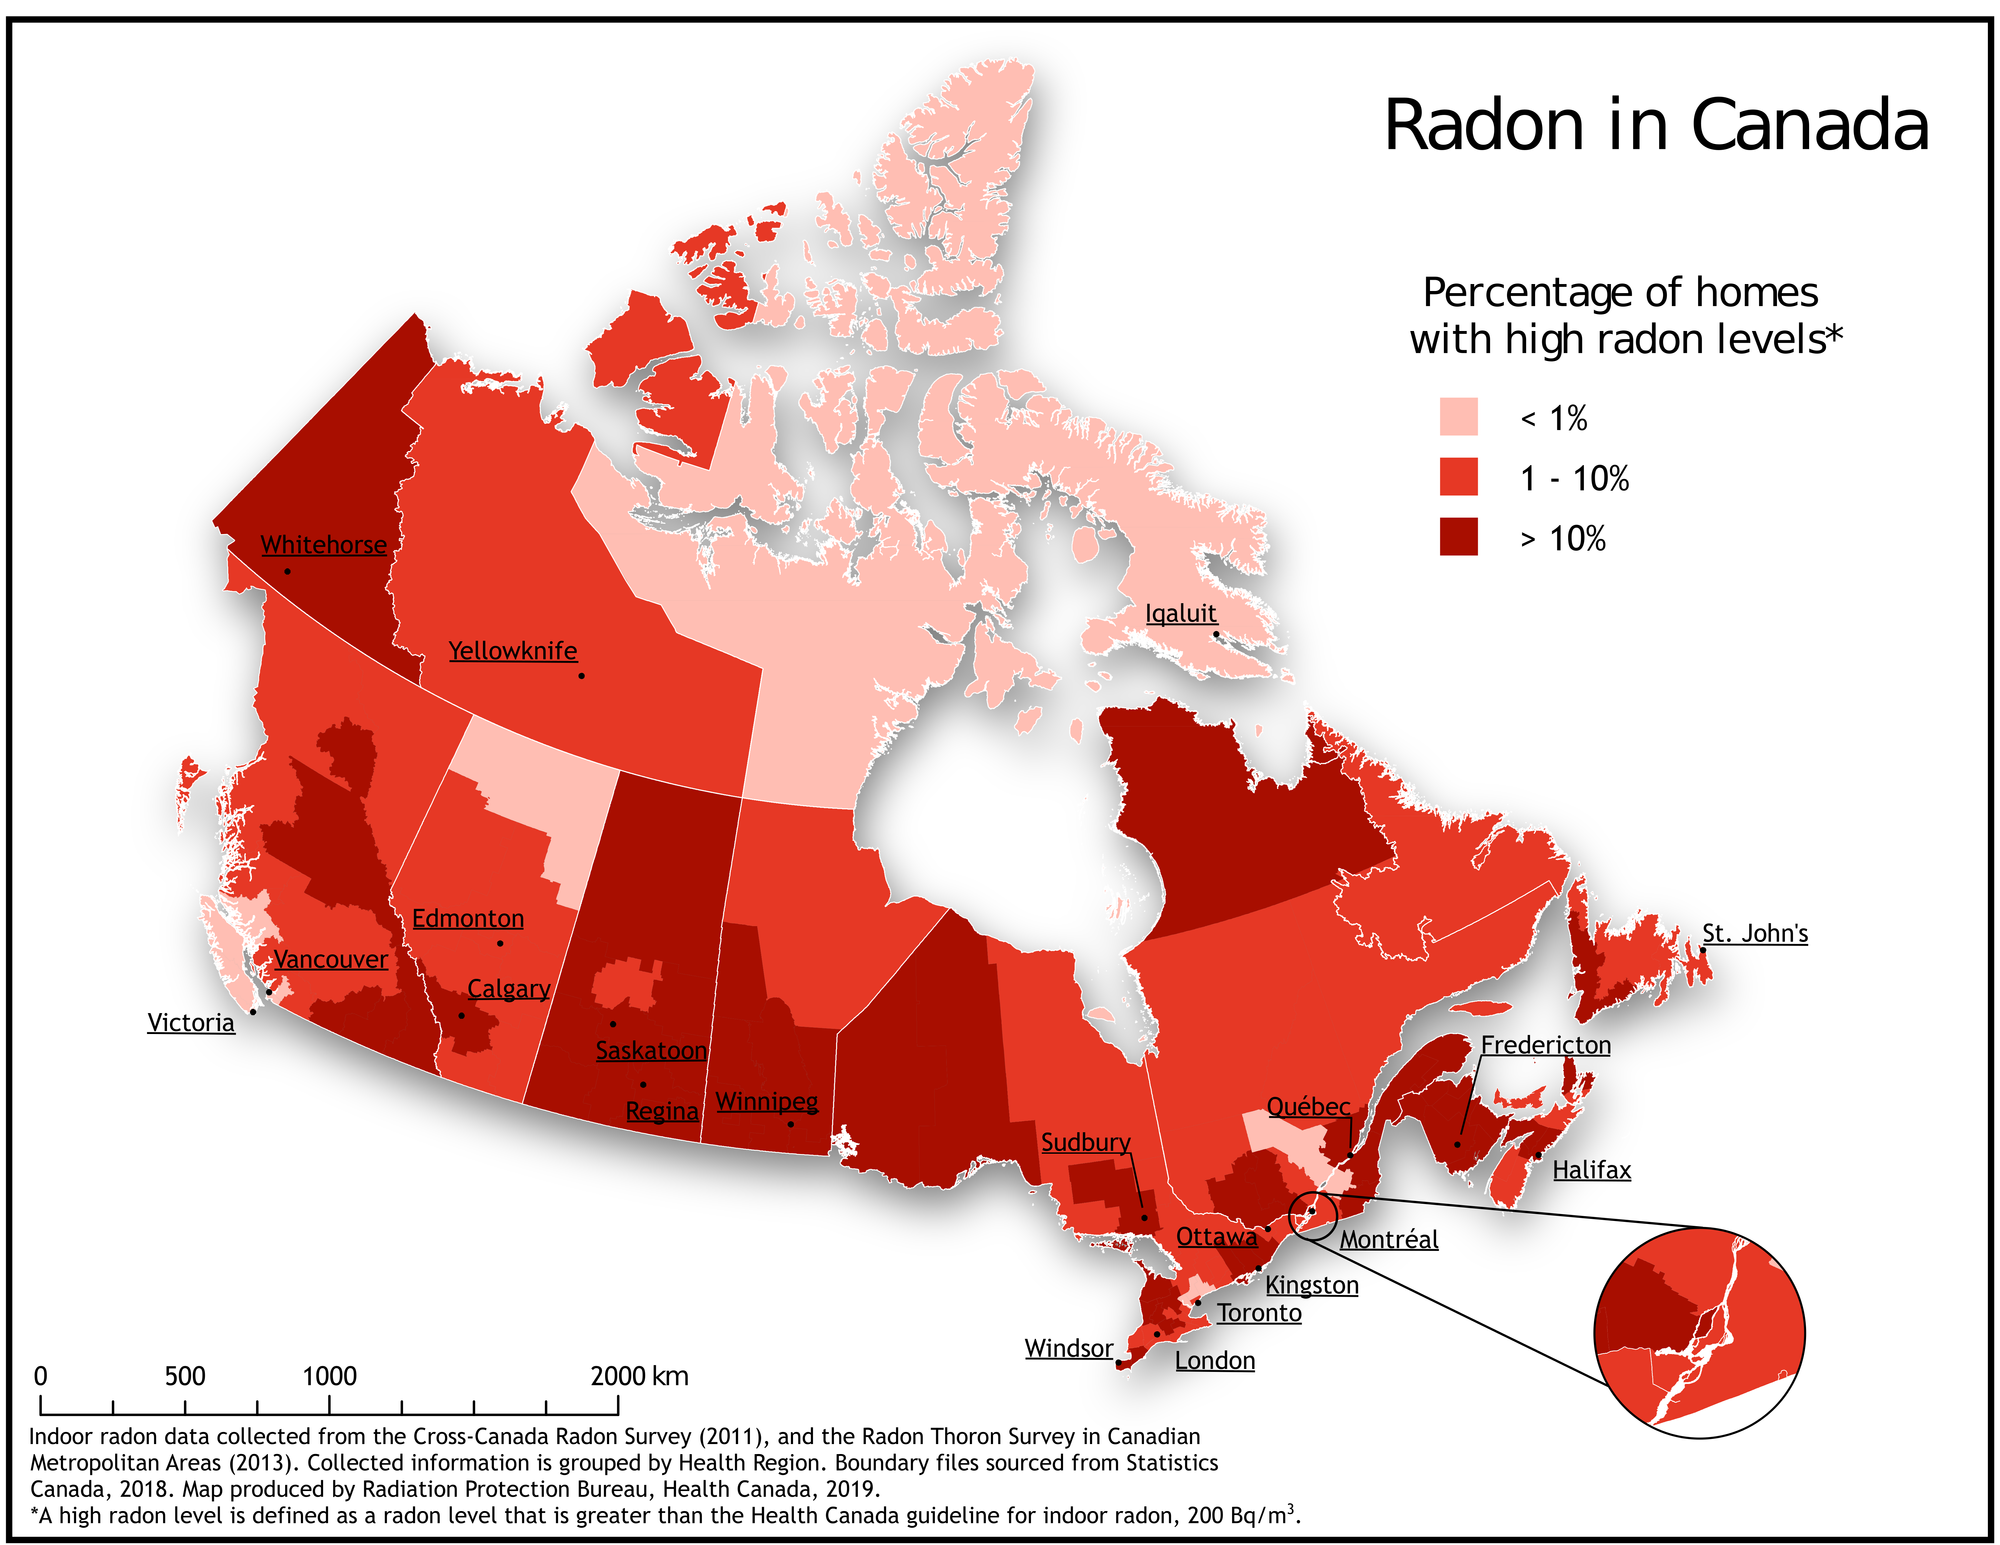
Radon levels vary over different periods of the year
Radon levels can vary depending on the time of year due to several factors related to home ventilation, soil conditions, and meteorological influences. Here are some key reasons for seasonal variations in radon levels:
- Ventilation Rates:
- During the winter months, homes are often sealed more tightly to conserve energy and keep the cold air out. This reduced ventilation can result in higher concentrations of radon indoors. In contrast, during the warmer months, windows and doors are more likely to be open, leading to better air exchange and lower radon levels.
- Temperature and Pressure Differences:
- Radon is more soluble in cold air than in warm air. In winter, the temperature difference between indoor and outdoor air is greater, leading to lower indoor air pressure. This can cause an increase in radon infiltration from the soil into the home. In summer, the temperature and pressure differences are typically less pronounced.
- Snow Cover:
- In regions with significant snowfall, the insulating effect of snow cover can influence soil temperatures. The presence of snow can reduce the transfer of radon from the ground into the air, potentially leading to higher indoor radon levels.
- Soil Moisture Content:
- Soil moisture can affect radon levels. Wet soil tends to seal the entry points for radon, reducing its entry into homes. In the summer, when the soil is drier, radon may more easily migrate through the soil and into structures.
- Home Heating and Cooling Systems:
- The operation of heating, ventilation, and air conditioning (HVAC) systems can impact radon levels. During the heating season, the HVAC system may draw in radon-laden air from the ground. In the cooling season, the system may expel indoor air, leading to lower radon levels.
- Occupant Behavior:
- Human behavior, such as opening windows and doors, using exhaust fans, and spending more time outdoors during warmer months, can influence indoor radon concentrations.
It's important to note that while seasonal variations are common, radon levels can also be influenced by geological factors, the construction of the home, and local environmental conditions. Regular radon testing, regardless of the season, is the best way to understand and manage radon exposure risks in your home.
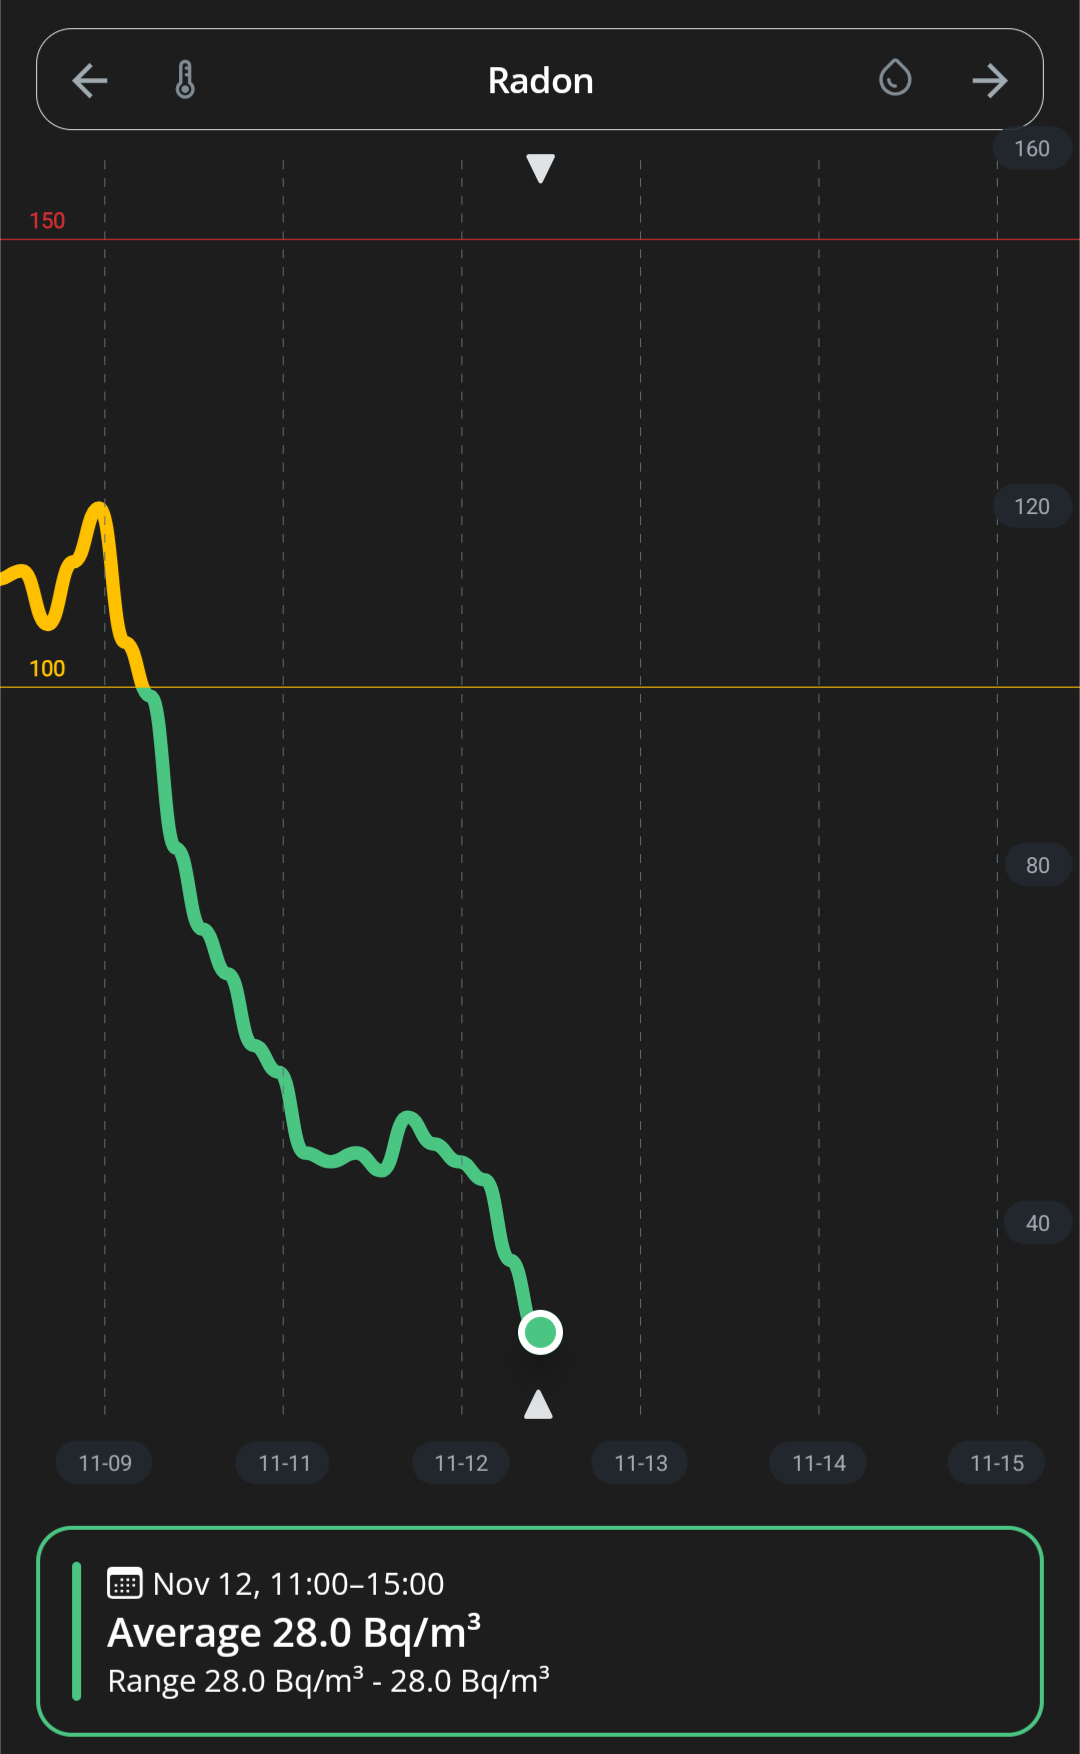
Over a course of 3 months I have been testing and my numbers have varied from 75 Bq/m³ up to 400 recently not that we are entering the winter season, we had new windows and doors installed (creating a better home seal) and when I placed the tester near my suspected entry point. More on my mitigation process below.
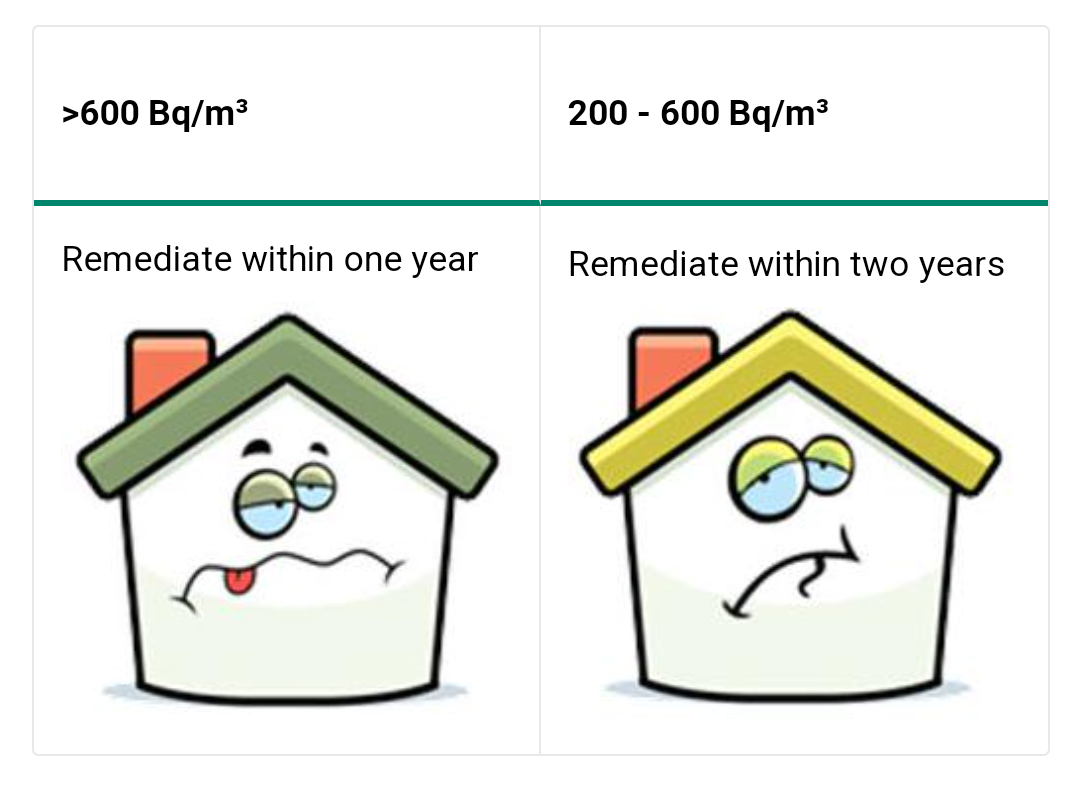
Acceptable Levels of Radon
As of January 2022, radon guidelines and acceptable levels may be subject to change, and it's essential to consult the most recent and authoritative sources for the latest information. However, as of the last update:
- Canada:
- Health Canada recommends that indoor radon levels should not exceed 200 becquerels per cubic meter (Bq/m³). The action level, where remedial measures are recommended, is 200 Bq/m³.
- United States:
- The U.S. Environmental Protection Agency (EPA) has set an action level of 148 Bq/m³. If radon levels in a home are at or above this level, the EPA recommends taking measures to reduce exposure.
- World Health Organization (WHO):
- The World Health Organization recommends a reference level of 100 Bq/m³ for radon in homes. This level is intended to guide national authorities in establishing their reference levels.
It's important to note that these levels are not strict safety thresholds but rather action levels where authorities recommend considering measures to reduce radon exposure. Mitigation measures can be taken even at levels below these guidelines to further minimize the risk of radon-related health issues.
Mitigating Radon
If testing reveals elevated radon levels in your home, taking prompt action is crucial. Mitigation strategies can help reduce radon levels and minimize health risks. Here are some effective measures:
- Ventilation Systems:
- Install a radon mitigation system, such as a sub-slab depressurization system, which prevents radon from entering the home by creating a vacuum beneath the foundation.
- Use ventilation fans to increase air circulation, diluting radon concentrations.
- Sealing Entry Points:
- Seal cracks in the foundation and walls using polyurethane caulk or other appropriate sealants.
- Ensure a tight seal around pipes, cables, and other openings in the foundation.
- Well Water Mitigation:
- If radon is present in well water, consider aeration or activated charcoal filtration systems to remove radon before it enters the home.
- Professional Assistance:
- Engage the services of a qualified radon mitigation professional to assess your home and recommend the most effective mitigation strategy.
Radon may be invisible and odorless, but its potential impact on health is substantial. Testing for radon and implementing effective mitigation strategies are crucial steps in safeguarding your home and the well-being of its occupants. By staying informed and taking proactive measures, you can reduce the risks associated with radon exposure and create a healthier living environment for you and your family.
My levels and mitigation process
Over a three month period I tested the Radon levels in my home office where I spend most of my days as of recently the levels have been around 400 Bq/m³, a level that I need to take action at. Lung issues especially hit home with me now after I got hit by a bacteria - My story of Legionnaires disease.
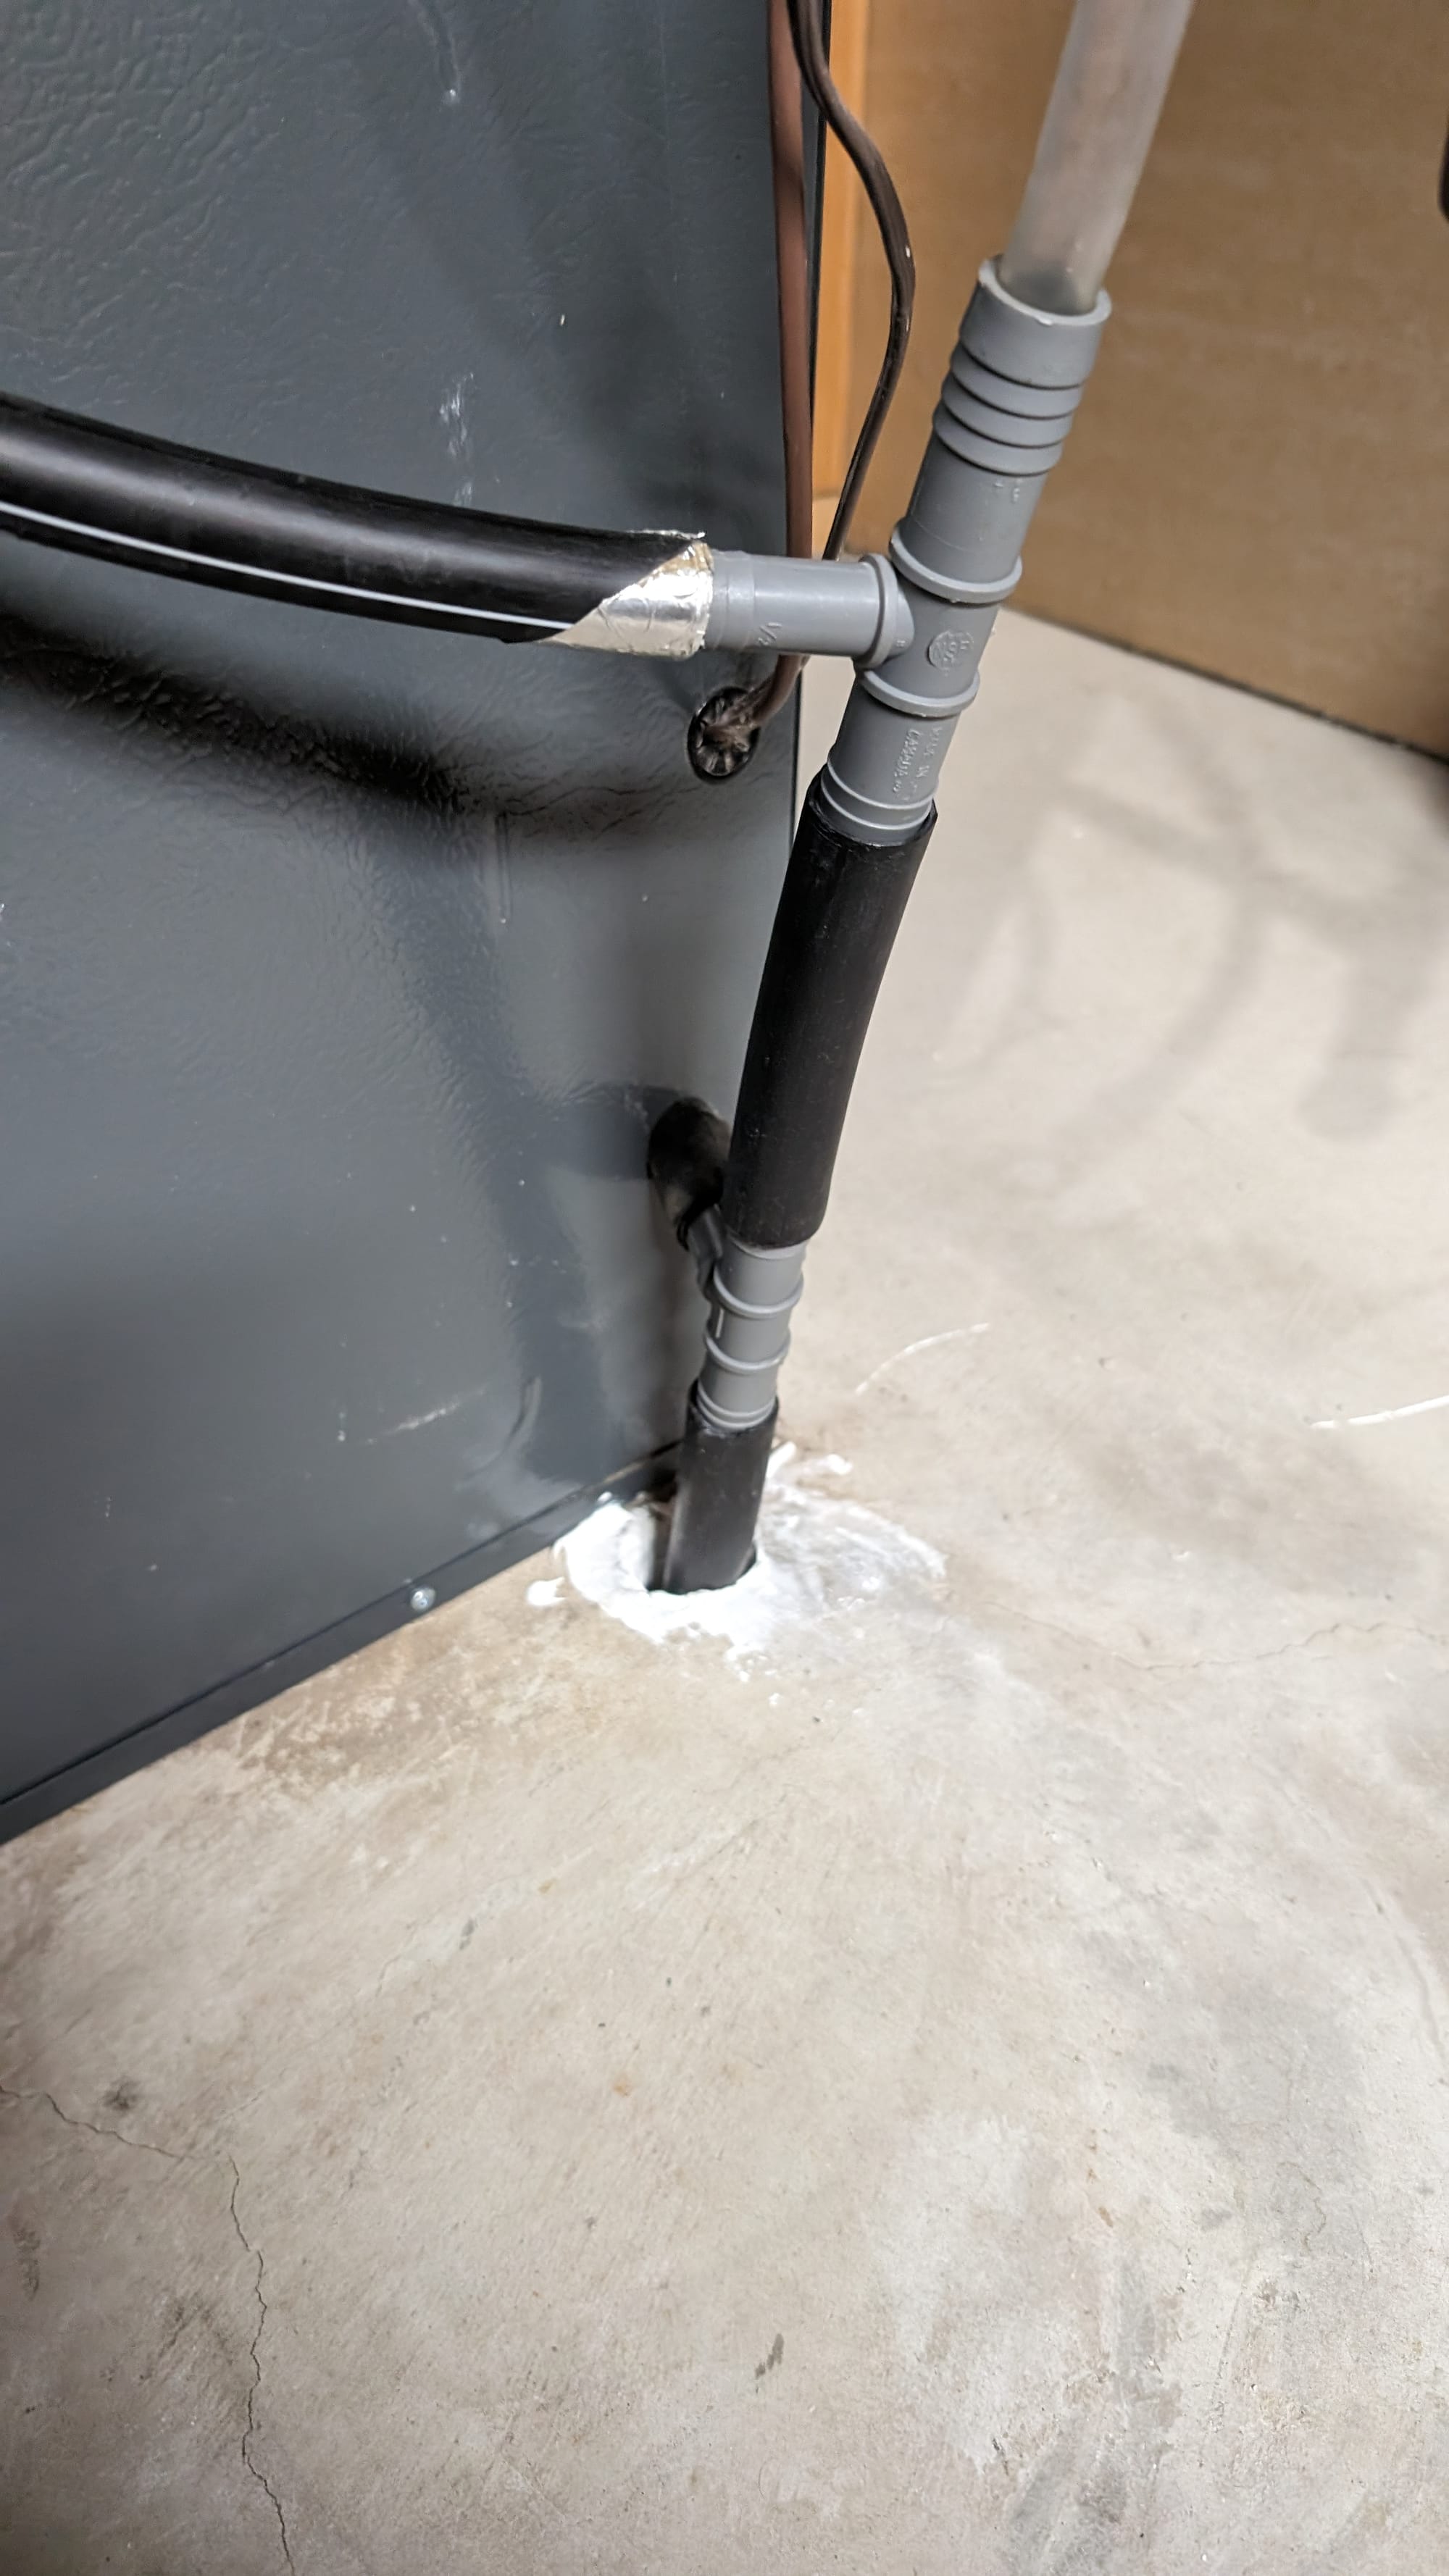
There are two primary places where I think the Radon is entering our basement and with these two I will be using the mitigation process of Sealing these Entry Points.
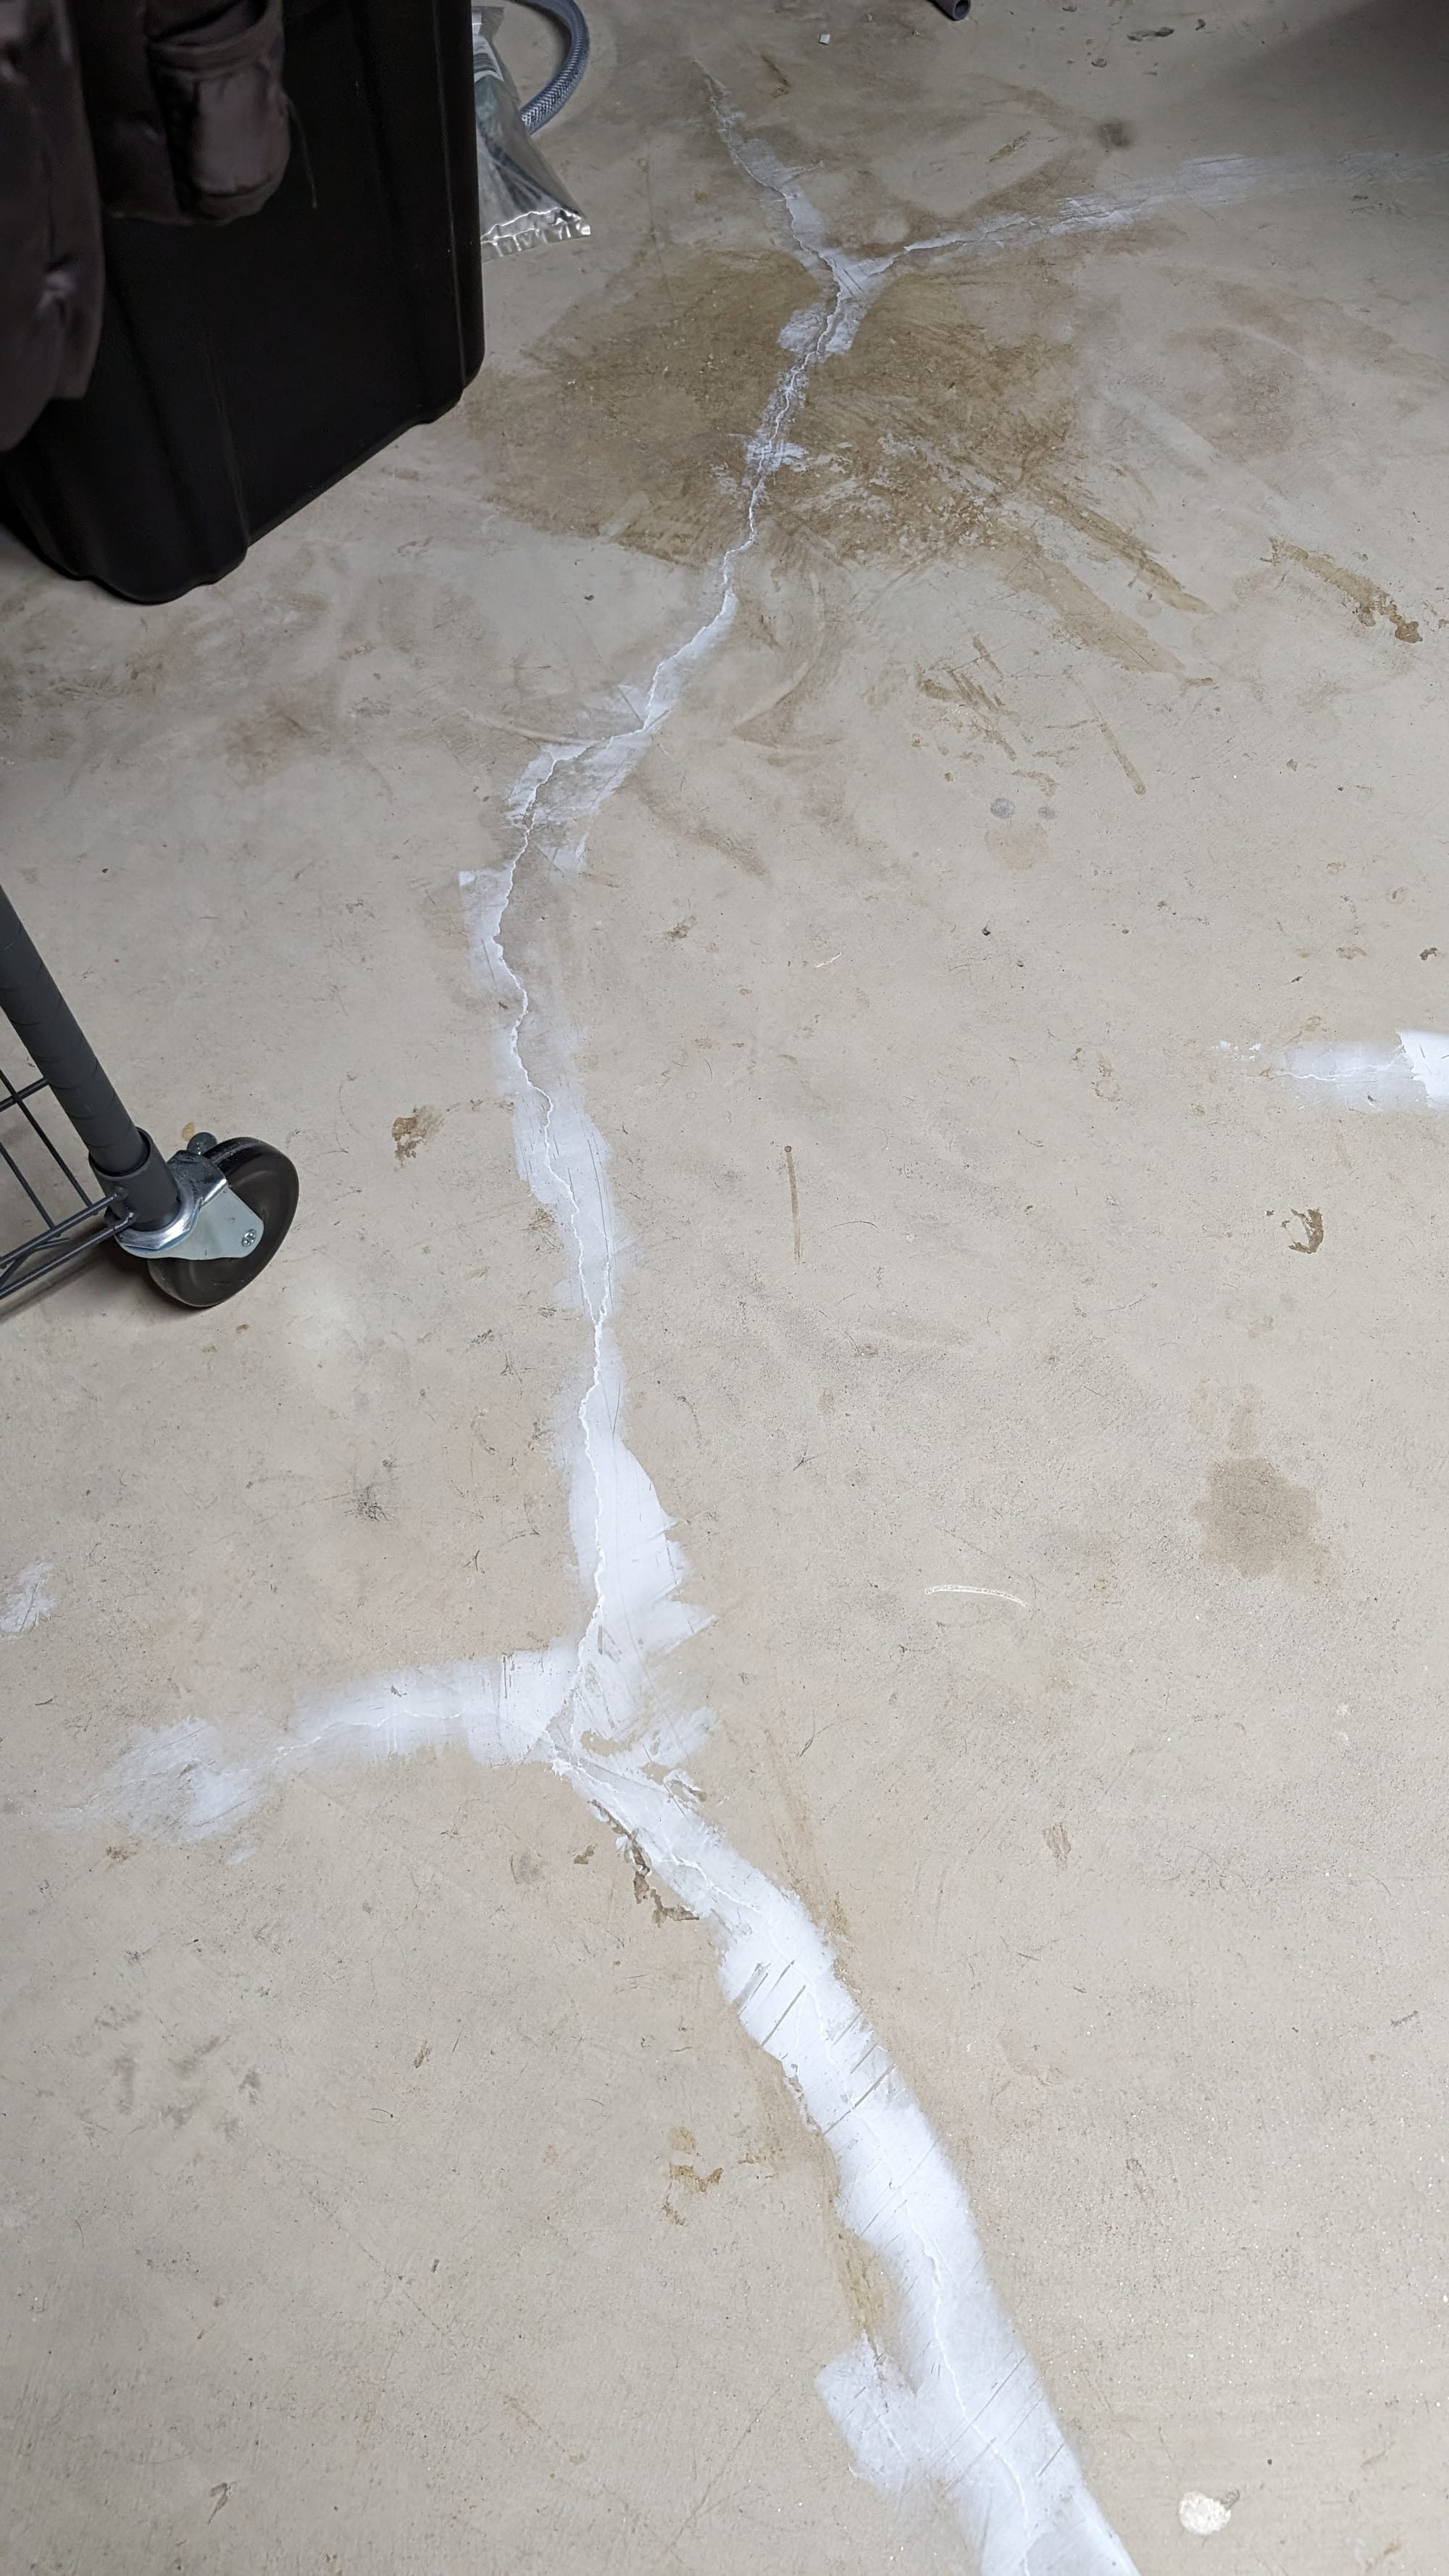
- Mitigation step 1: A ~1.5" hole cut into the basement floor near our furnace where the water drip from the furnace and the air exchanger drips into and a pin crack in our basement floor;
- Mitigation step 2: The sump-pump hole located in the cold storage.
Mitigation step 1:
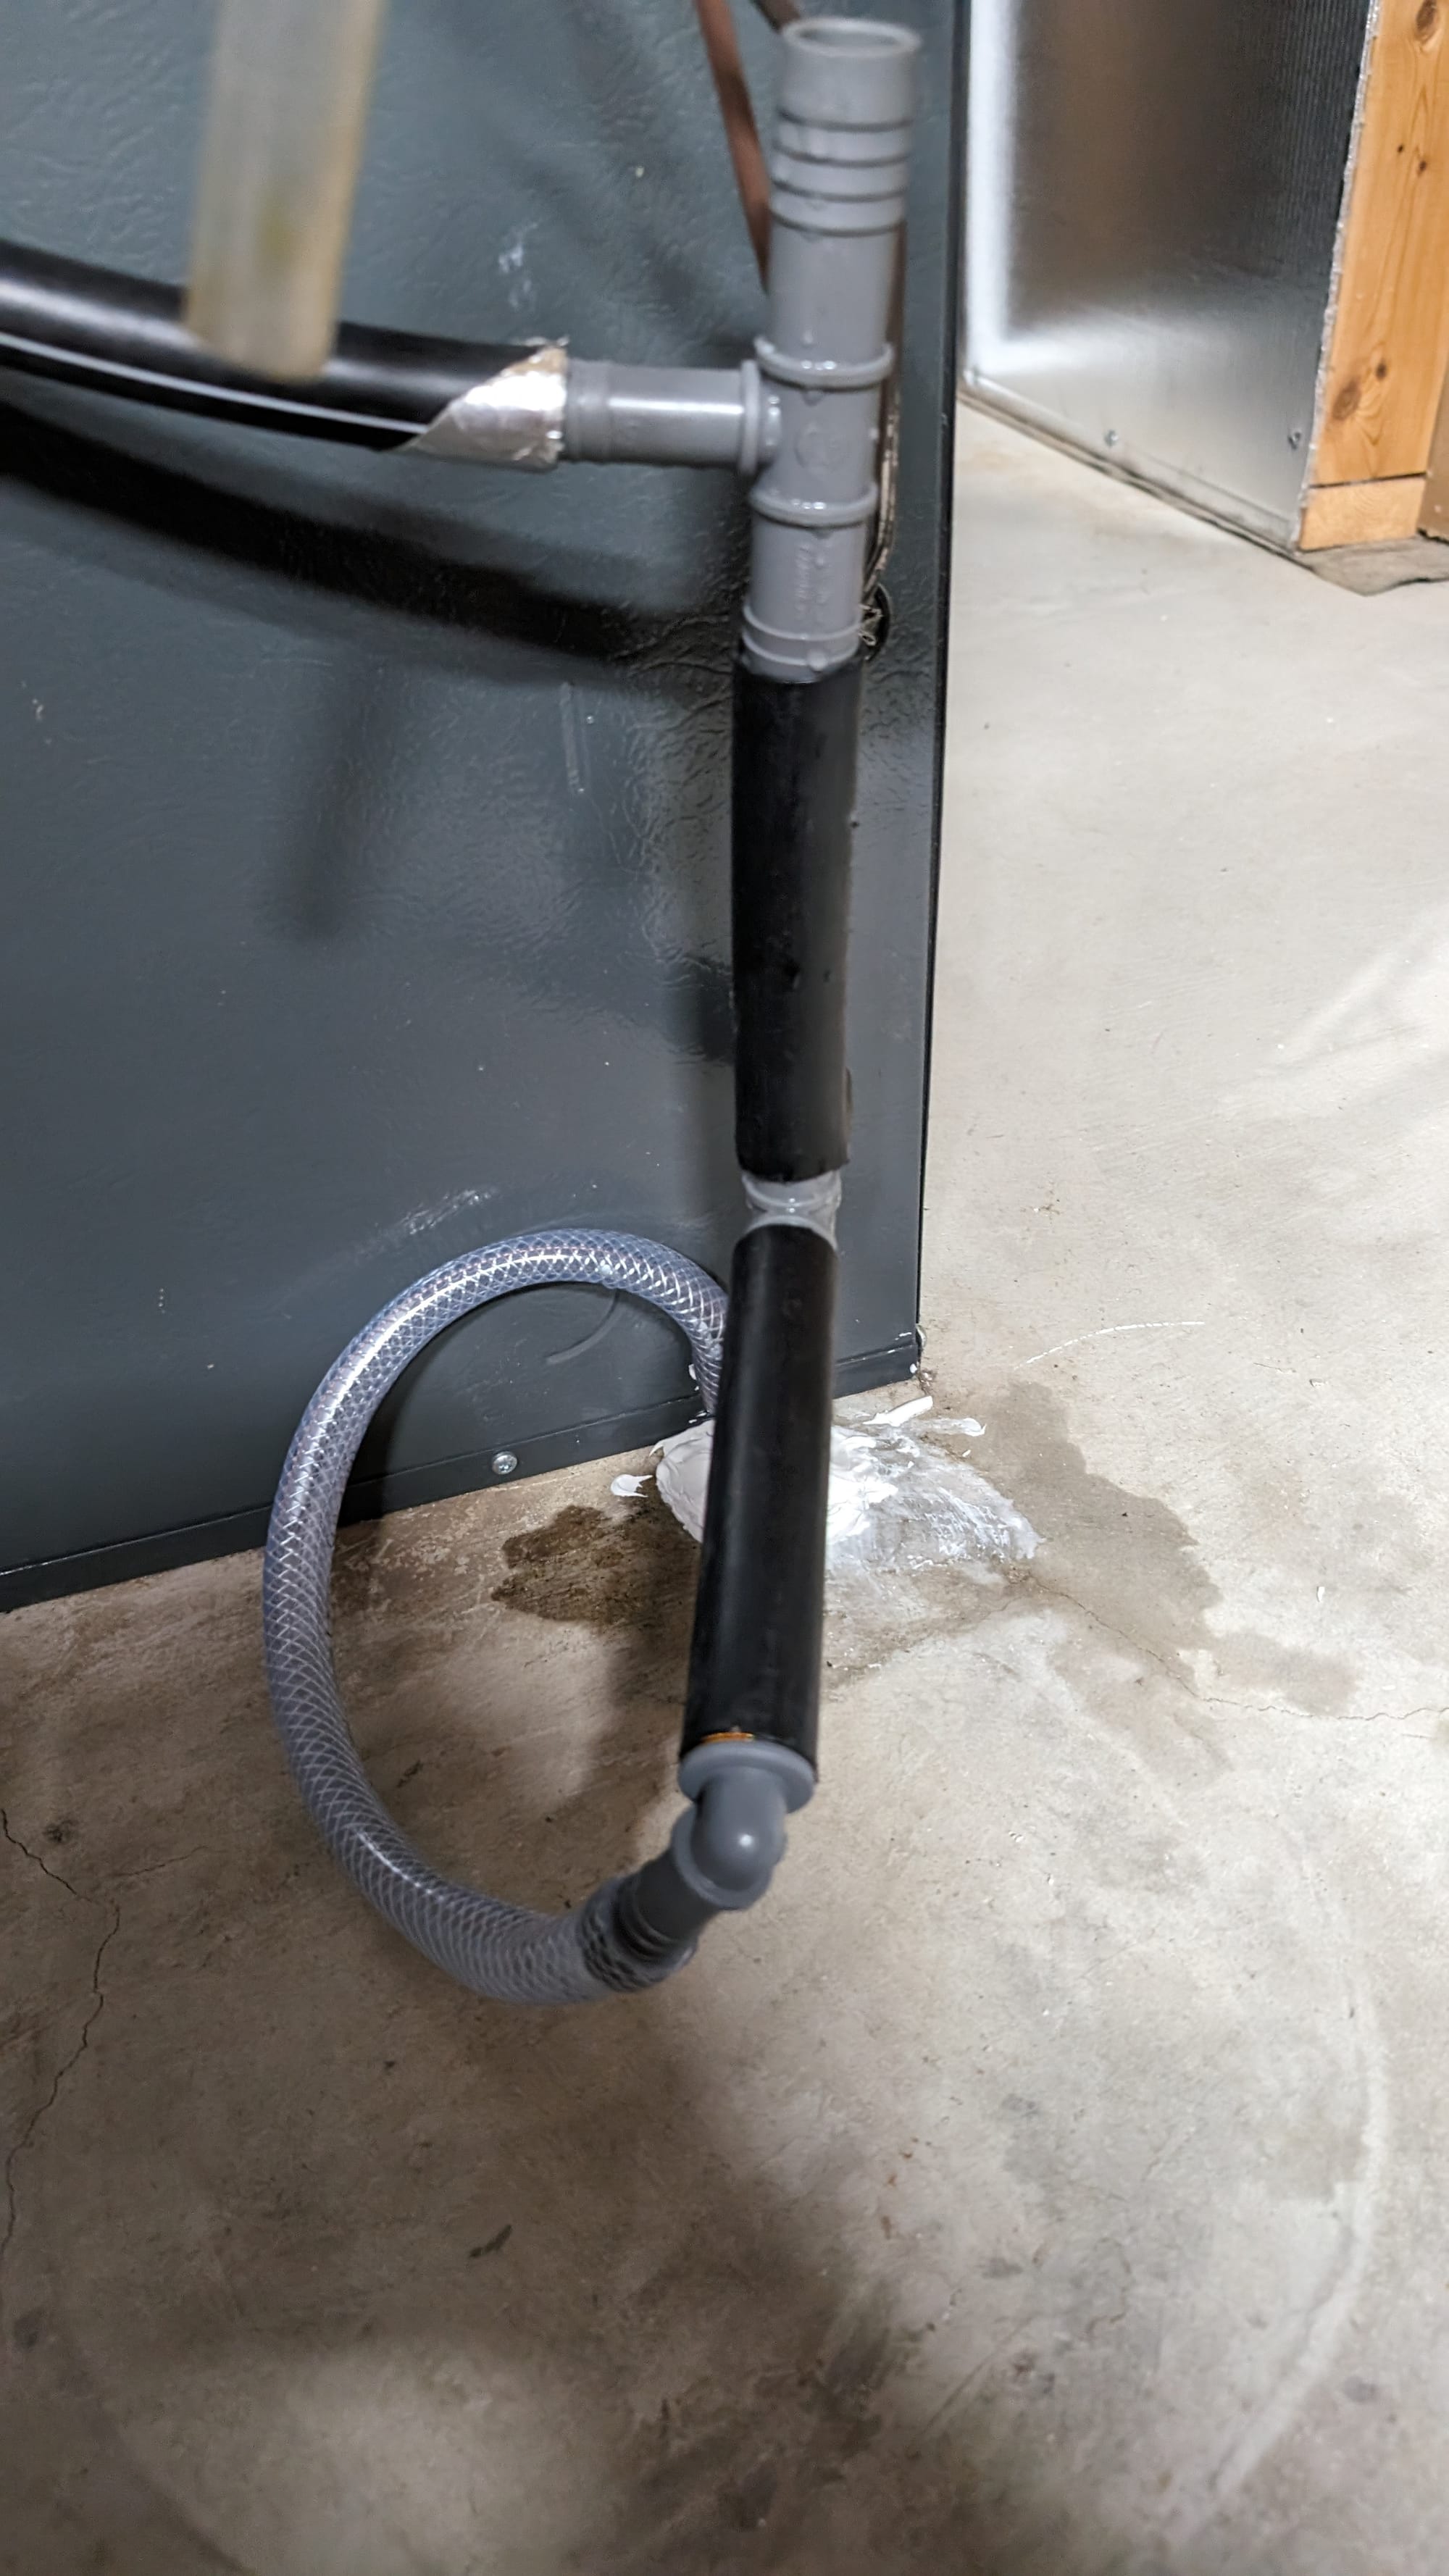
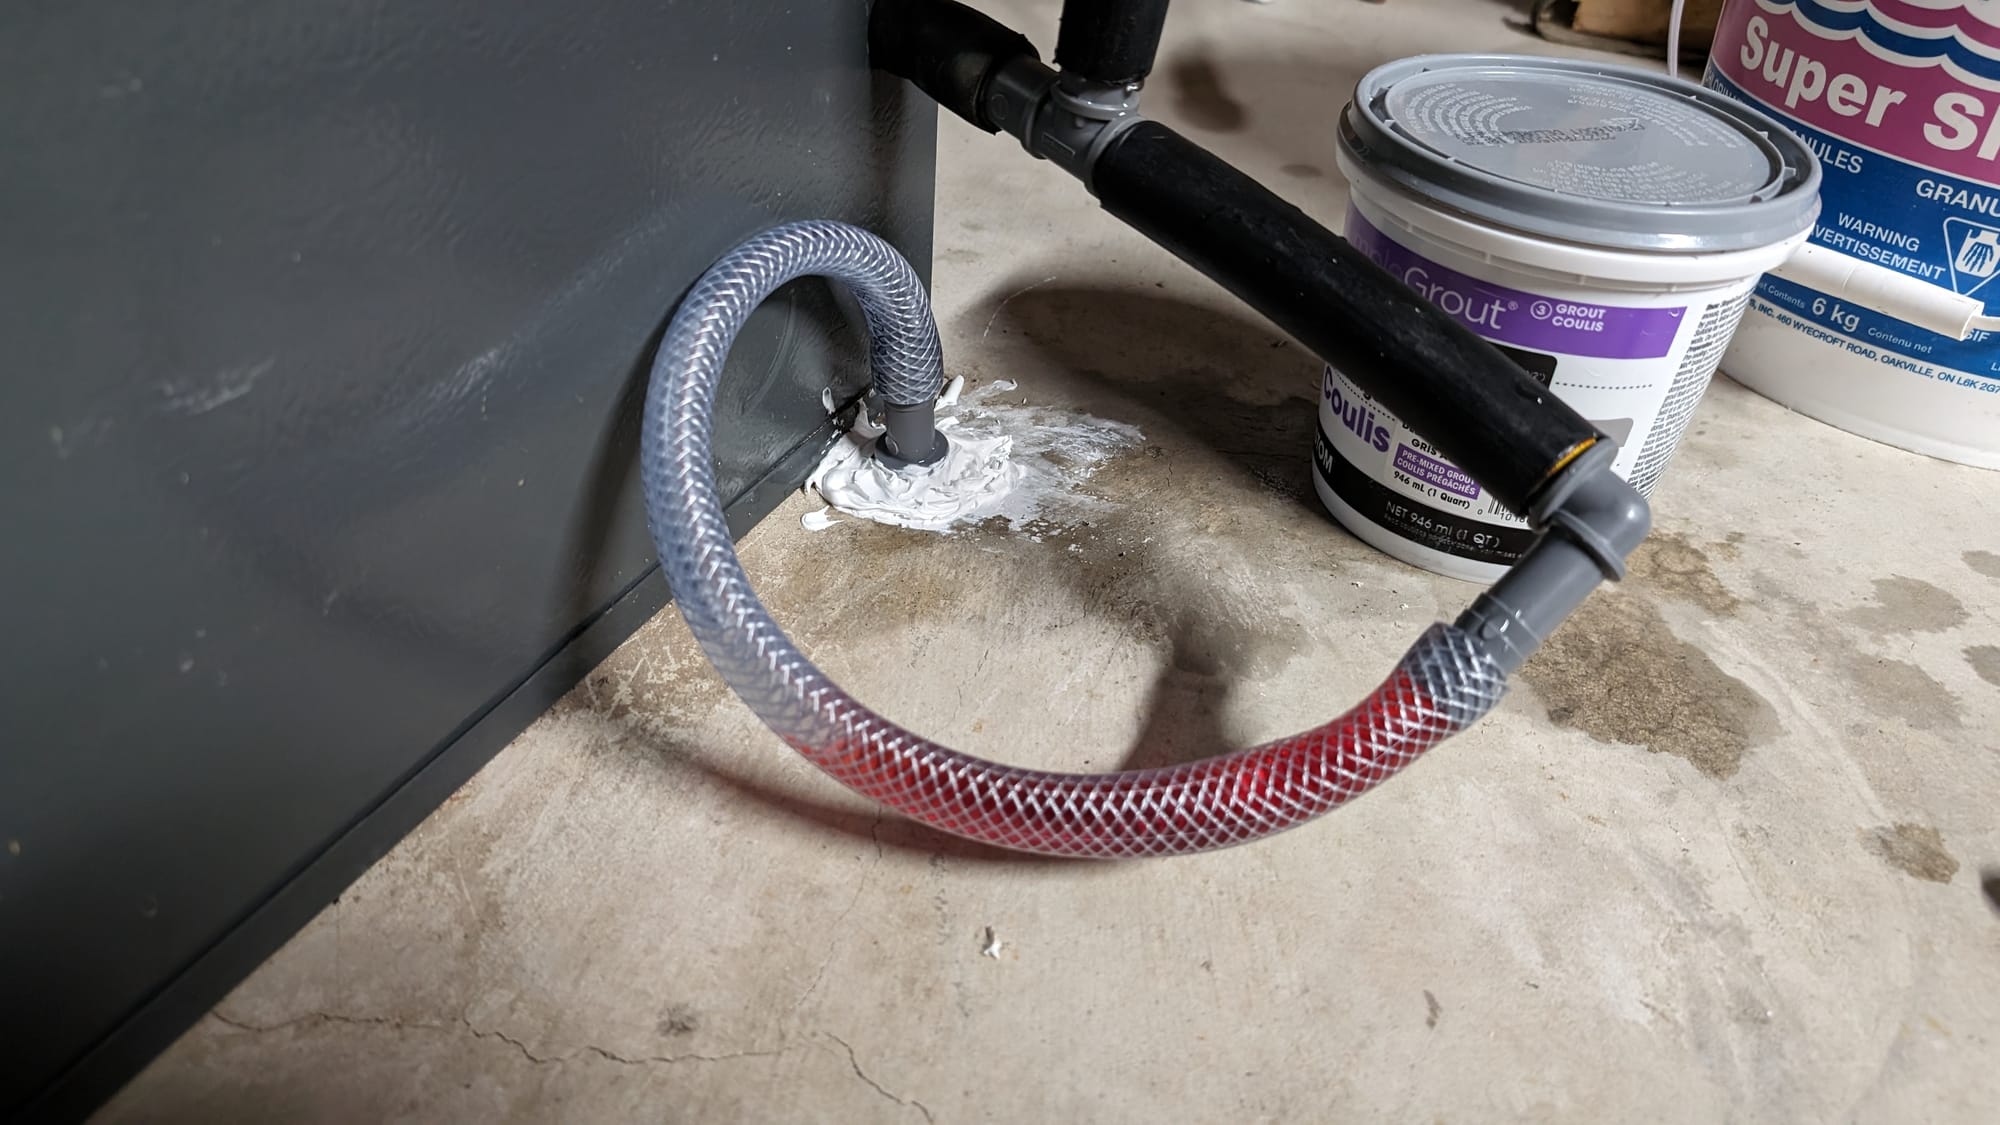
For the water drip hole in the floor, my first thought was to create a seal around the pipe going into the floor and to create a sort of P trap in the line to restrict the flow of air back into the house via the drip pipe into furnace. While I thought this was a brilliant idea, it caused another problem, a vacuum seal on the furnace which caused the furnace not to enter the second heating stage, meaning it would not heat above 19 degrees.
On I go to my second idea to solve the issue. I will be directing the water drip into a large collection pan and installed in the pan will be a small bulge pump and a float switch. The water will drip into the pan, and when the float switch is engaged, the pump will pump the water from the pan and into the main water drainage of the house. Then seal the hole in the floor with silicone caulking.
Hole in floor into the ground. Attempt 1 to create a sort of P-Trap. Red is just food coloring as a visual reference Crack in floor sealed.

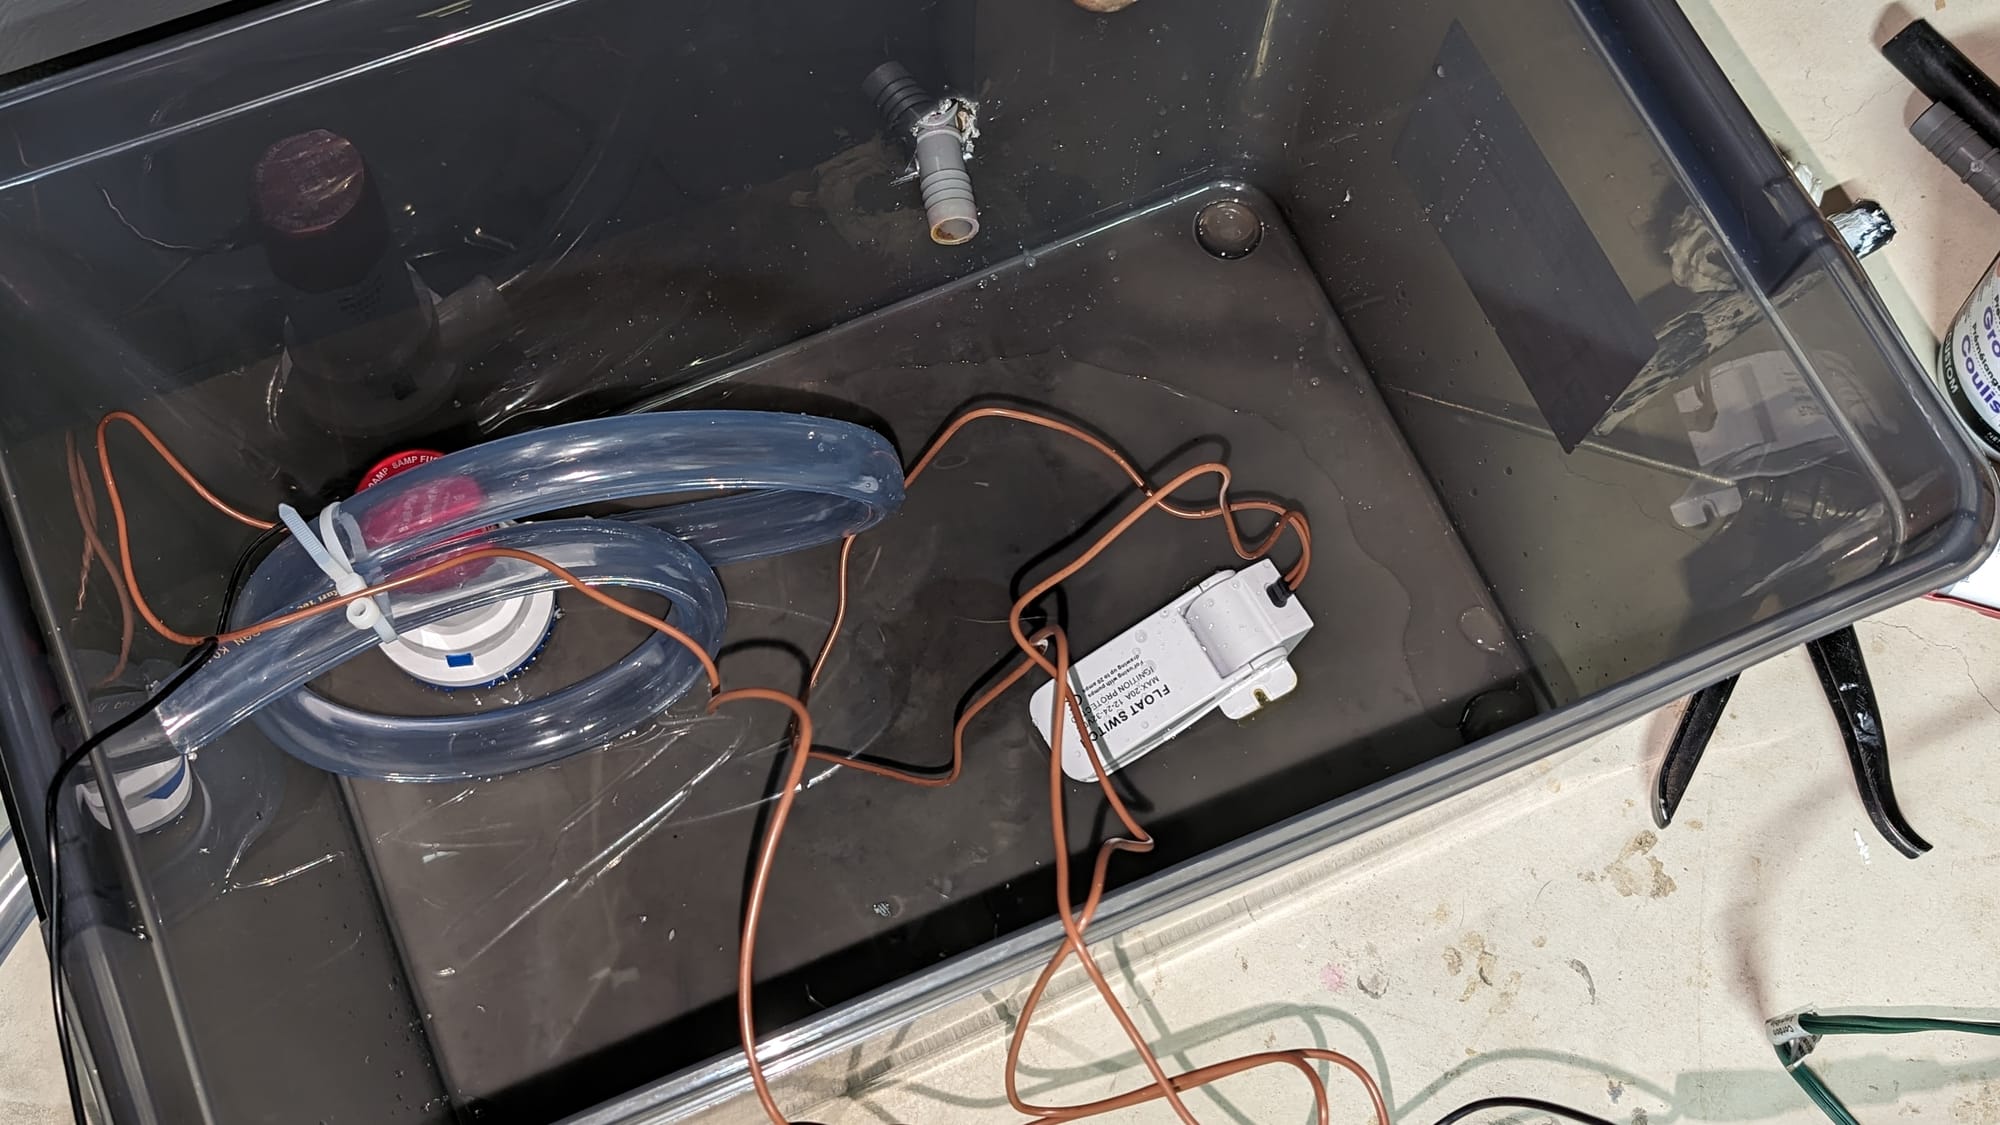
Items used for issue 1:
- Plumbing Electric Bilge Pump with Float Switch
- 12 Volt 6 Amp Power Supply Adapter to connect the bilge pump
- Silicone caulking
I have since upgraded the above solution and used a made for use system to eliminate my homemade setup and used the following: Little Giant VCMA-20ULST 115 Volt, 80 GPH, 1/30 HP Automatic Condensate Removal Pump with Safety Switch
I will monitor these levels over the next 2 months and if I do not see a significant drop in radon levels in our home, I will move to the step and install a radon mitigation system.
Mitigation step 2:
(update 2024-11-12)
For the full mitigation system, you can install it yourself, its a fairly simple process but you will need a few items that will cost about $725 and take you about a day if you are handy or you can hire a contractor. Rough cost for a contractor will be around $3000-$4000.
After monitoring for about a year now my levels have constantly being above the recommended 200Bq/m³ (new Canadian recommended levels are below 150Bq/m³). Additionally, testing near my cold storage sump pump hole has garnered levels above 1400Bq/m³.
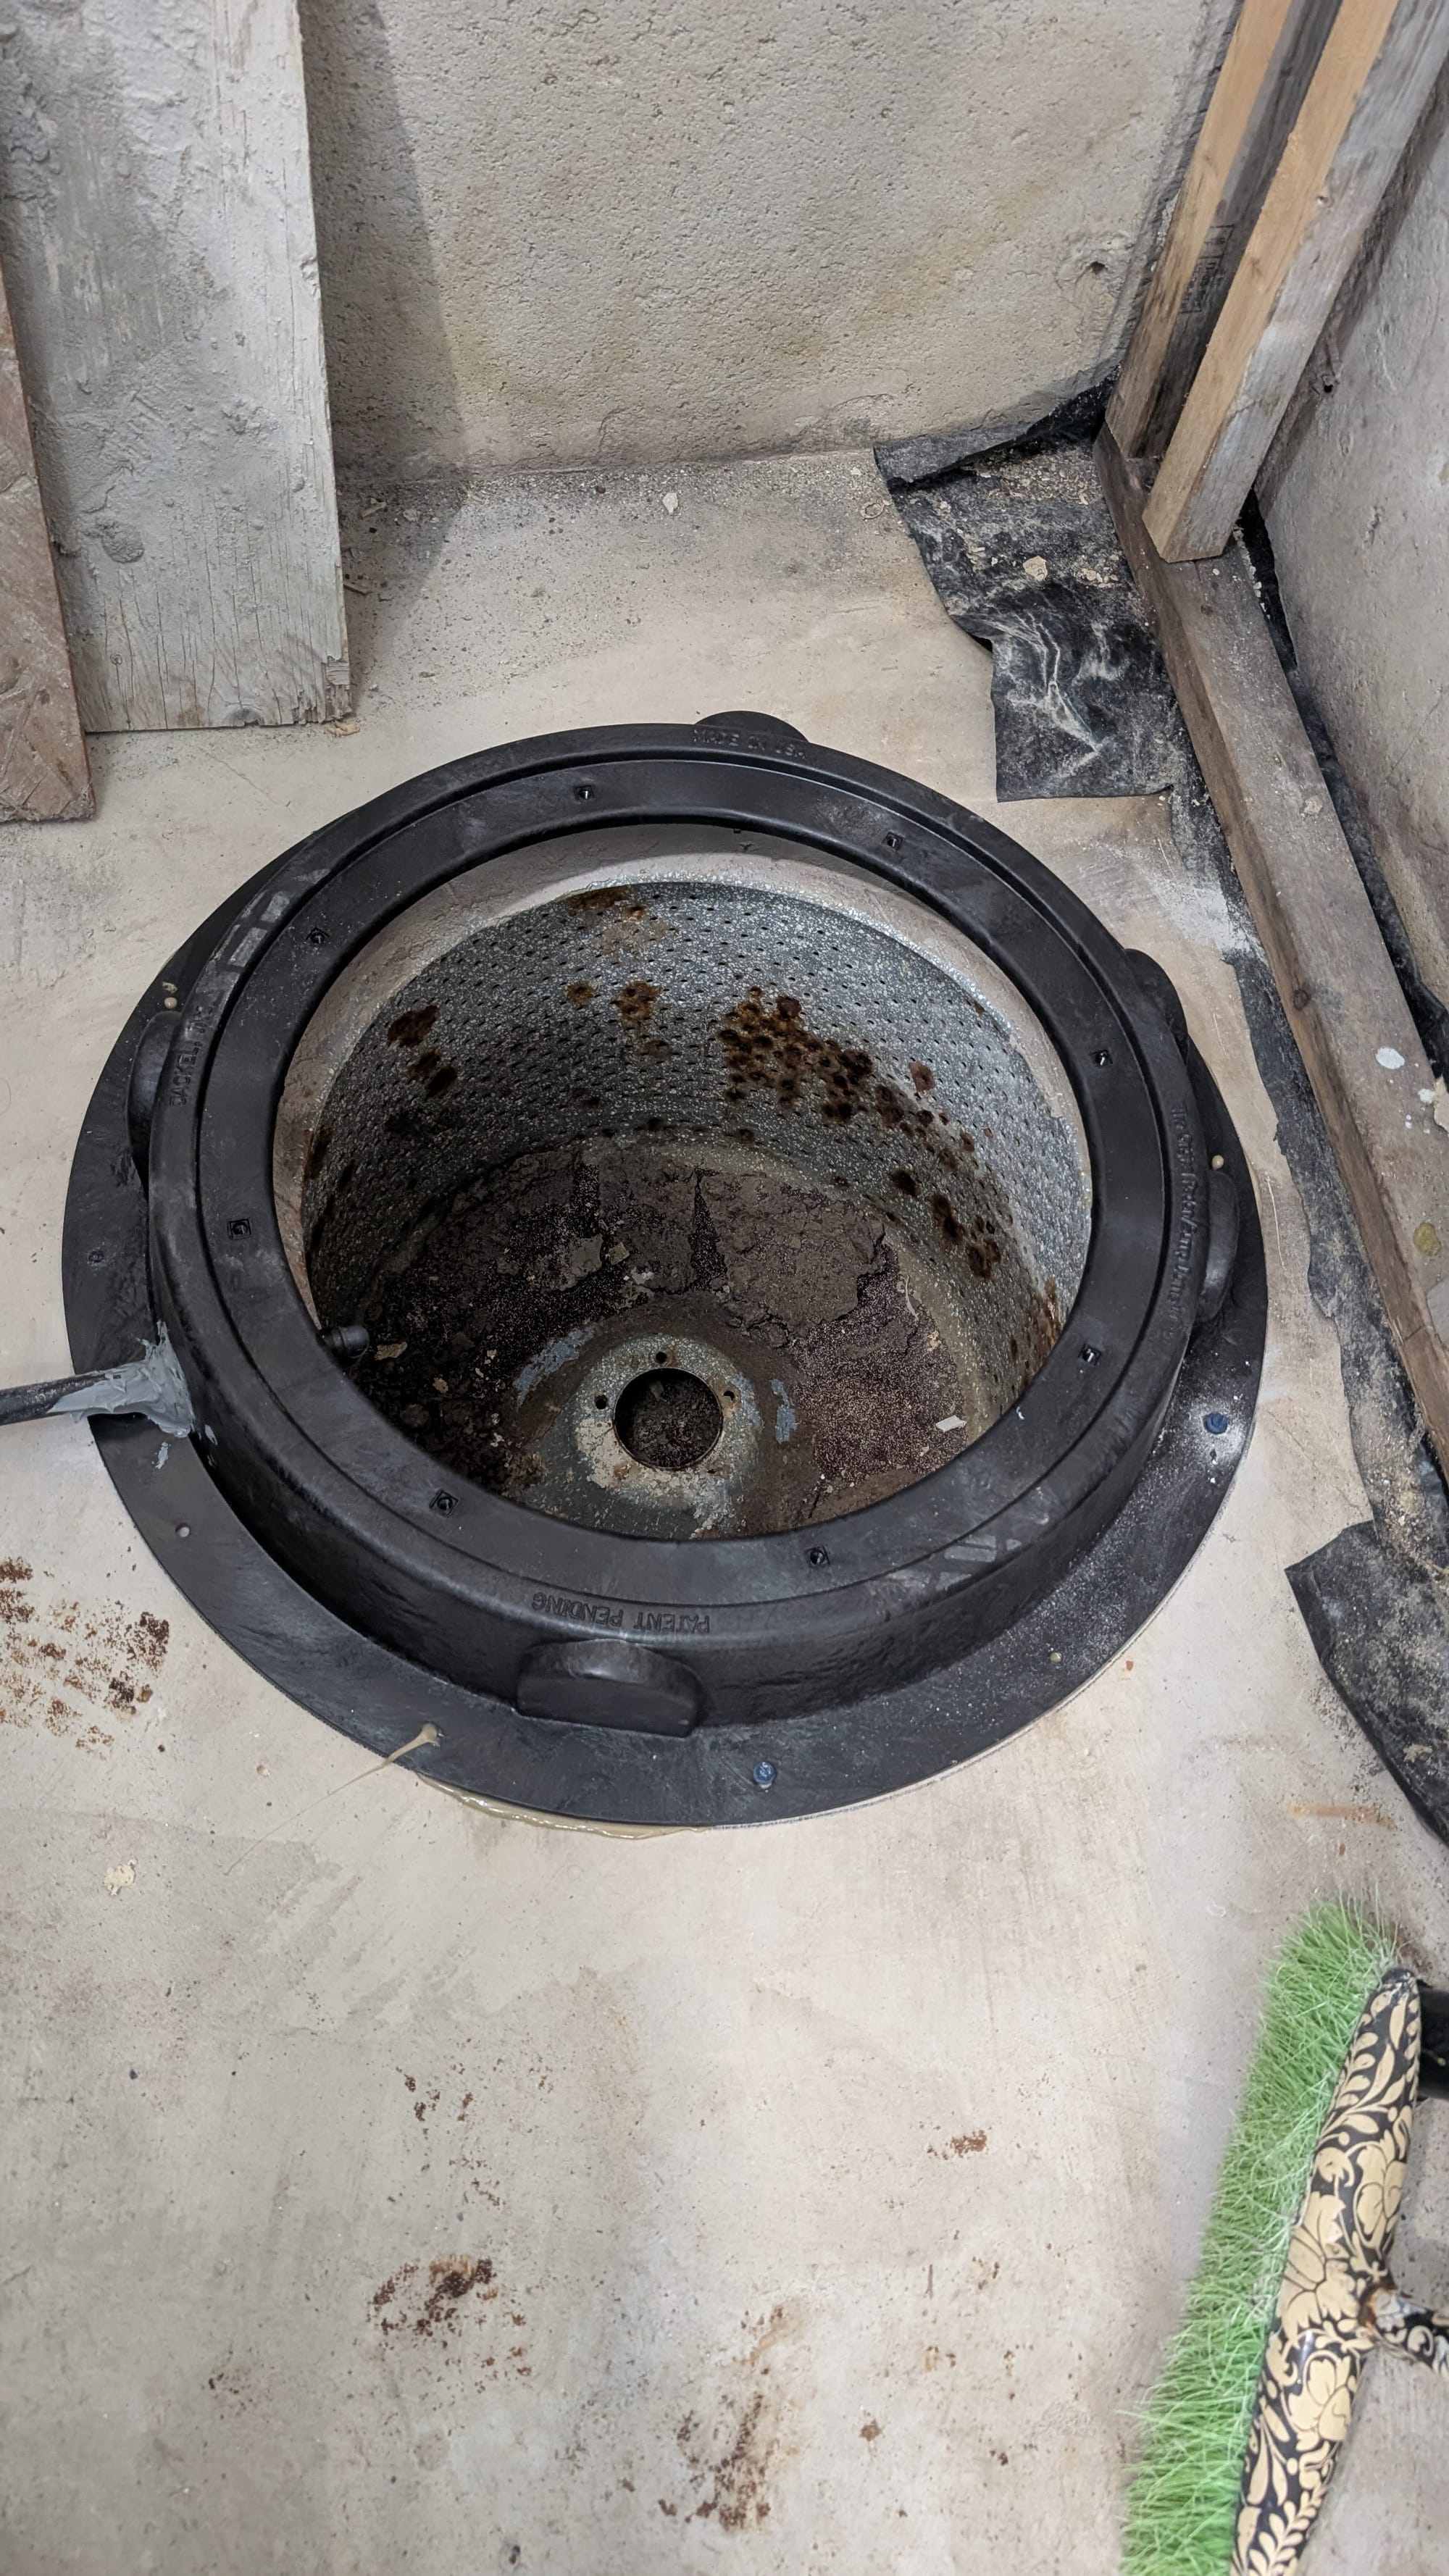
There are two main ways to install a radon mitigation system in your home; use a current available void in your basement floor like a sump pump hole or drill the slab to create a void to suck the air from. Both will work, and both will use most of the same supplies. Drilling of the slab will be a bit harder (This old home on how to install through the slab).
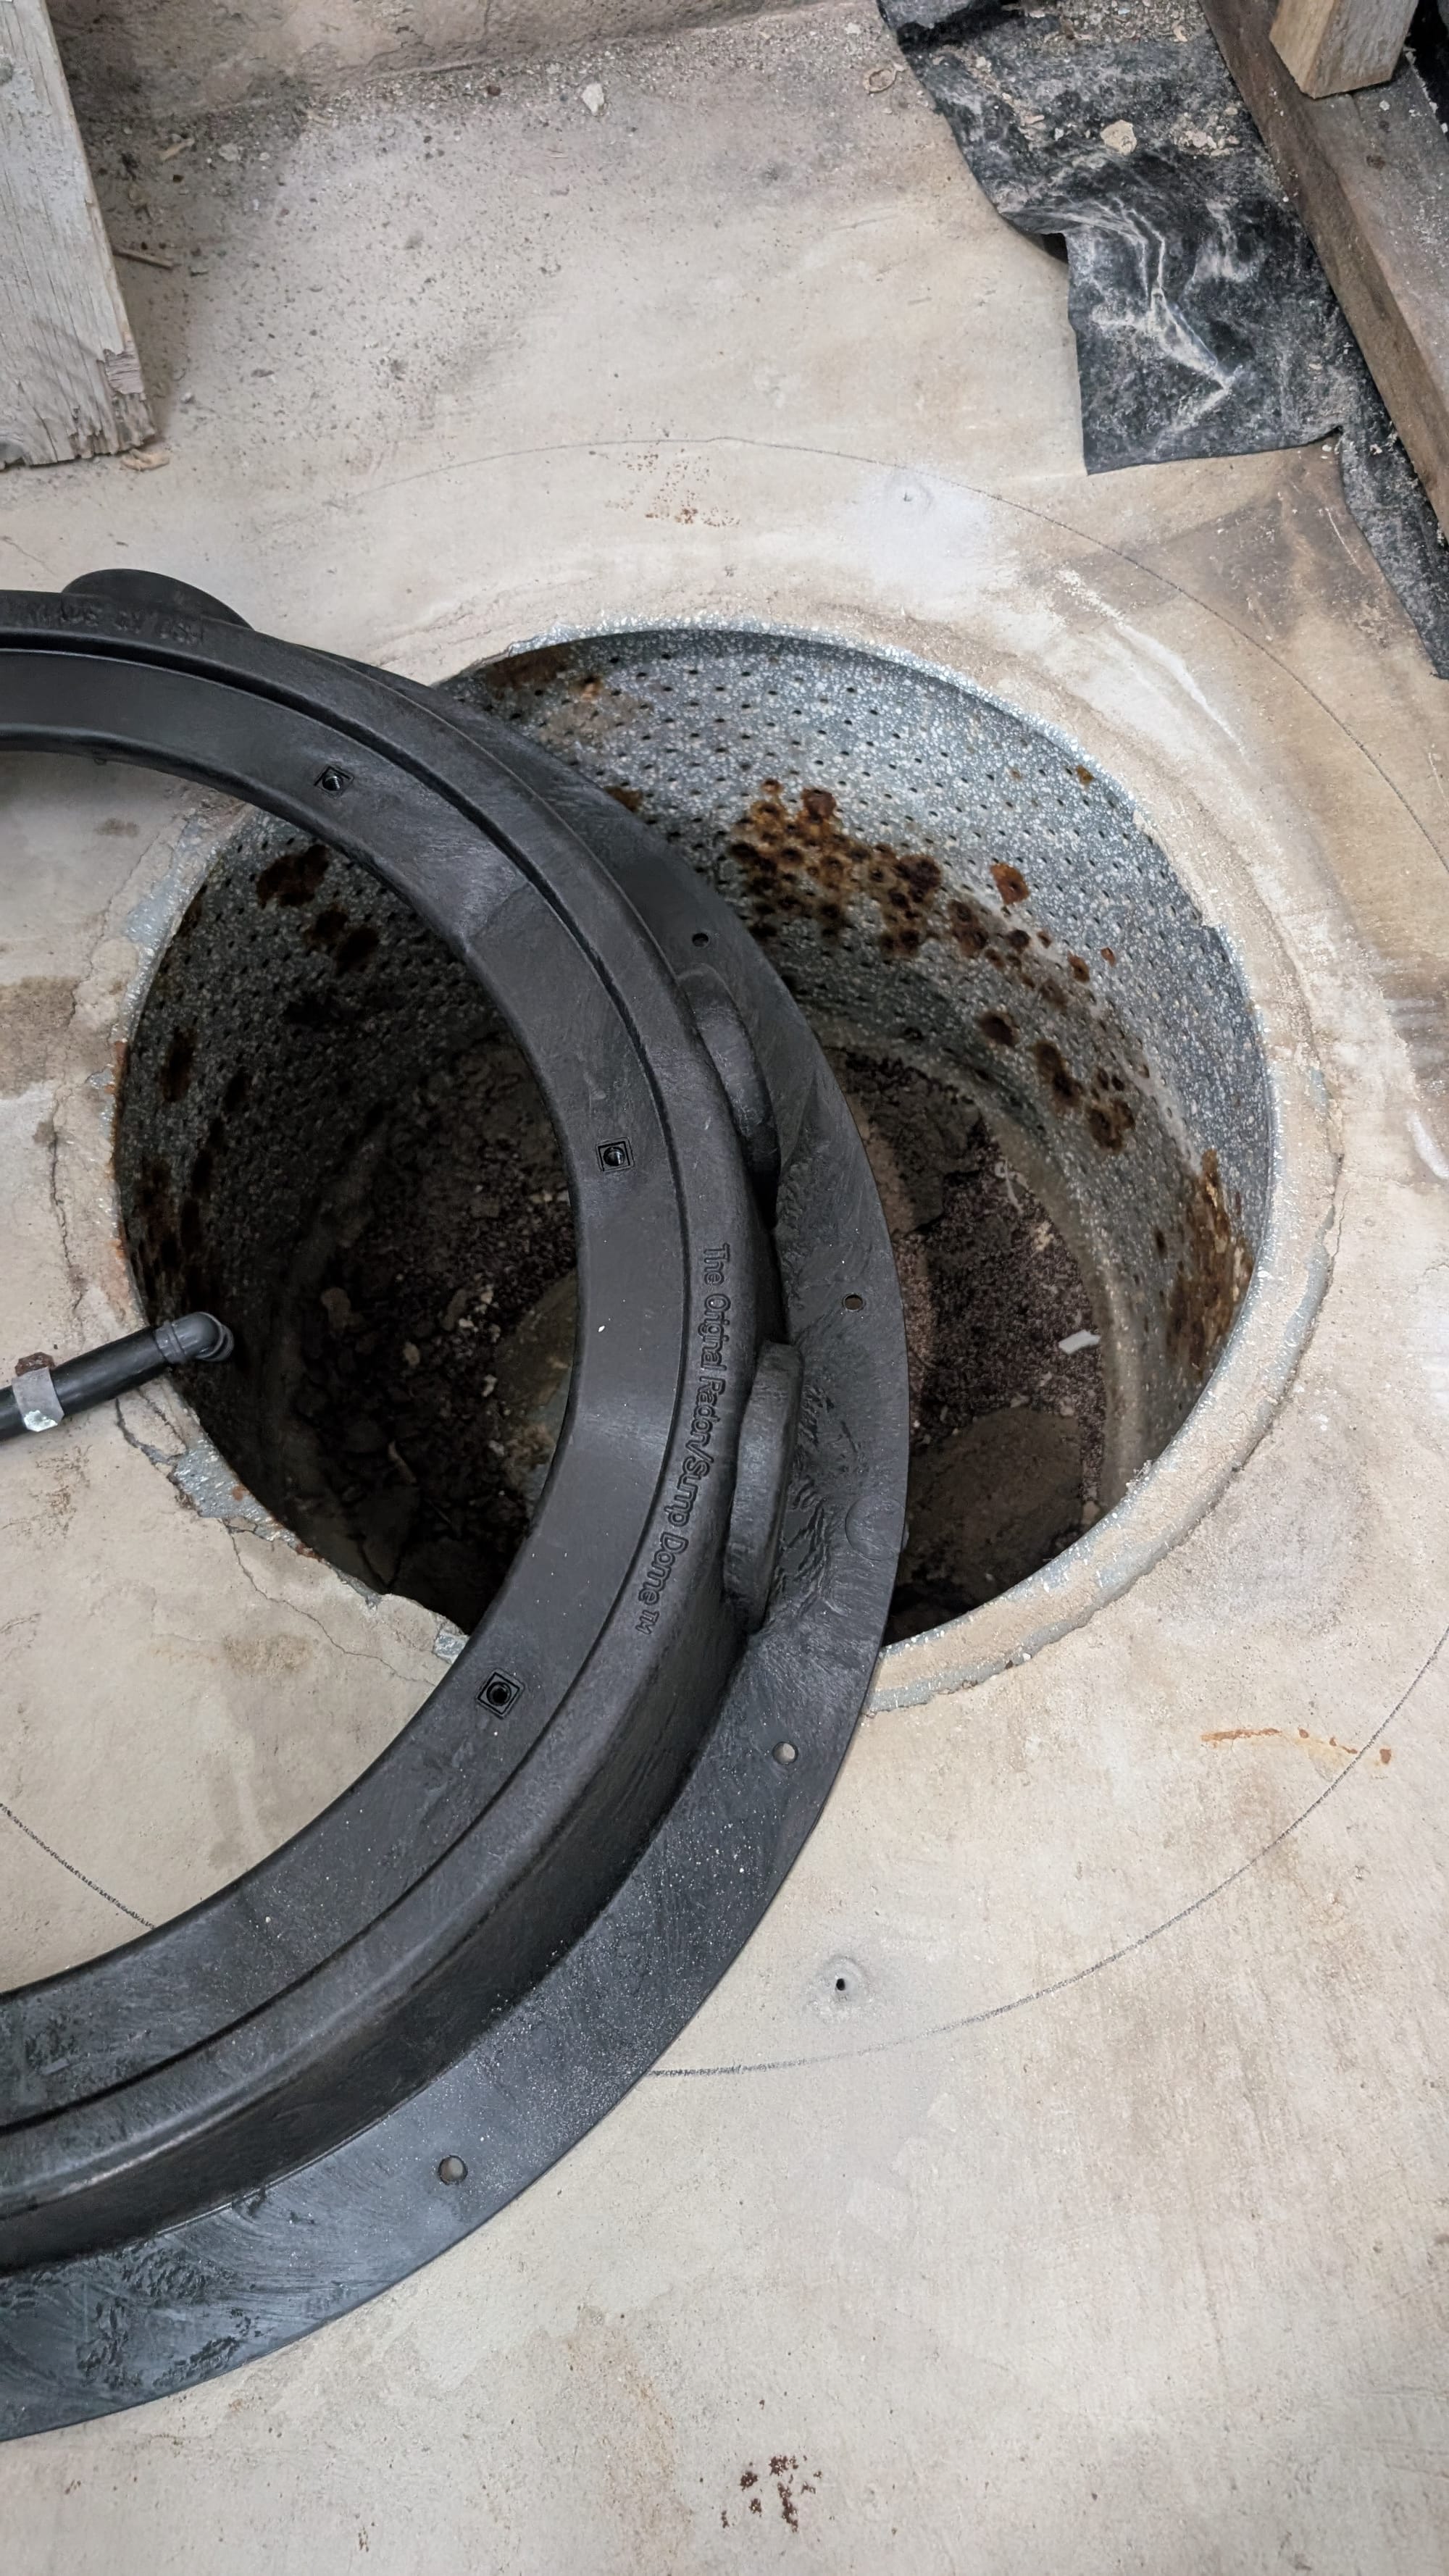
Luckily for me, there was an already available open sump pump hole and pre-drilled 4" holes to the outside, so no drilling of holes in the slab but needed to purchase the proper cover for the sump hole.
List of items I ordered:
- 4 inch Radon Fan Installation Kit -Inline Centrifugal Fan with Rubber Couplers (4 inch x 3 inch) and Air Pressure Indicator - ~$250
- The Original Radon/Sump Dome (Model: SMR16101-CV) - ~$275
- NIBCO 4804 Male Adapter H x MIPT - PVC DWV, 3" - ~$15
- 4 x 10' 3" PVC piping - ~$110
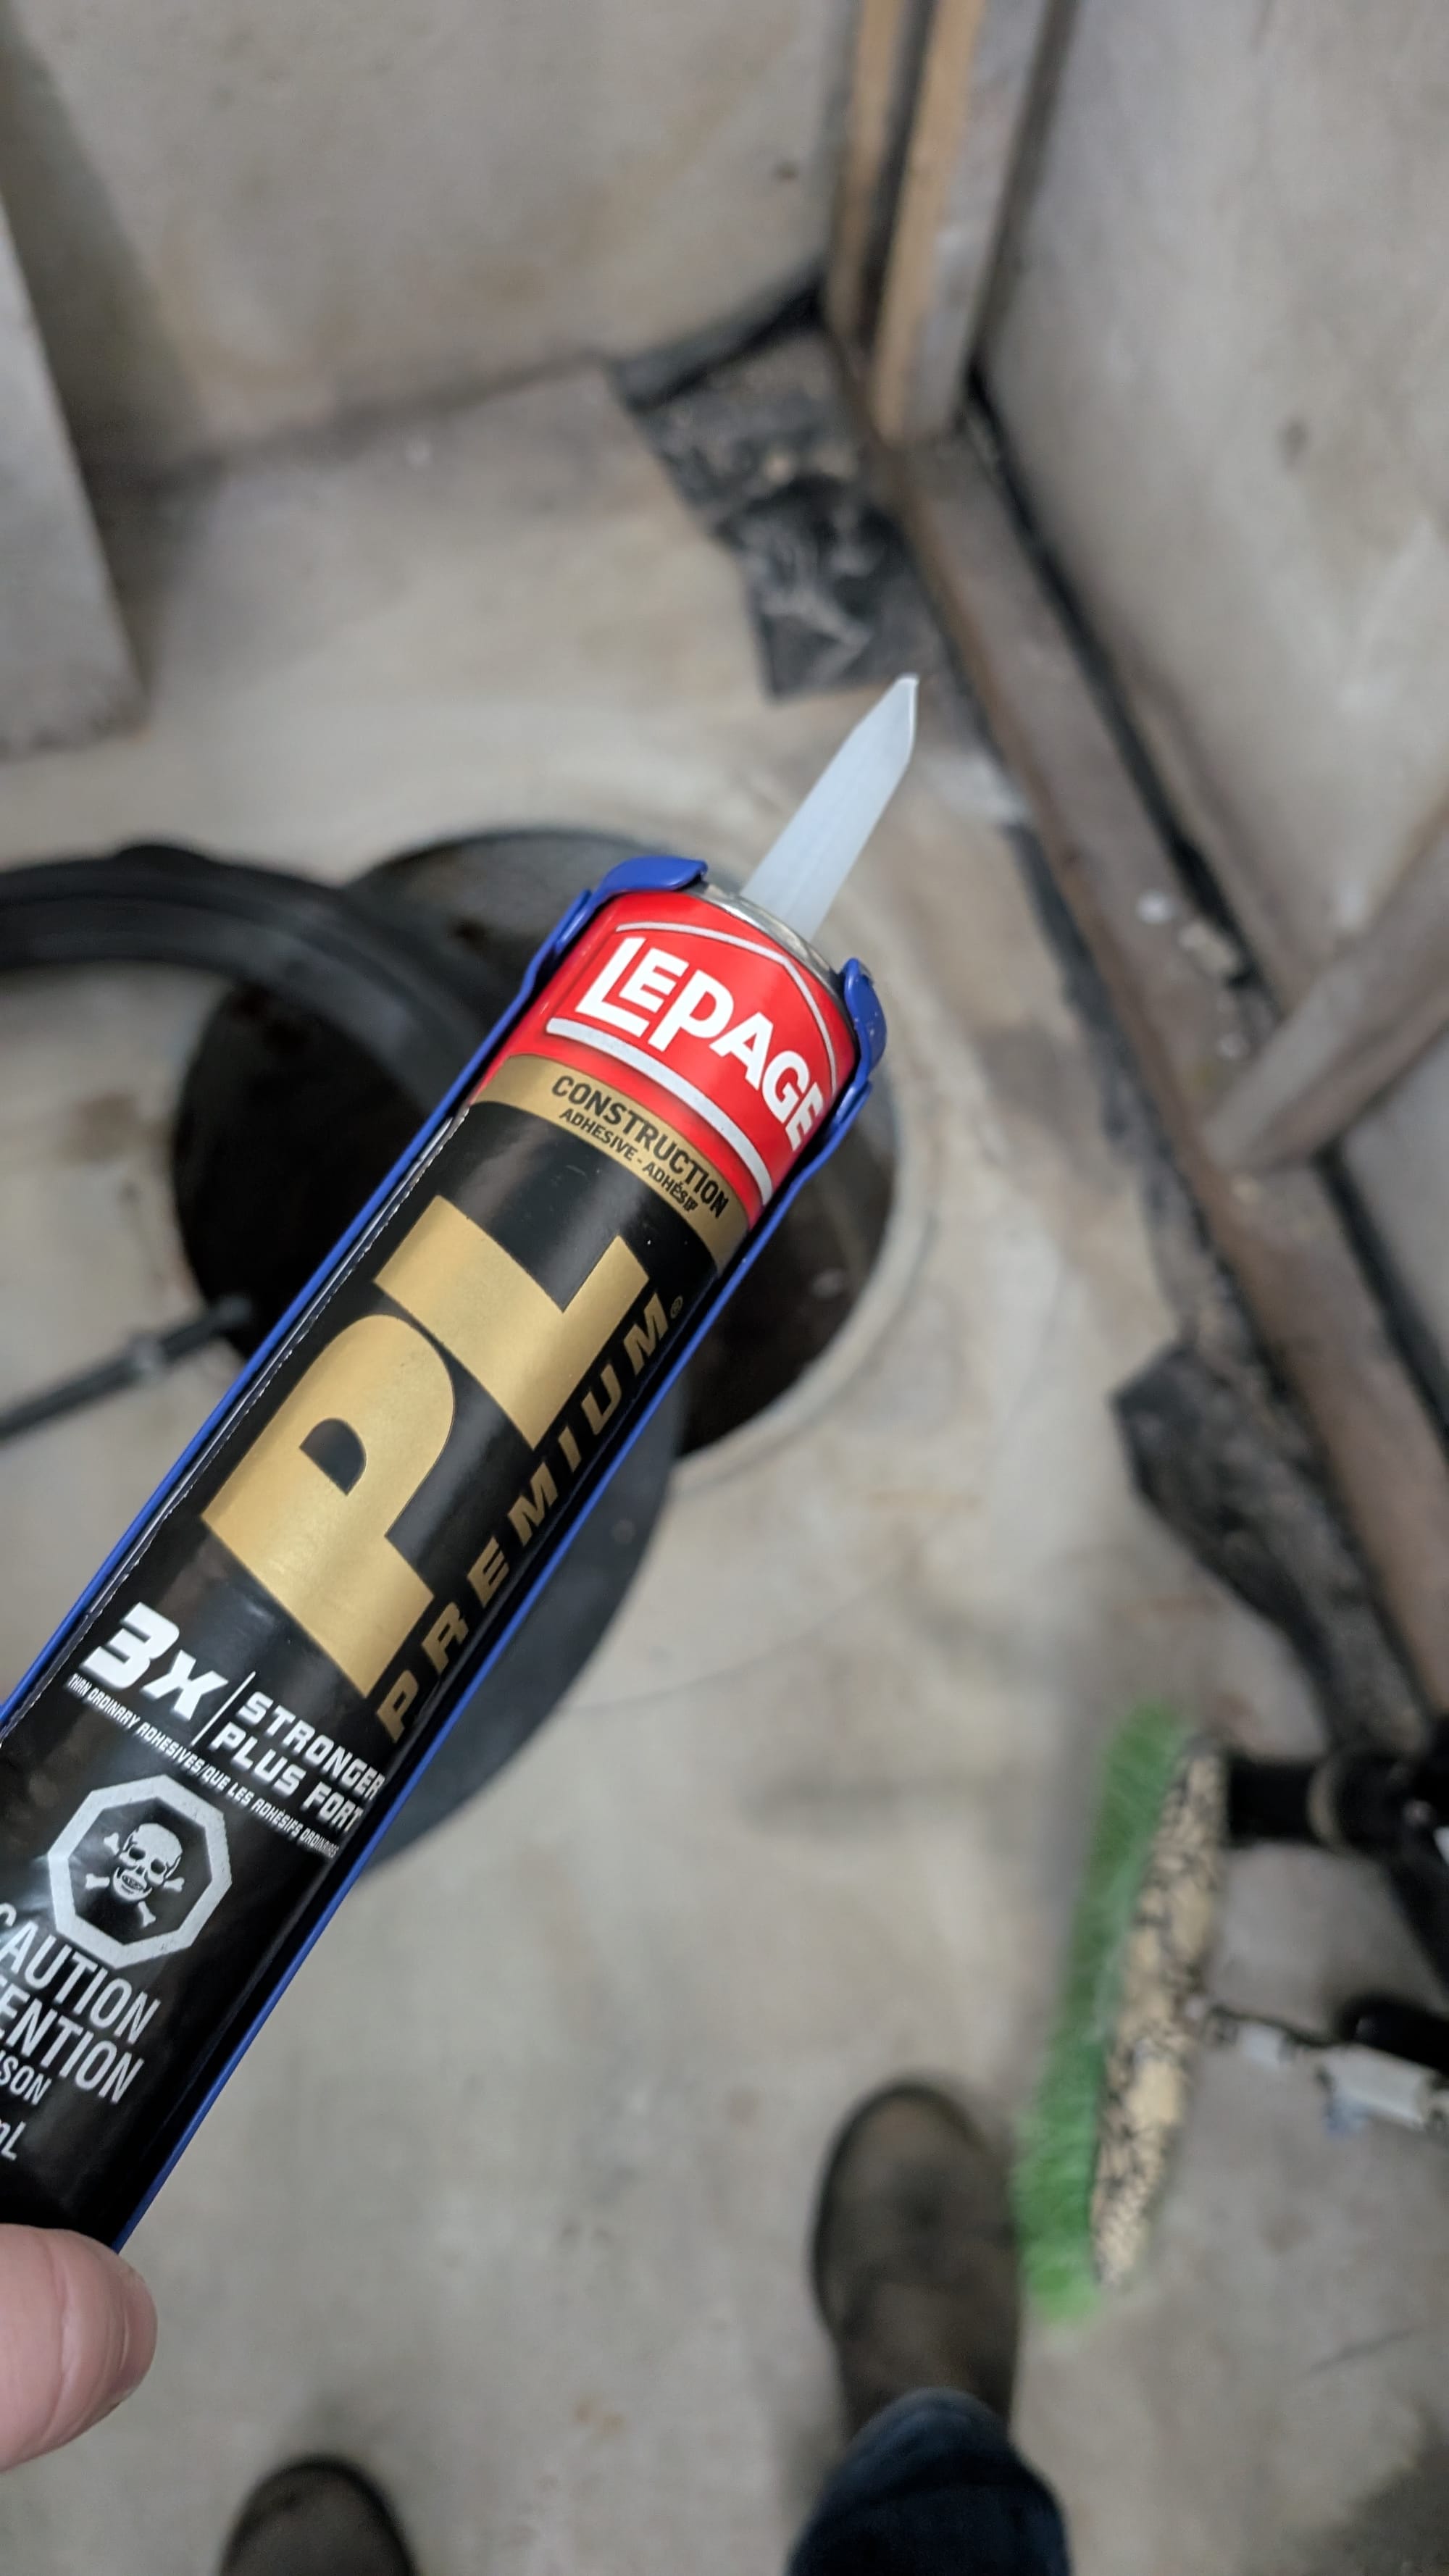
- Pipe joints, and pipe glue to join it all together - ~$50
- PL90, foam insulation, silicone caulking - ~$30
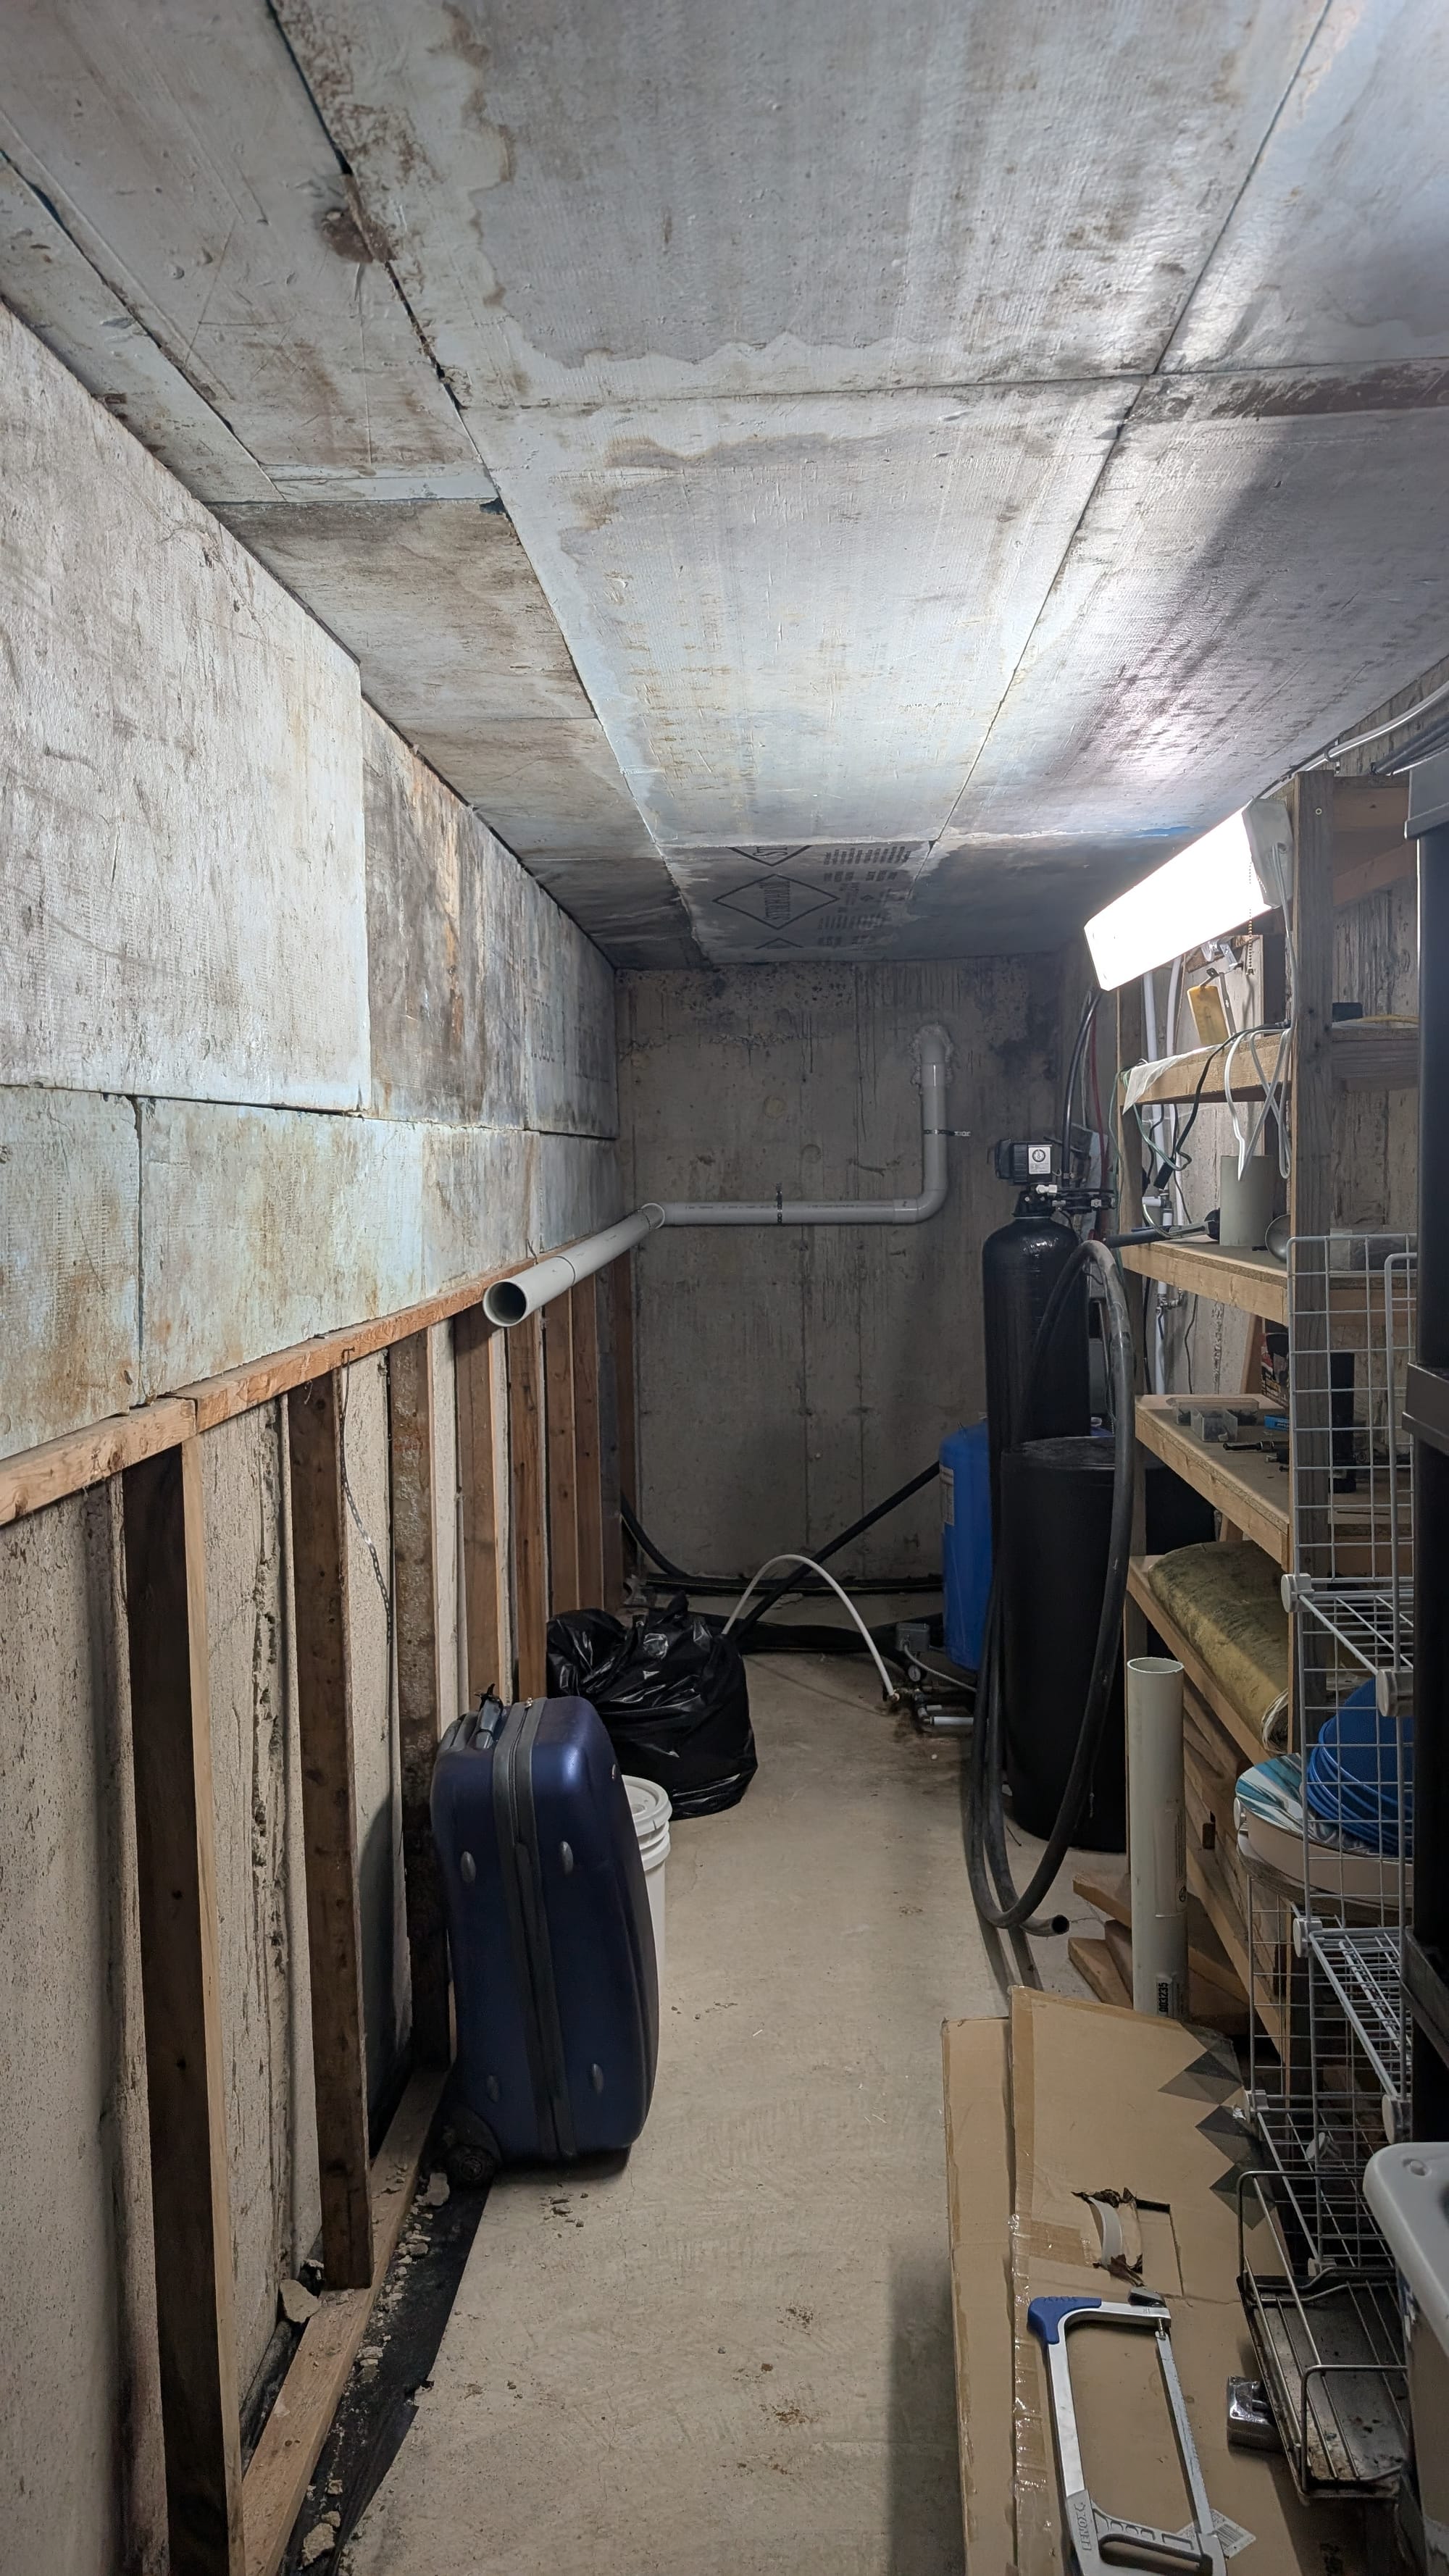
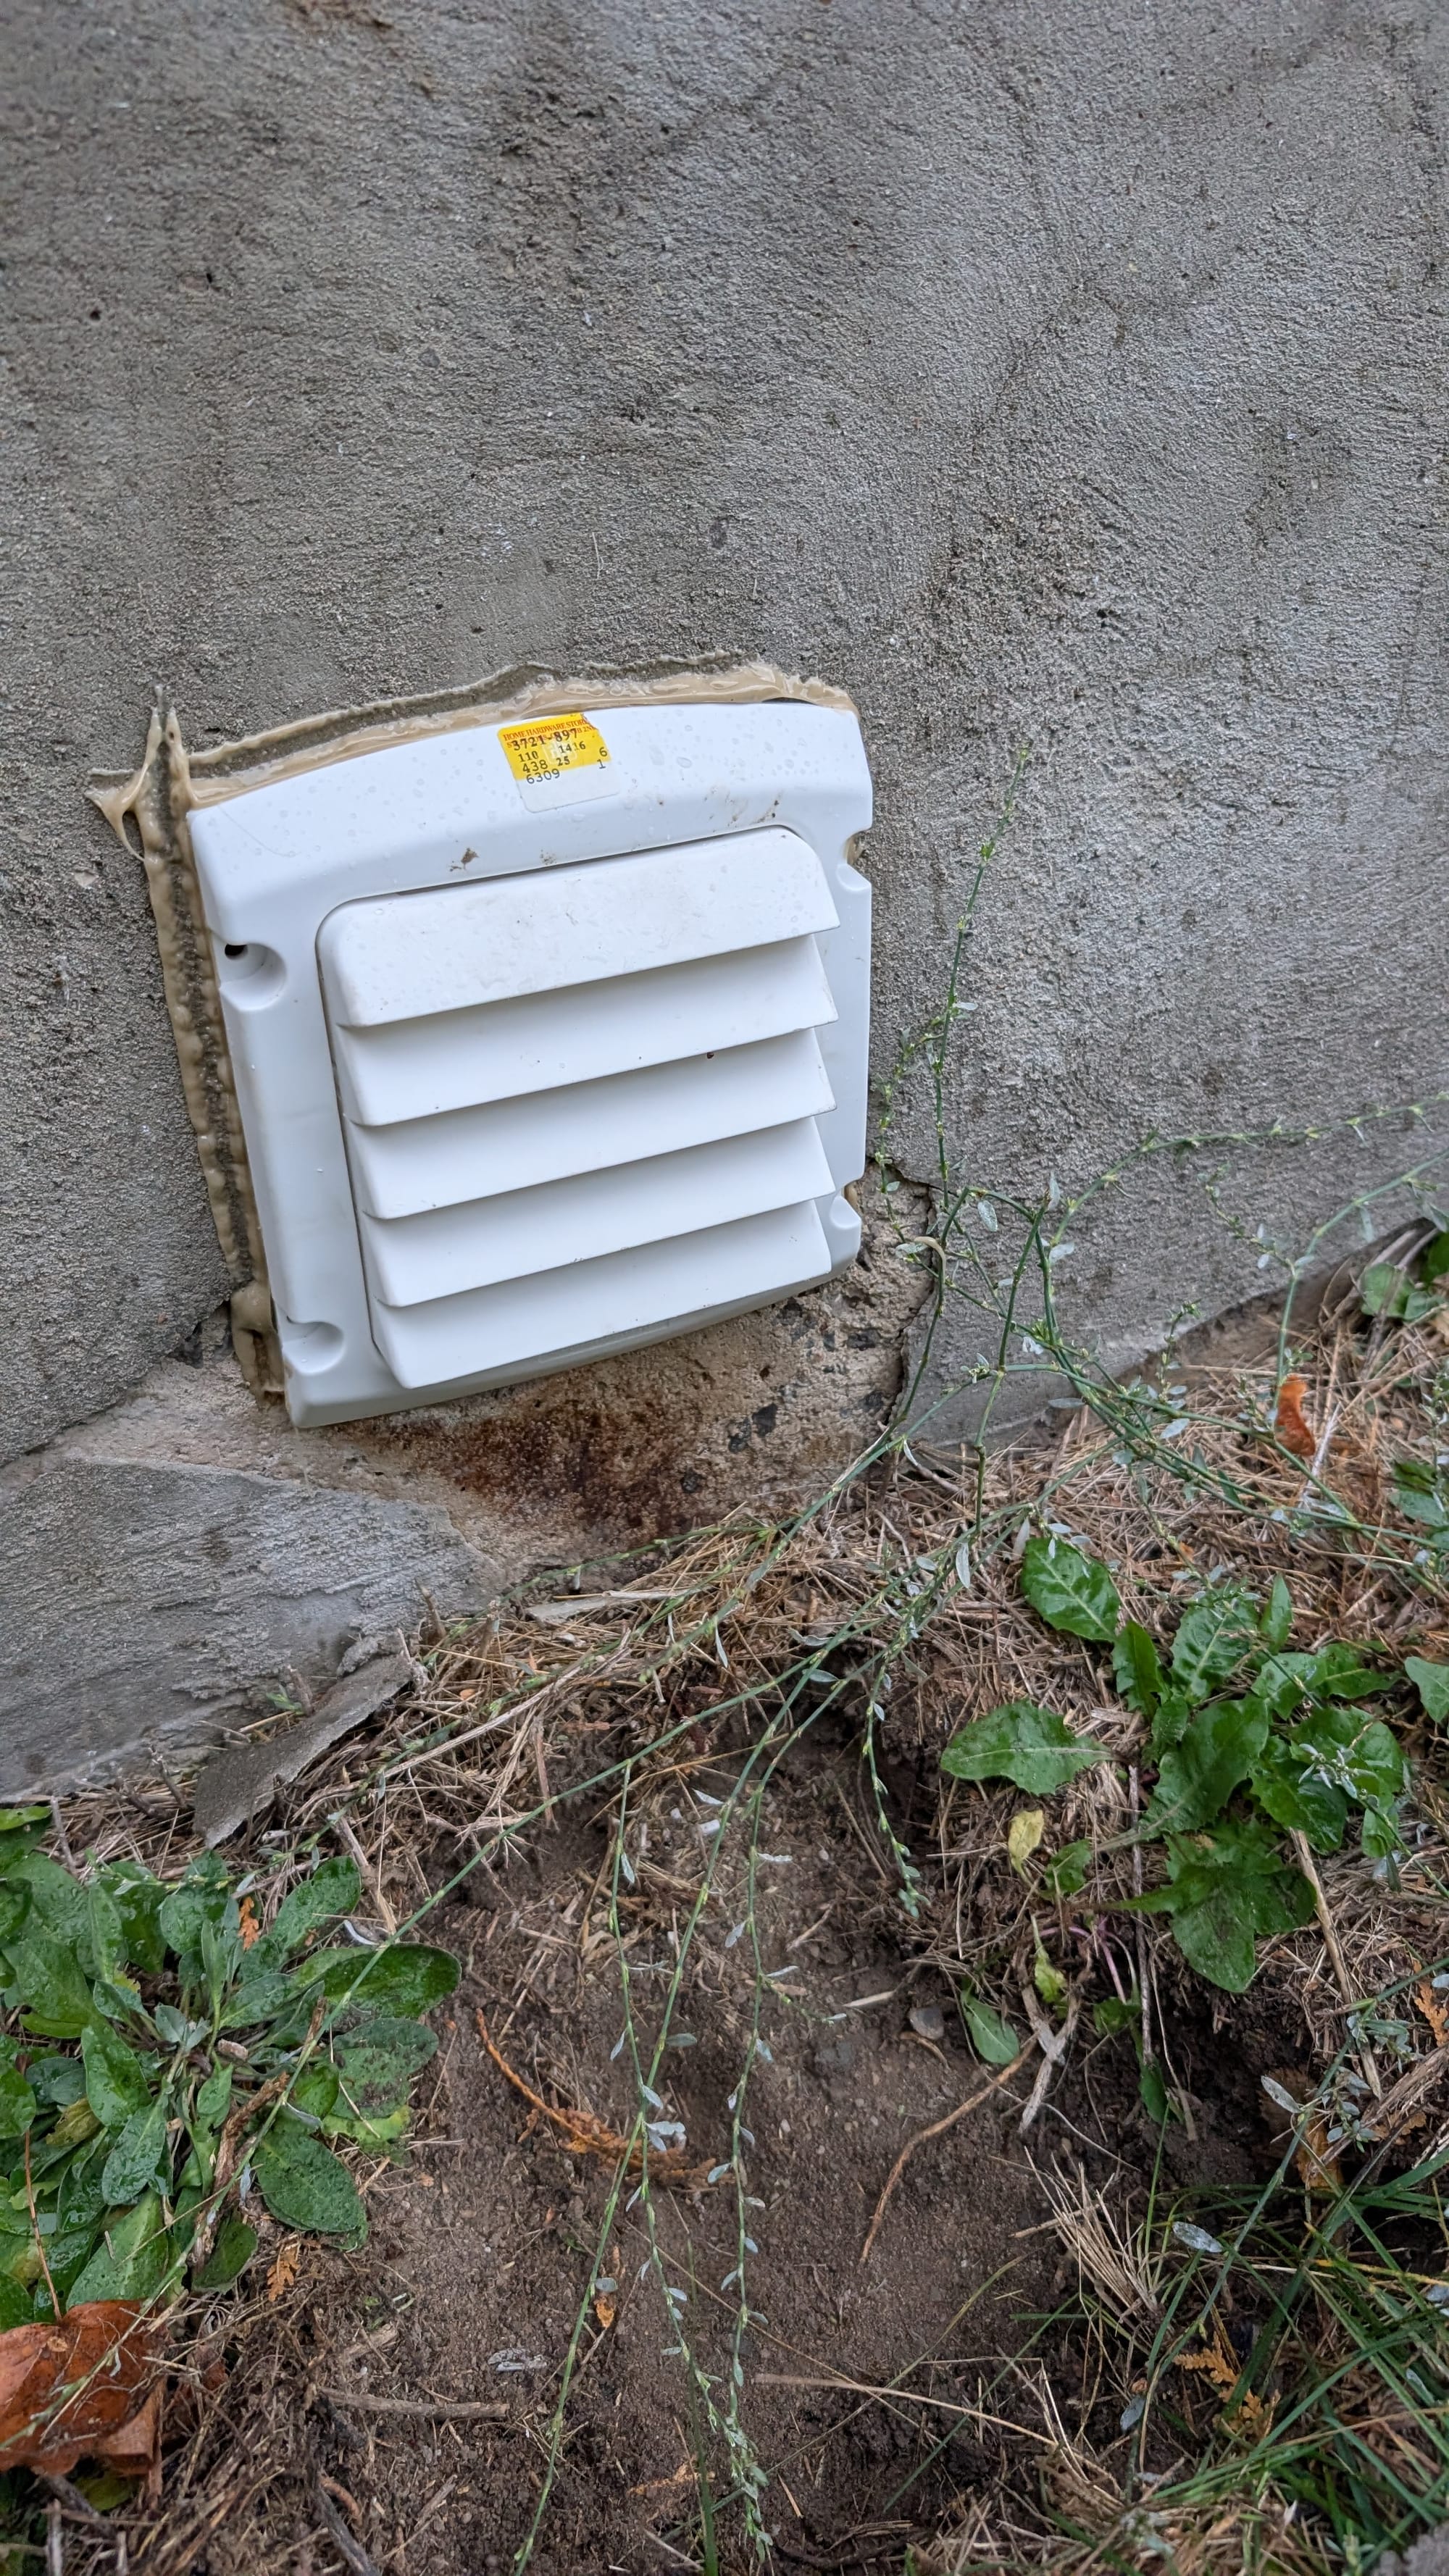
First up I had to remove some insulation and stuffing from the holes that went from the inside cold storage to the outside, I can only assume they were plugged to keep cold air out in the winter. On the flip side of this, it would of helped the house suck/breath more radon gas from this area.
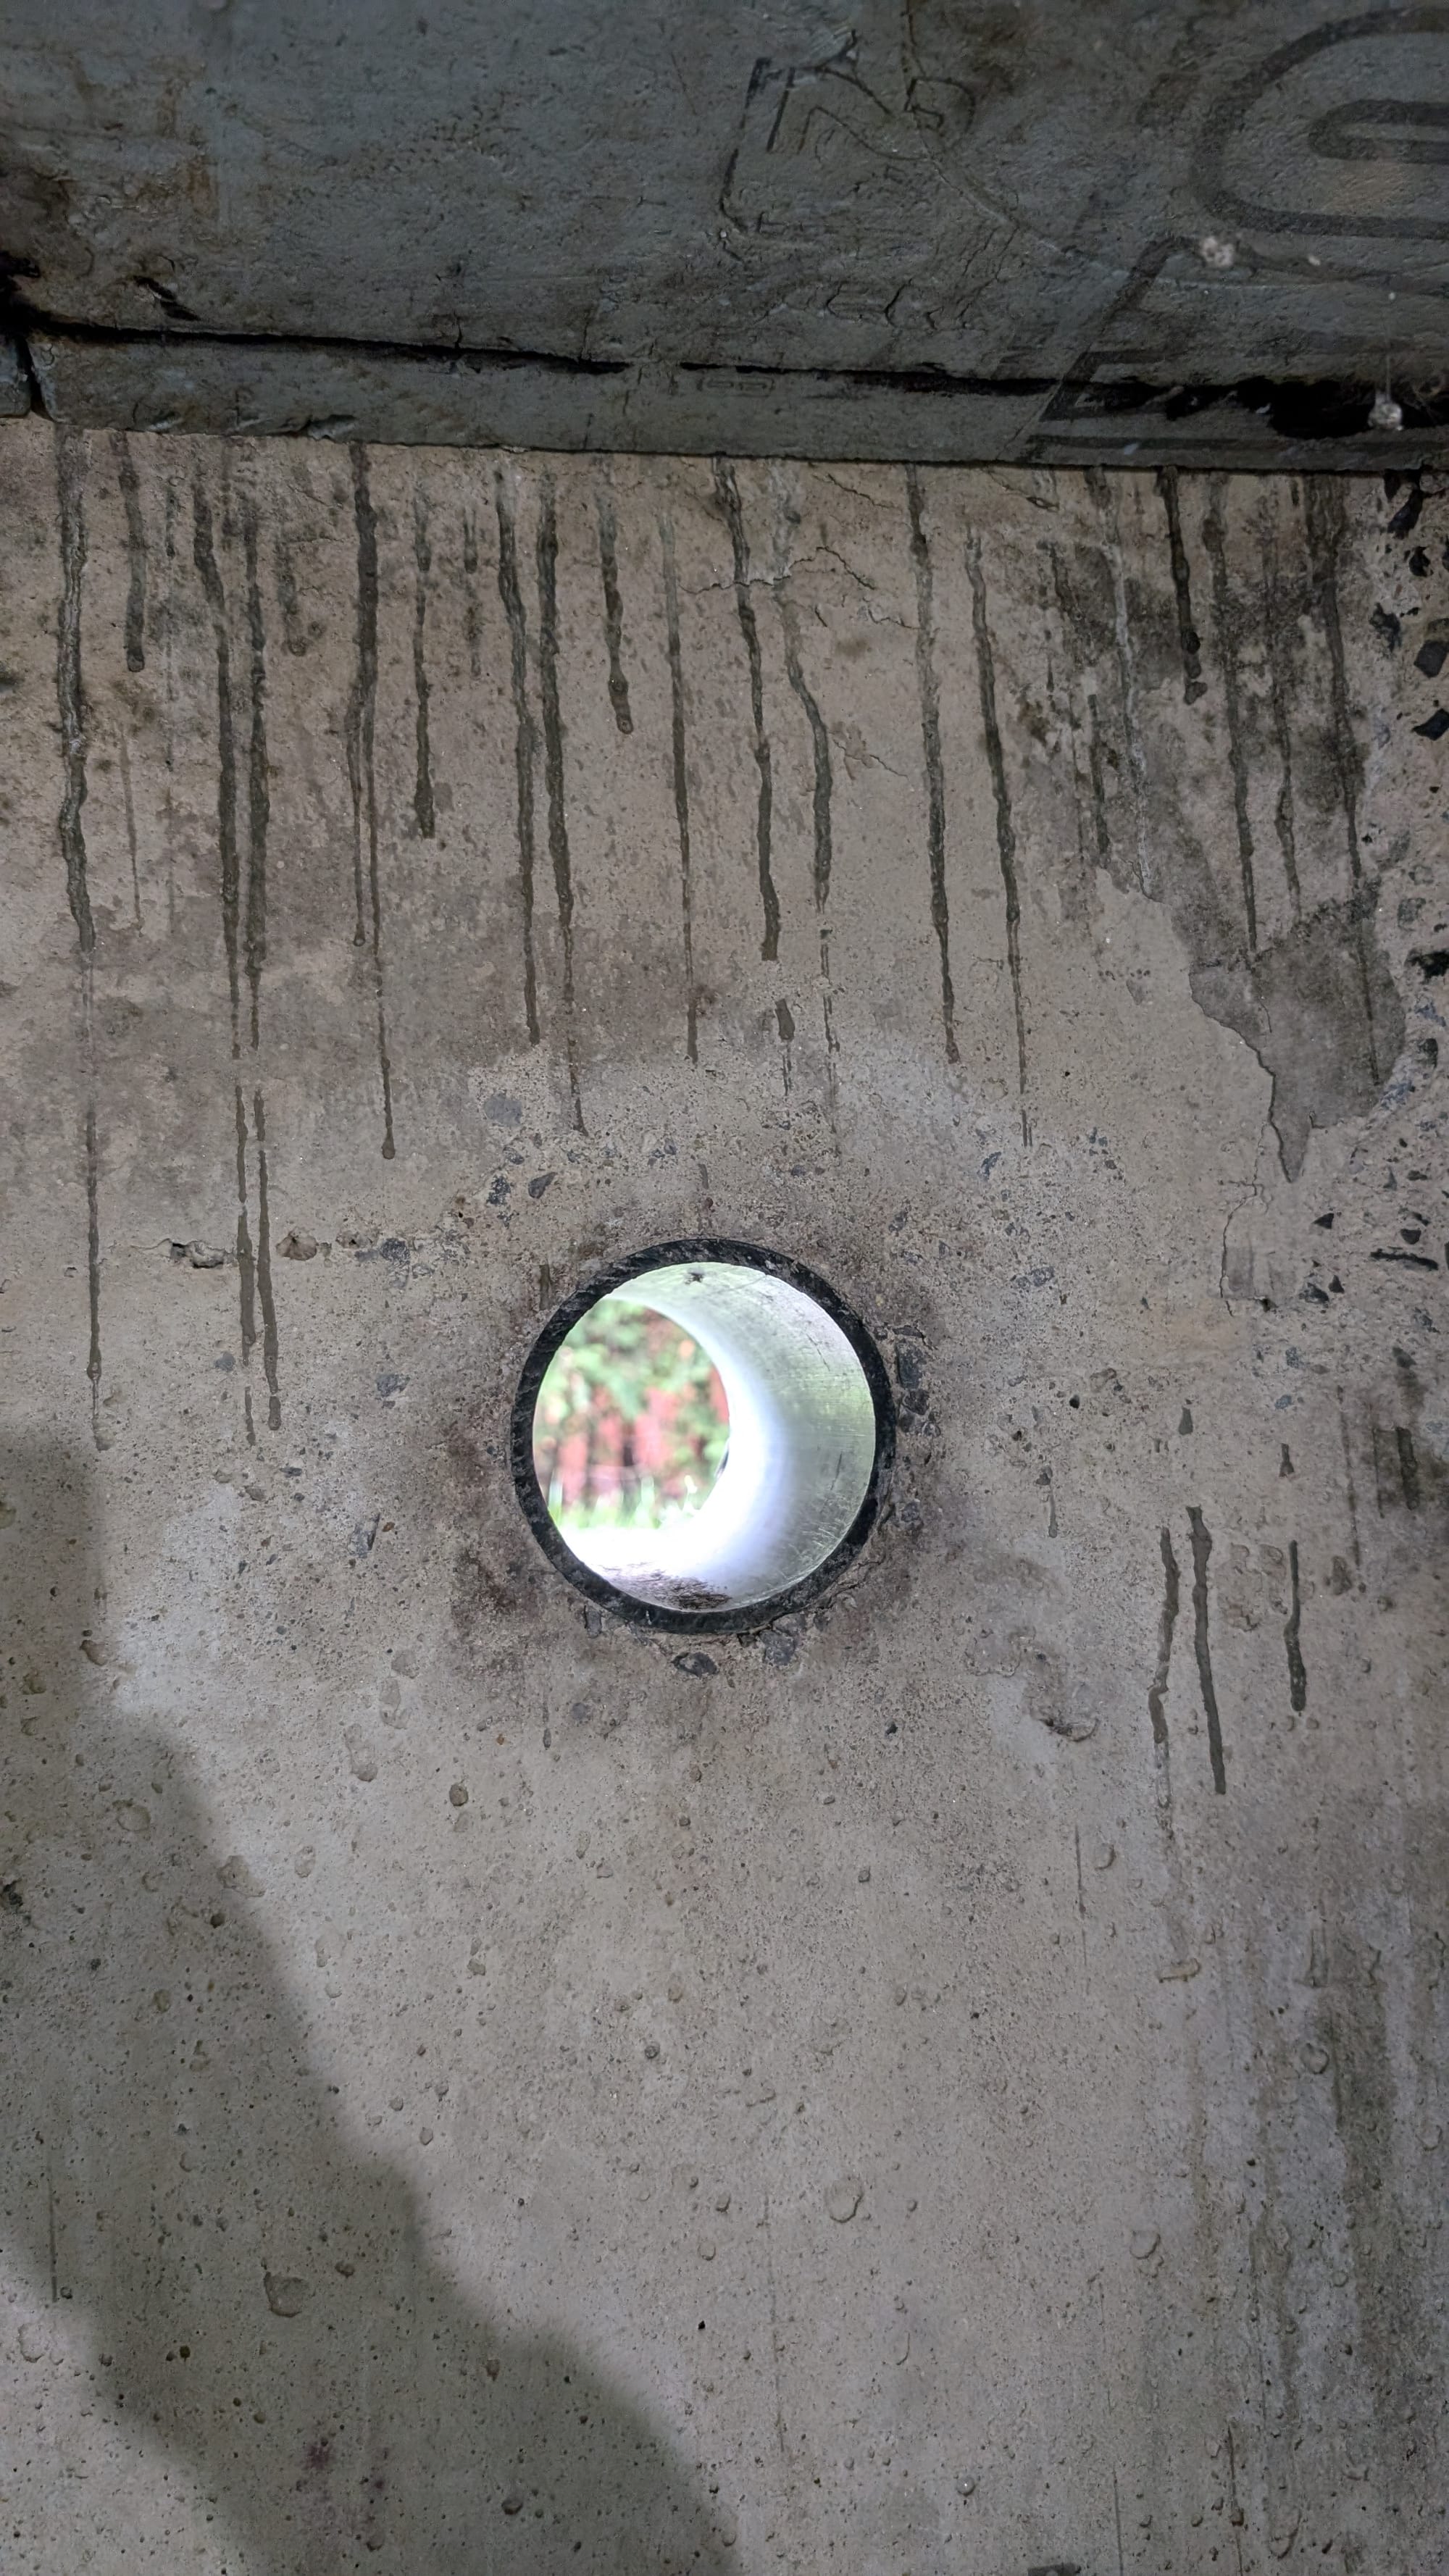
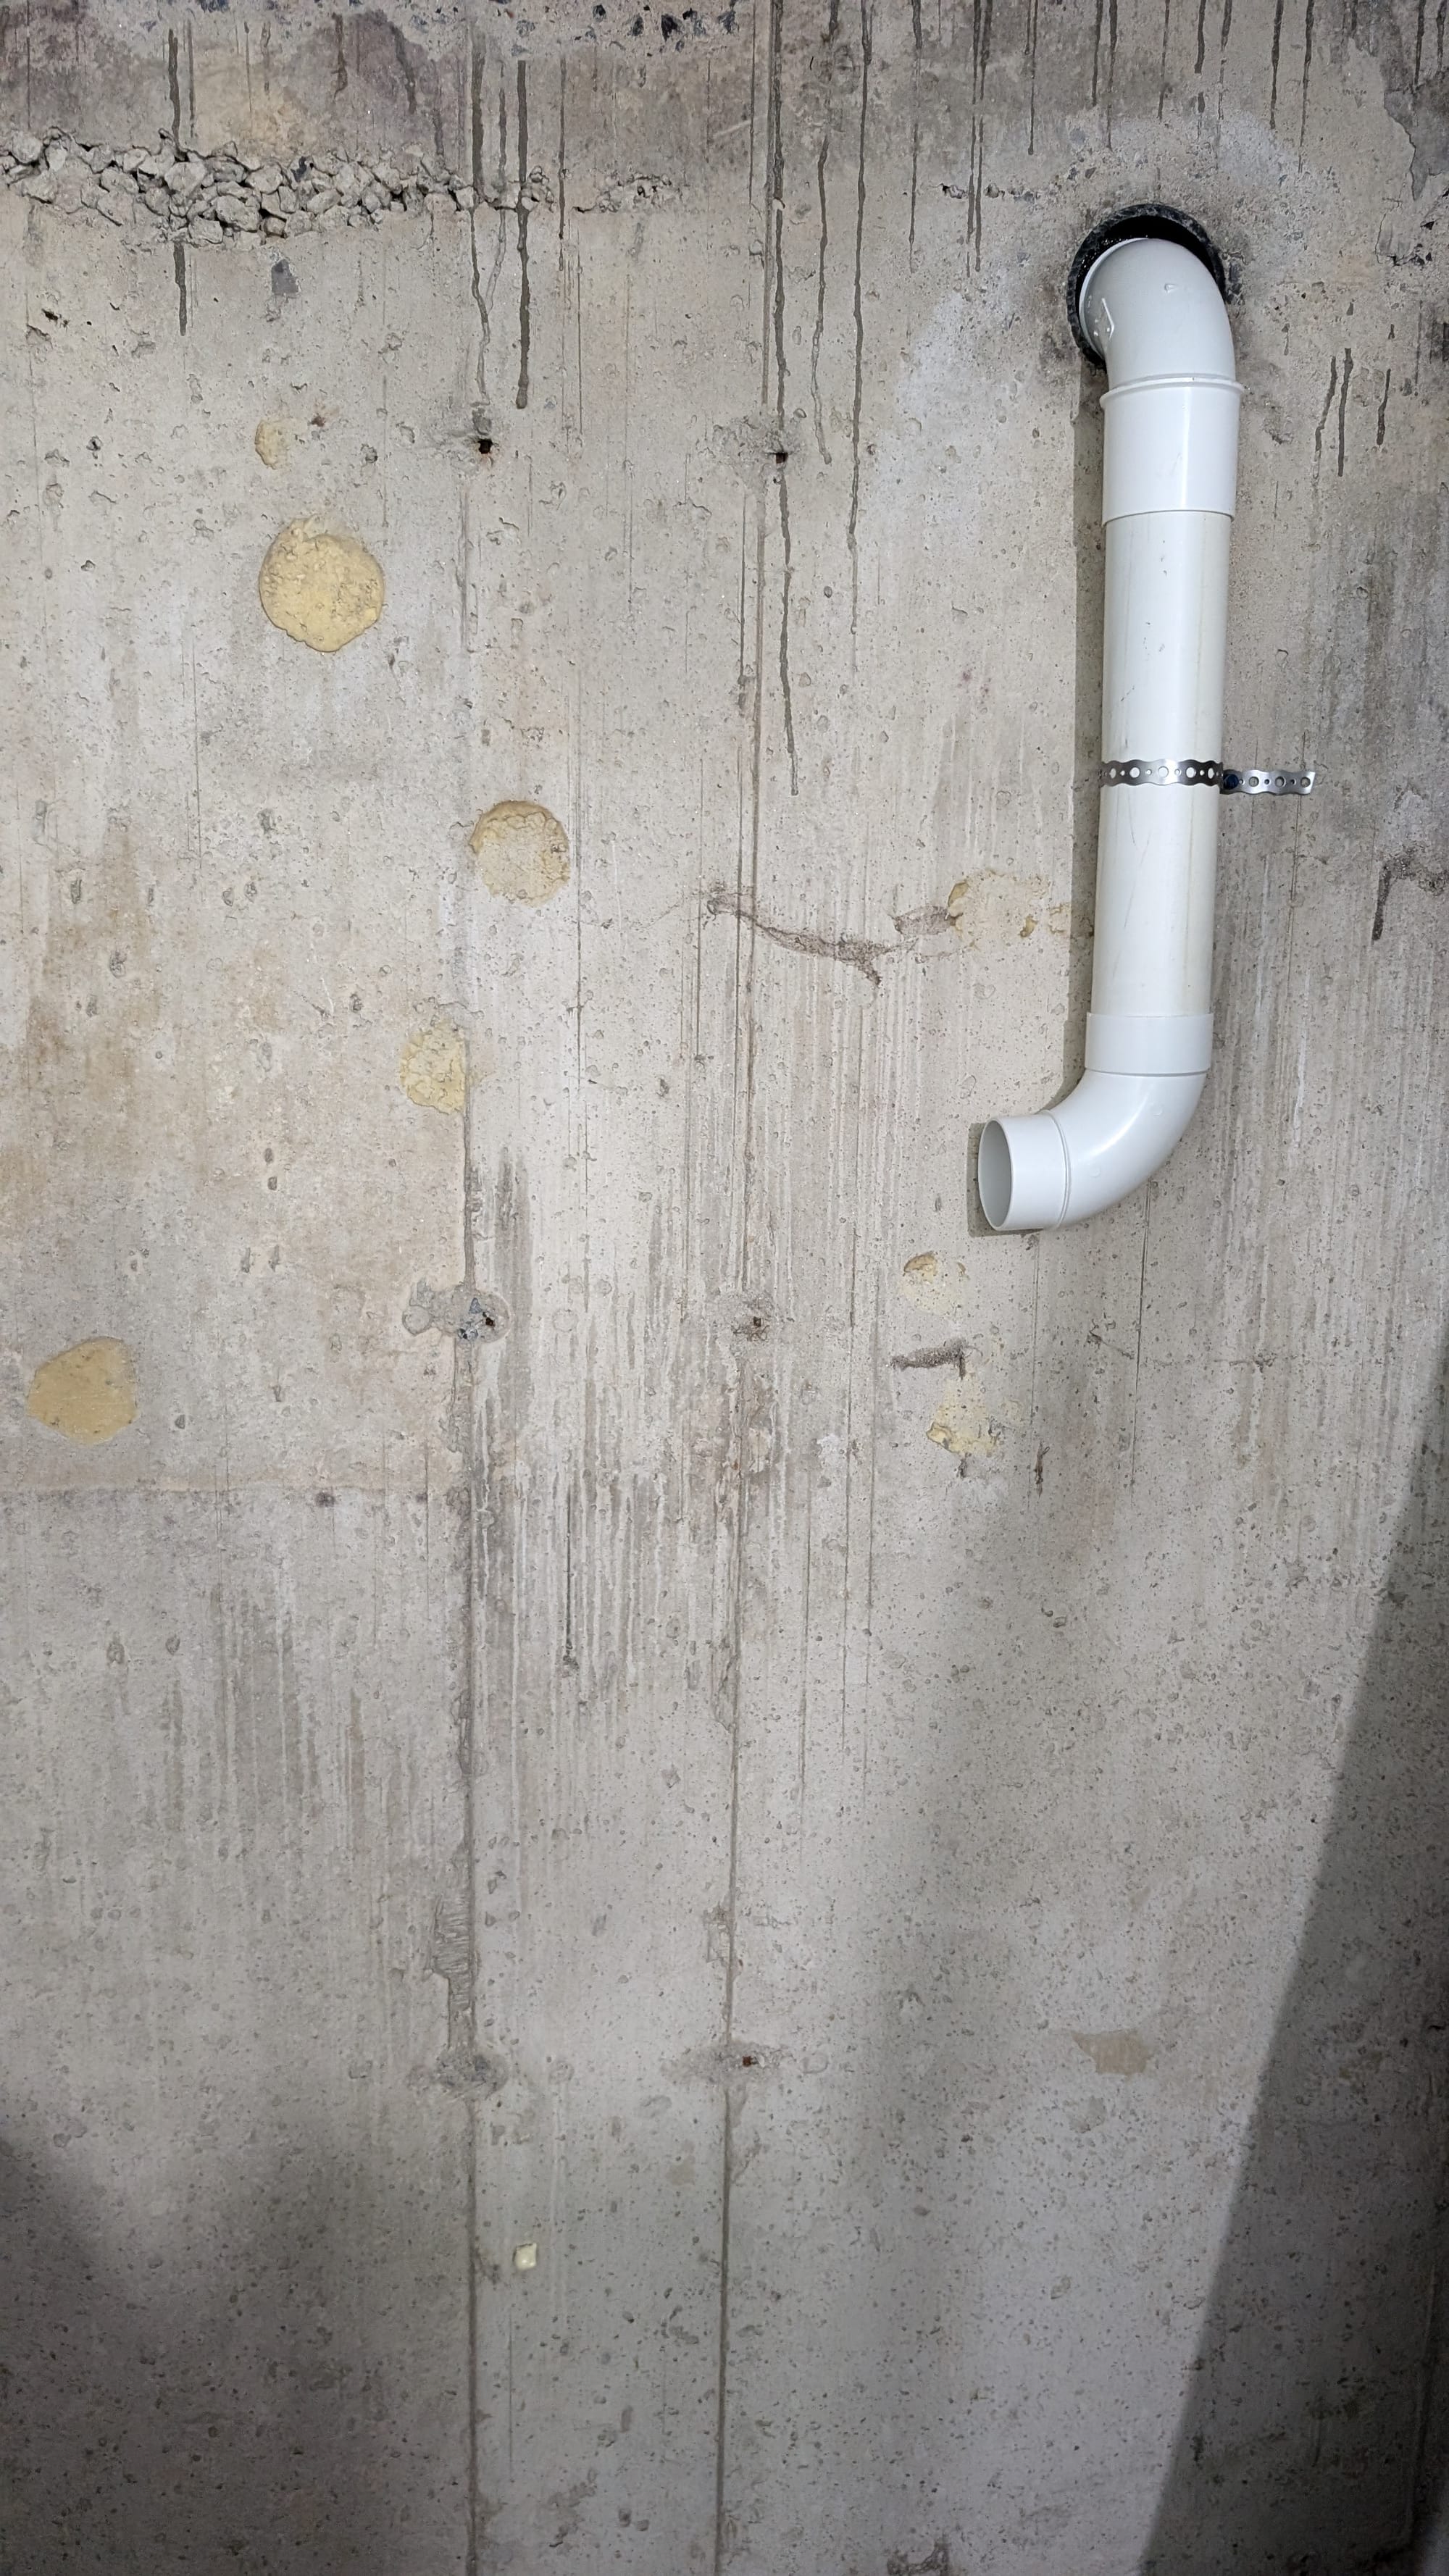
Next I connected and ran the 3" piping from the outside hole I was going to use to the area where the radon fan would be located. There was a closer hole to the outside, but it would have terminated right outside the front steps/door of the house, not ideal, so I decided to spend some extra on piping to terminate away from any other openings into the house
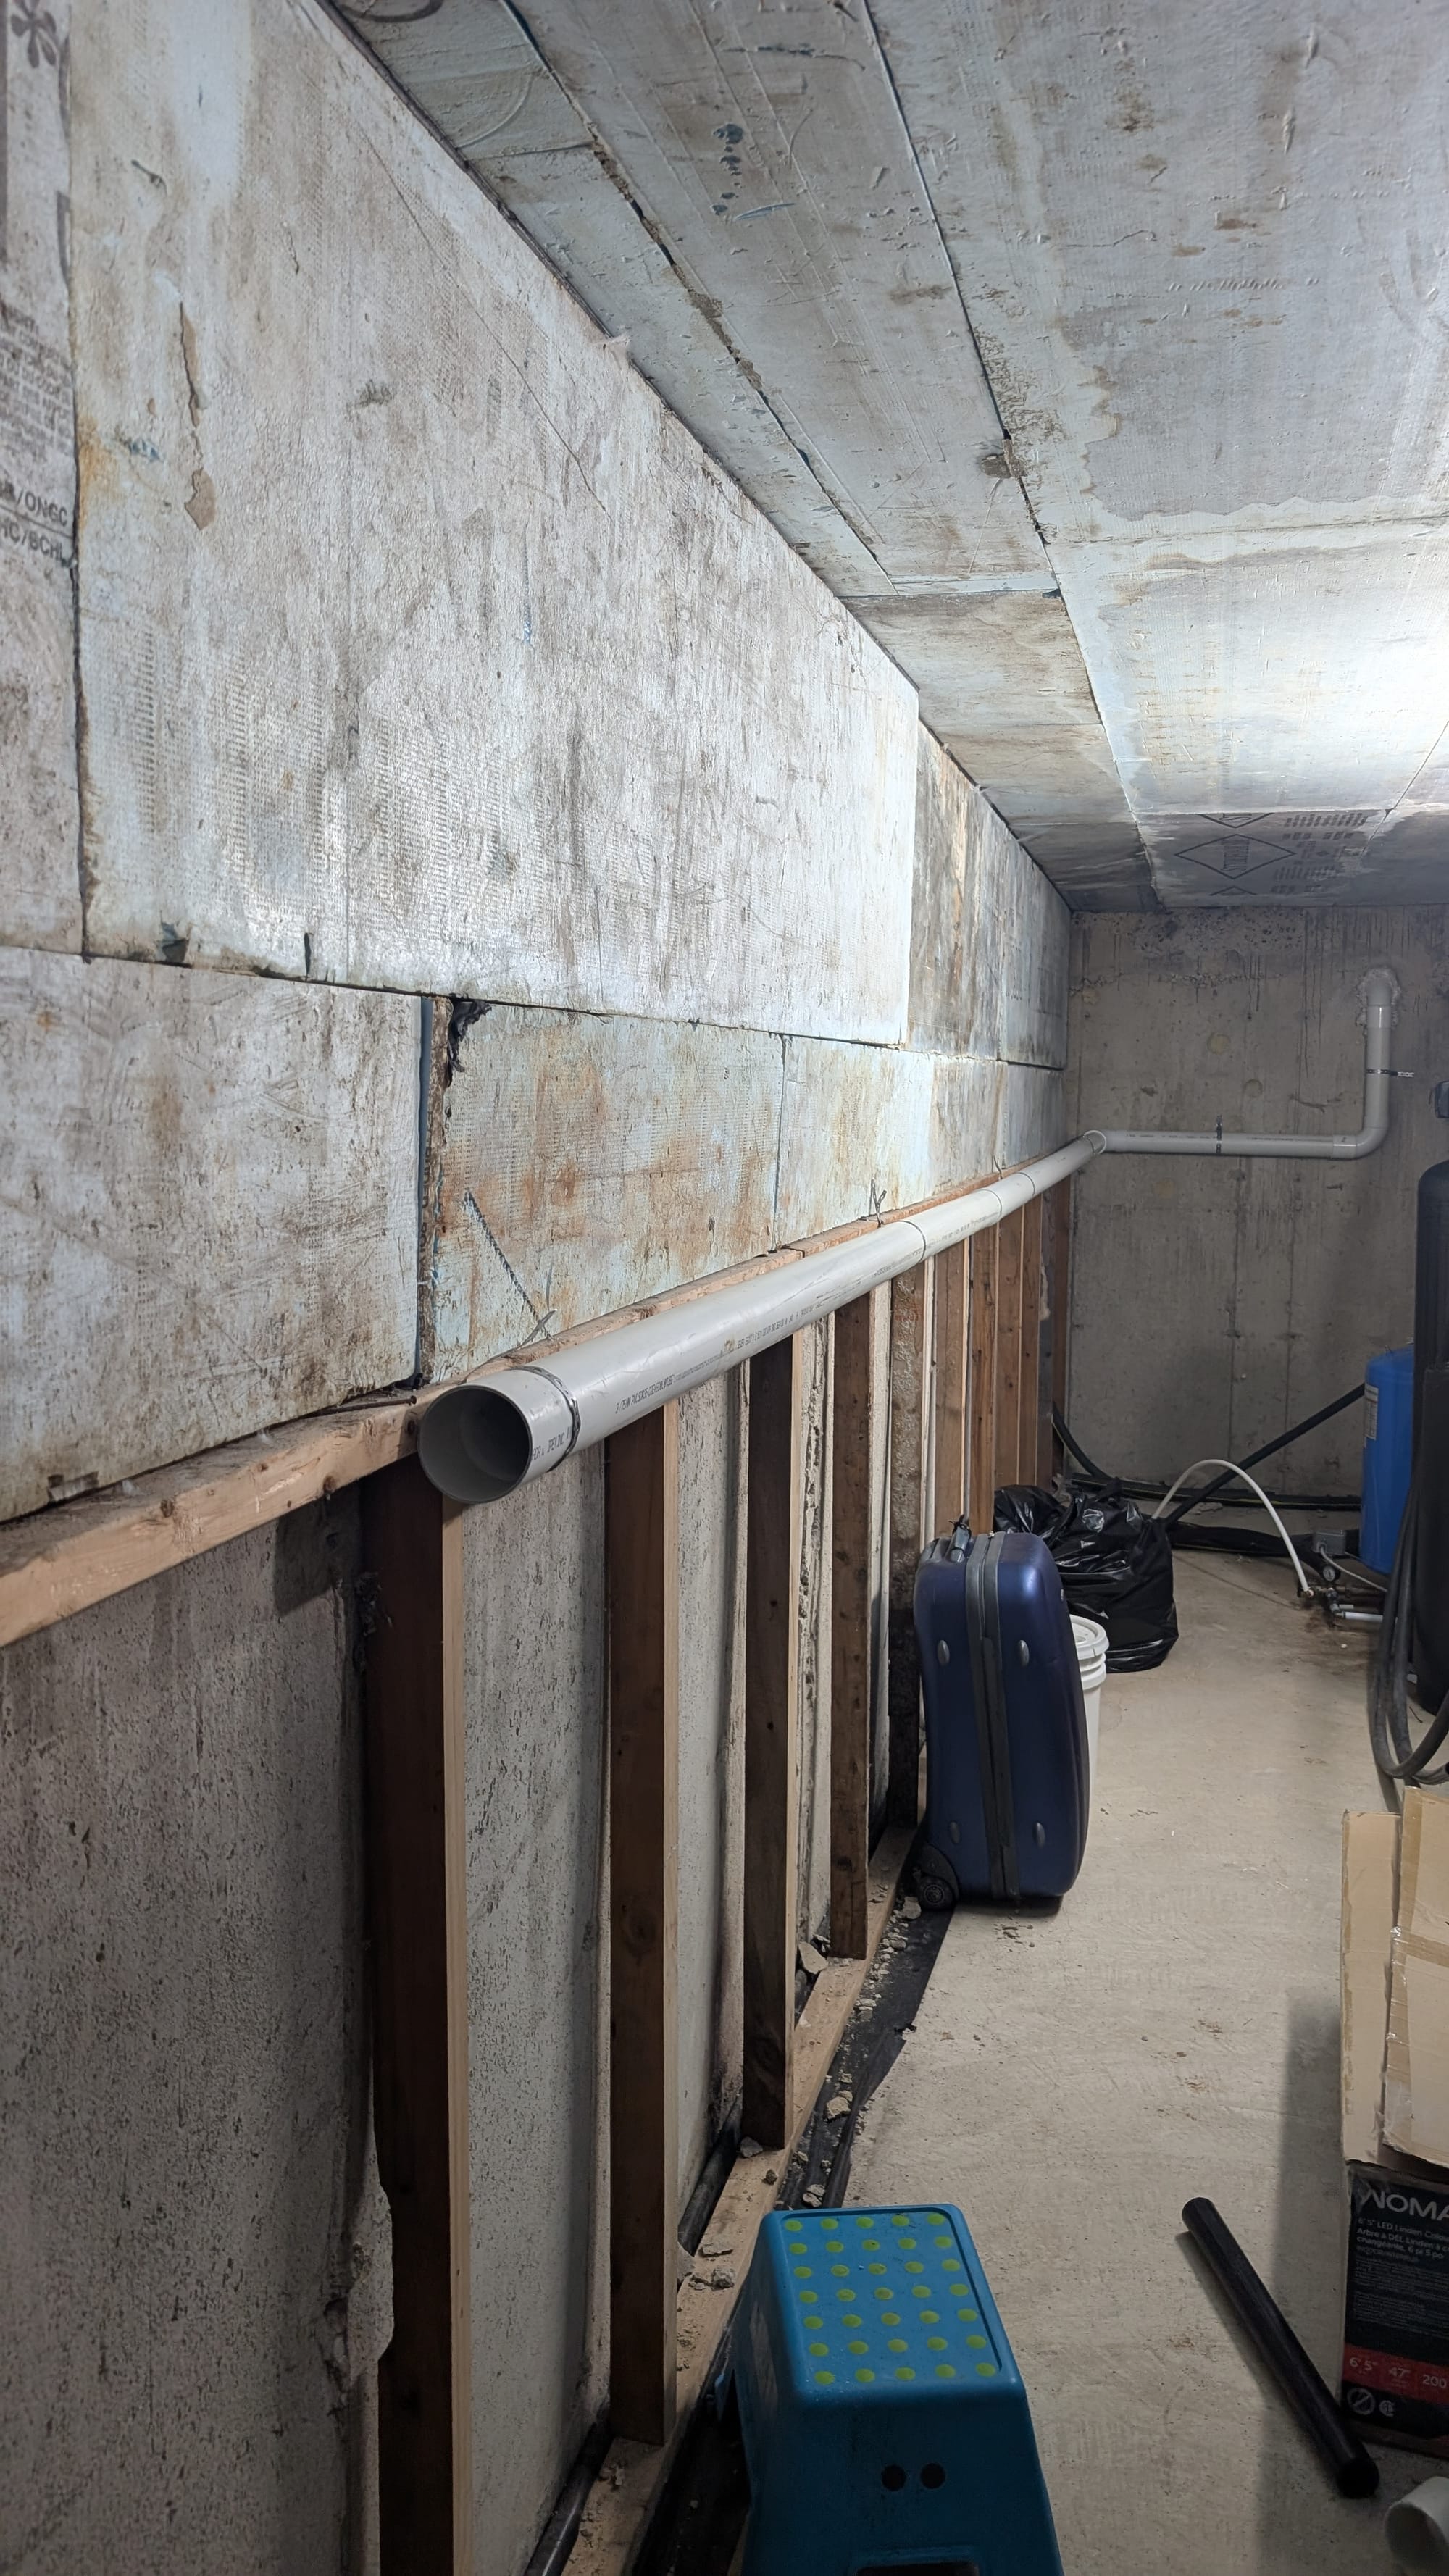
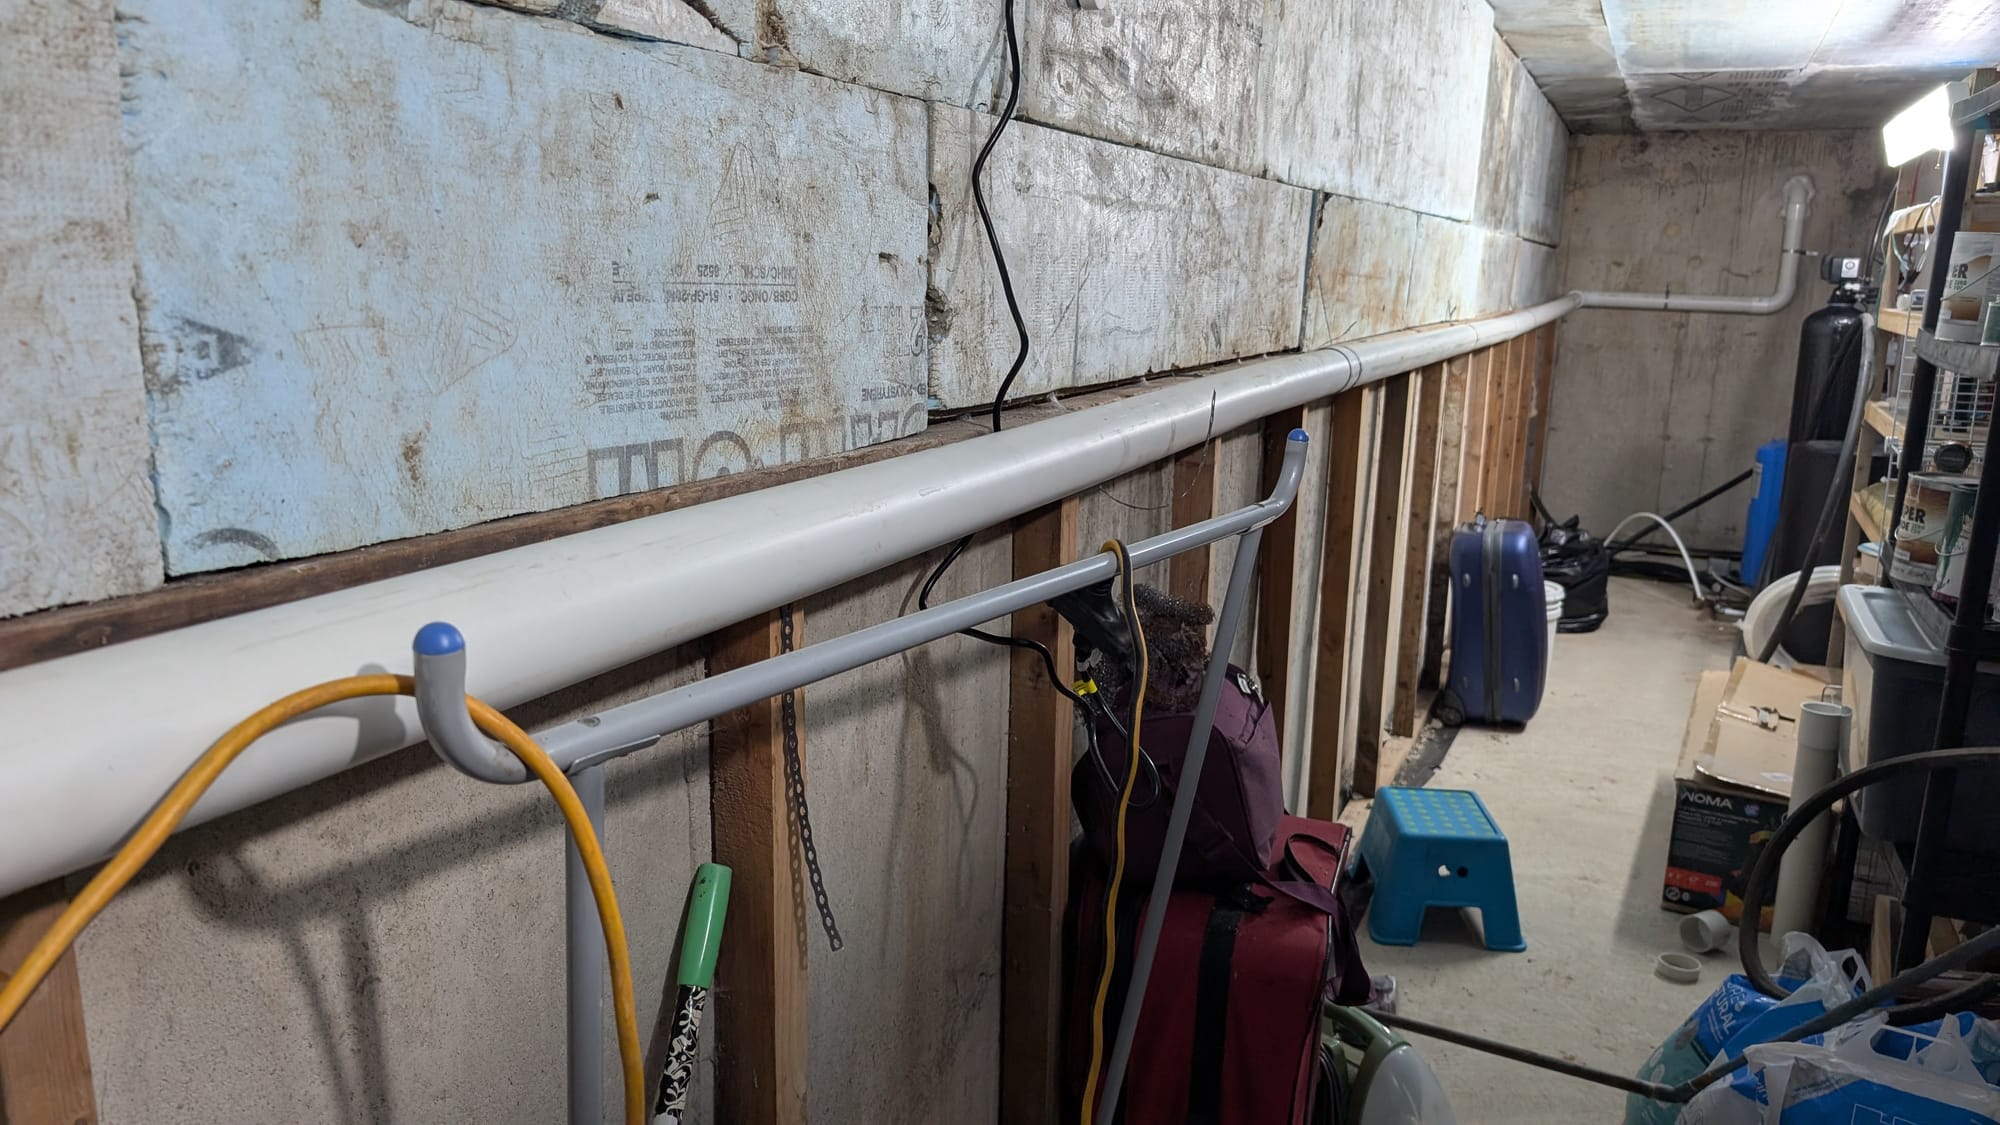
Next I disconnected the existing sump pump and cleaned up the area. Laid down the radon cover and marked out where it would set, and where I needed to drill holes into the floor to secure it. After the correct location was prepped, tapcon screw holes drilled, and the water softener waste line installed through the side of the cover, I laid a generous amount of PL90, placed the cover in place and screwed it to the floor.
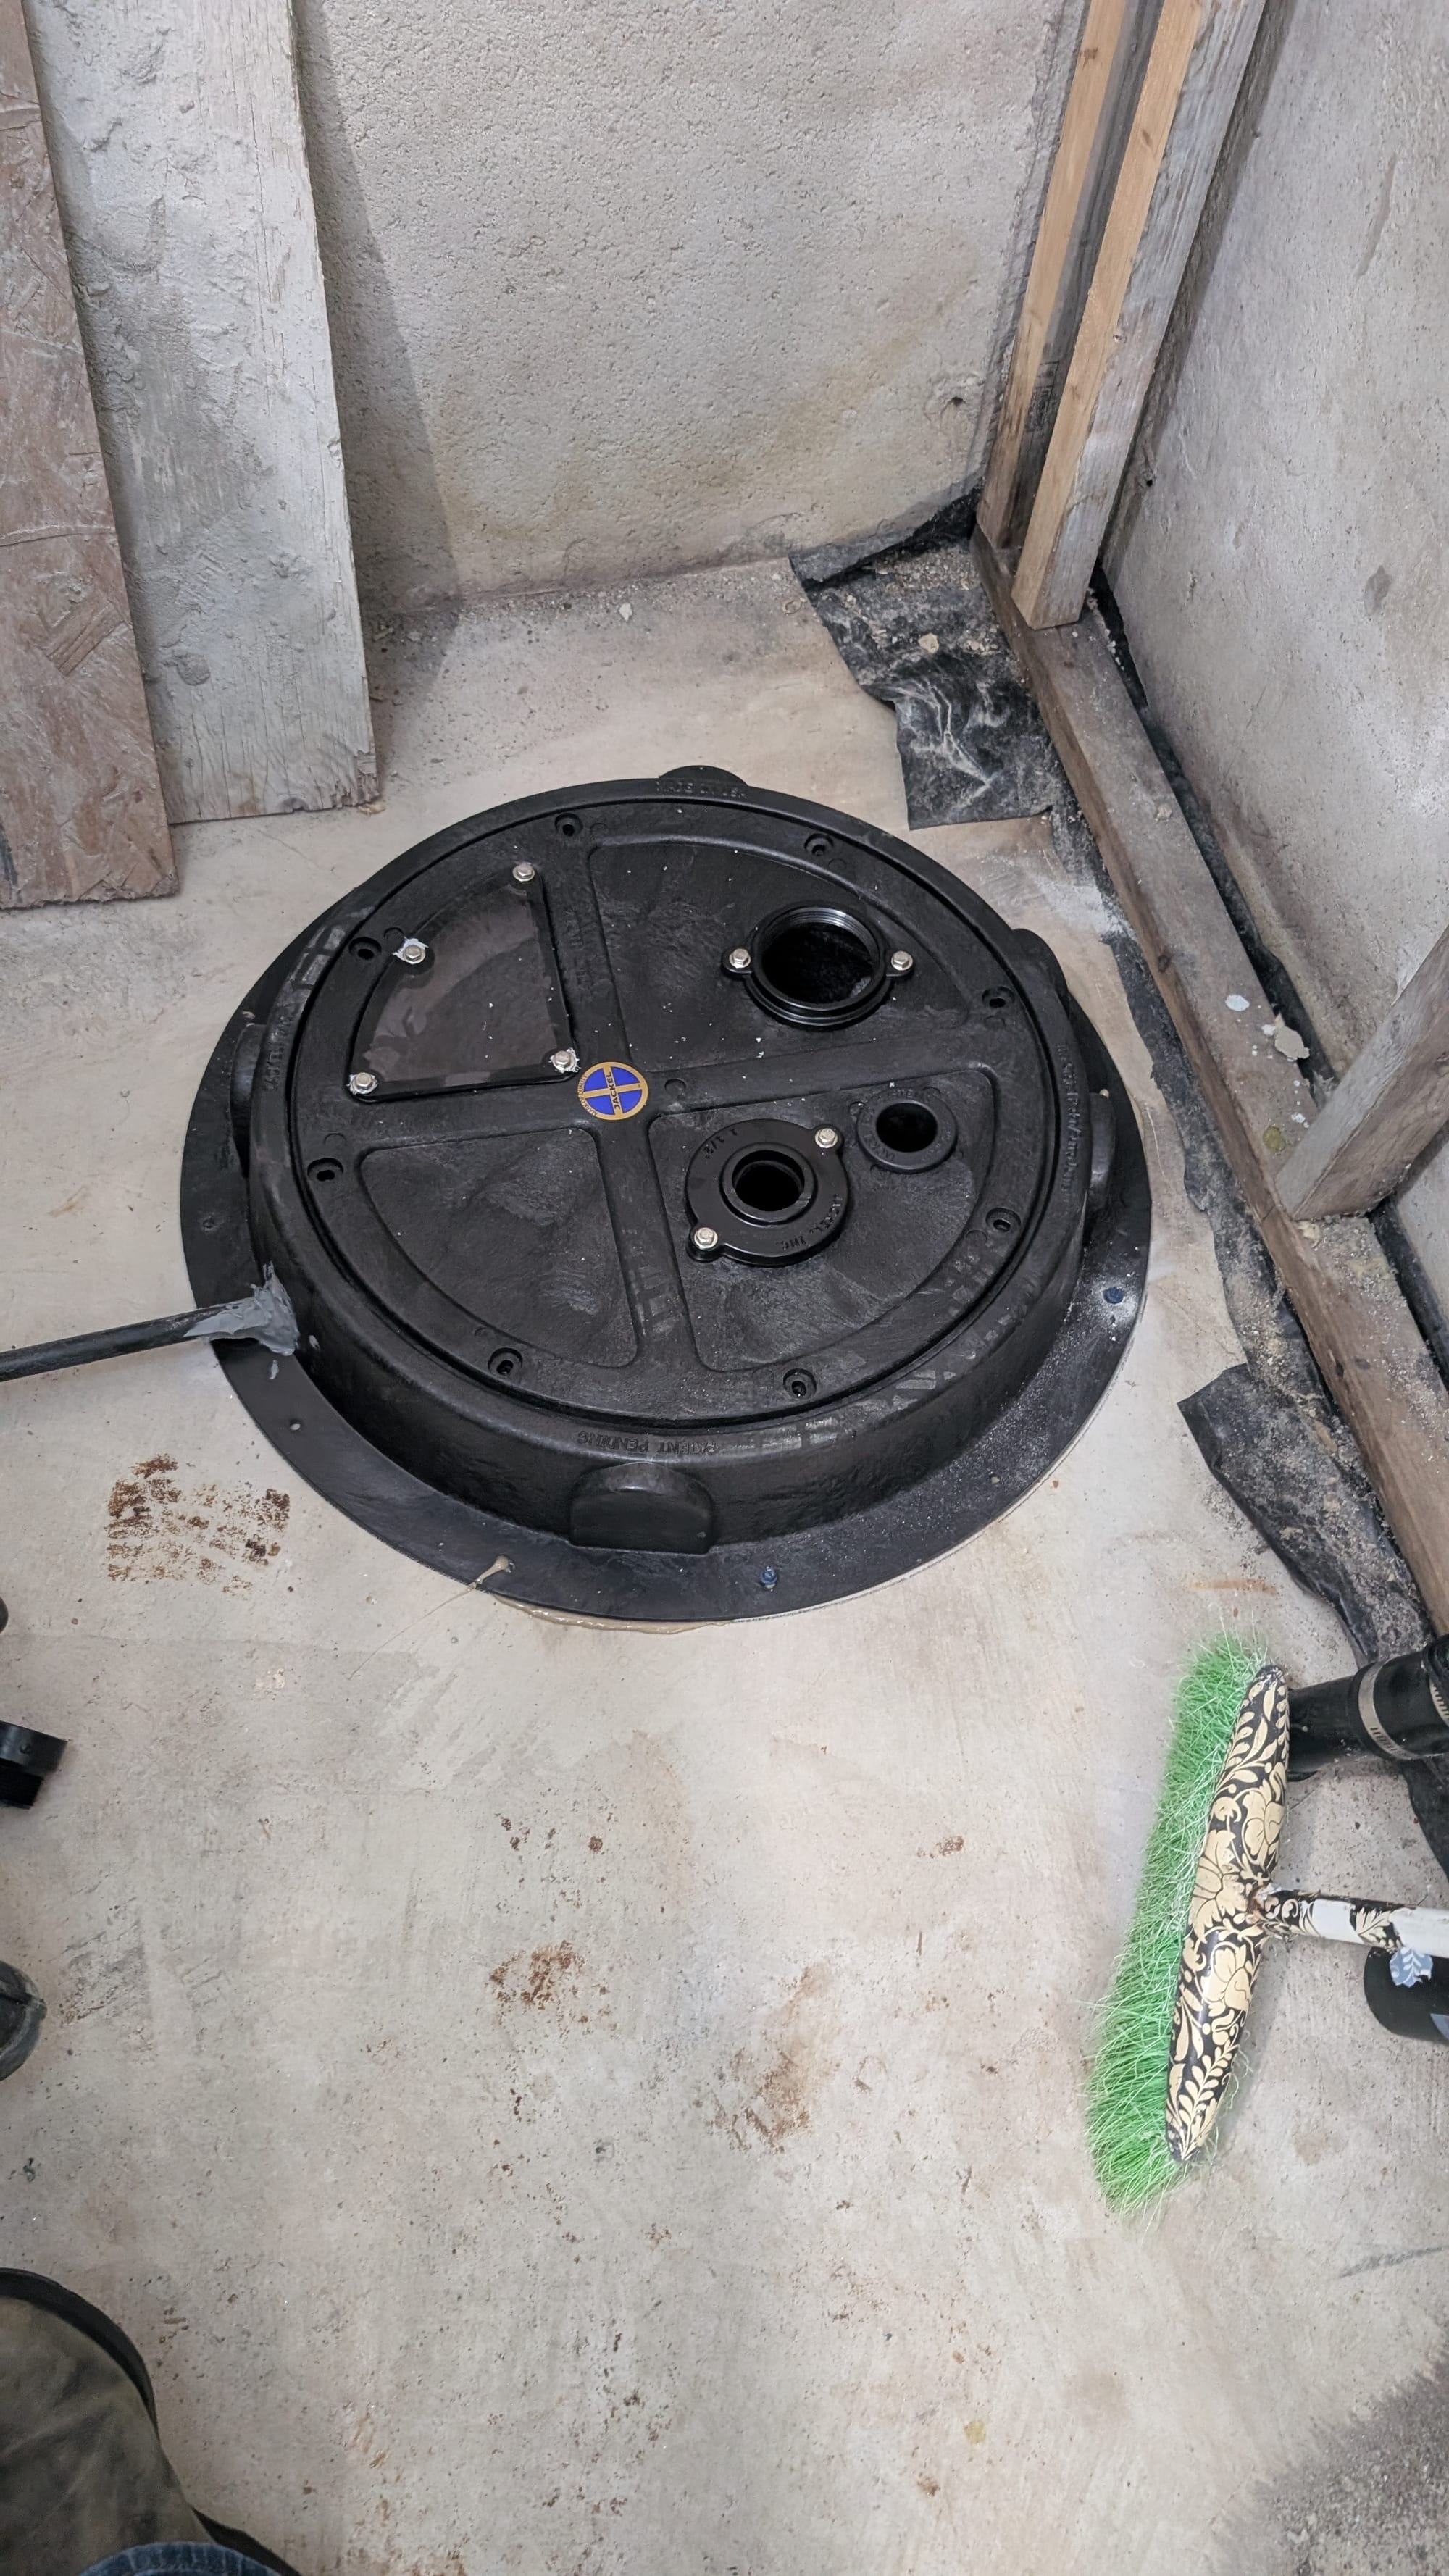
Once the piping was run, and the radon cover was in place, next was to install the sump pump back in place and install the radon fan inline with the radon cover and the pipe to the outside.
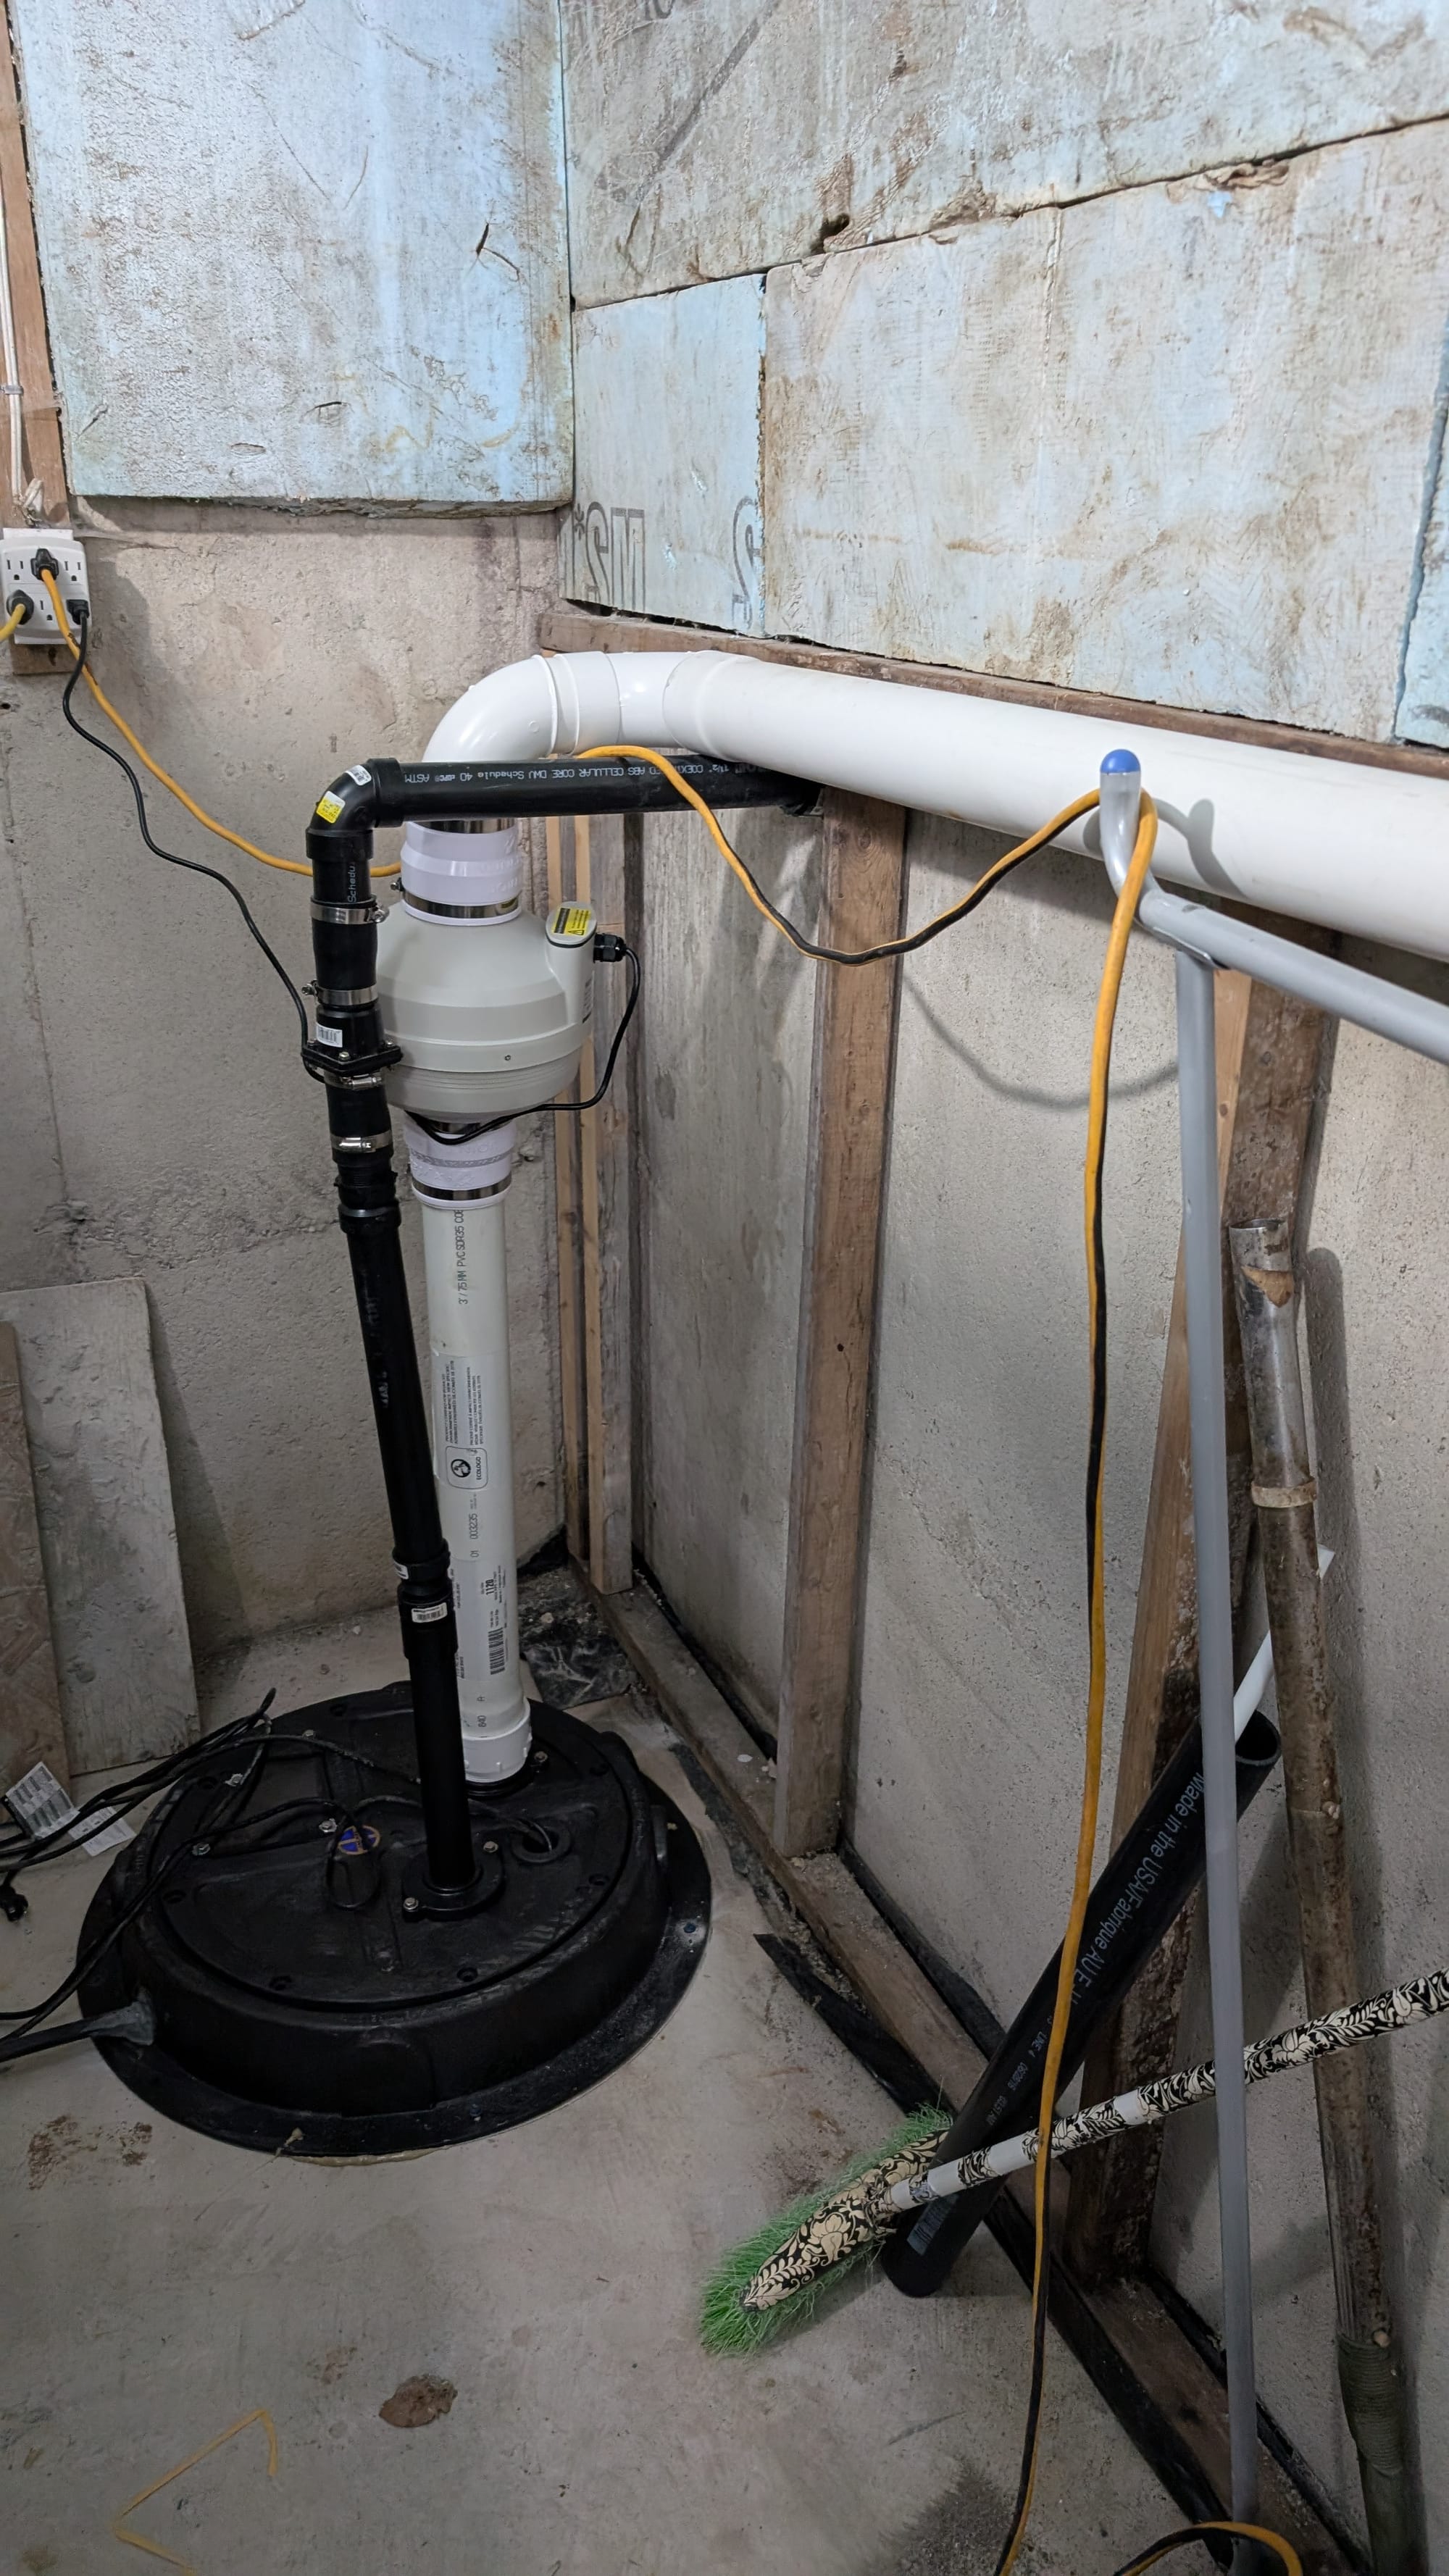
Complete! :-) yay! Overall a few hours work, and about $700 for peace of mind that my family and I are living in a healthy air home. Take a look at the results below.
Results
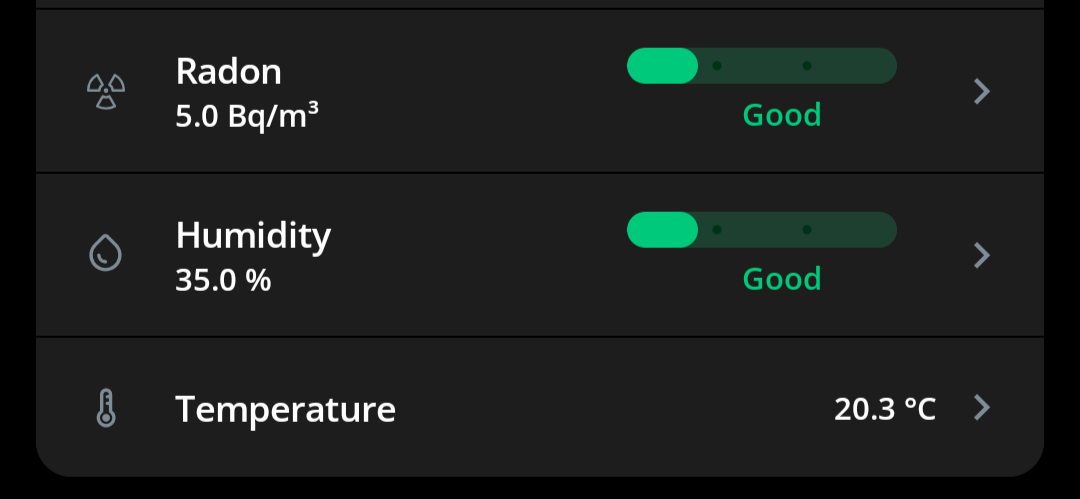
Two days following the install, my radon levels have gone from 1400Bq/m³ to currently 5 Bq/m³ and still dropping. Well under the Health Canada recommendation of under 150Bq/m³.
Extra
Since there was an additional hole from the cold storage to the outside, I bought and installed a small 4" fan inline to the hole as an additional venting from that area to ensure more airflow in that area to prevent any mold and mildew growth.
#photo of extra fan install
Some additional helpful install videos
Note: Exhaust pipe for your setup in Canada can be vented out the side and does not need to go through the roof to be to code.
Final thoughts
While the thought of high levels may be scary, it is an easy, quick and relatively cheap solution to mitigate those levels down to an acceptable level to make your home safer for you and your family.
And if after all of this you still don't believe me, listen to the the Number 1 Canadian contractor, Mike Holmes: