Let's talk about something that I think genuinely intimidates a lot of people: the Full Windsor knot or any tie knot for that matter.
It sounds so... official. So "boardroom" and "black tie." for years, I just stuck to the simple, I’ll let the store tie it for me or ask someone else to do it. It was fine. It worked. But not practical when one comes untied or I need one tied in a hurry.
But recently I got back into dressing up more, and a tie daily. That went well till my wife didn’t like the tie / shirt combo that I picked, and I needed a tie that was untied. The "this-could-change-things" moment for my lack of knot tying skills. I put on my best suit, and my simple little knot just looked... well, little. It looked sloppy and unbalanced with the spread-collar shirt I had.
So, I, er, we stood in the room in front of the mirror an hour before bed trying to partially master the skill from YouTube videos, images and readings. After awhile it slowly got easier and faster, until I had a resemblance of an acceptable knot. So, I decided to put this together for my future brain fart forgetful moments and for you to utilize too.
I’m here to tell you two things:
- It’s not as hard as it looks.
- The feeling of confidence you get from nailing this knot is 100% worth it.
The Windsor is a go-to for any event that matters. It’s thick, it’s powerful, and it’s perfectly symmetrical. It sends a message before you even say a word: "I'm here, I'm prepared, and I pay attention to the details."
So, let's learn it together. Grab a tie (a longer one is helpful) and let's do this.
The Setup
This is honestly the part where 90% of people mess up and end up with a tie that's either comically short or hangs down to their knees.
- Button your top shirt button and pop your collar up.
- Drape the tie around your neck.
- Now, look in the mirror. You need to make the wide end hang way, way lower than the thin end.
- Rule of Thumb: Let the tip of the thin end hang right around my solar plexus (where the two sides of your rib cage meet in the middle, 4-5 inches above your bellybutton). This leaves all the extra length on the wide end, which you'll need for the extra loops. Trust me on this.

Building the Knot (It's Just Two Triangles)
We're only going to be moving the wide end. The thin end just hangs out.
- Drape it over your neck as explained and shown above.
- Cross the wide end over the thin end.
- Bring the wide end up through the neck loop (from behind)
- Then pull it all the way down on the same side you started on. You've just created one "shoulder" of the knot.
- Take the wide end and wrap it behind the thin end, moving it horizontally to the other side.
- Now, do the same thing on the other side. Bring the wide end up through the neck loop (from the front this time) and pull it down on this new side.
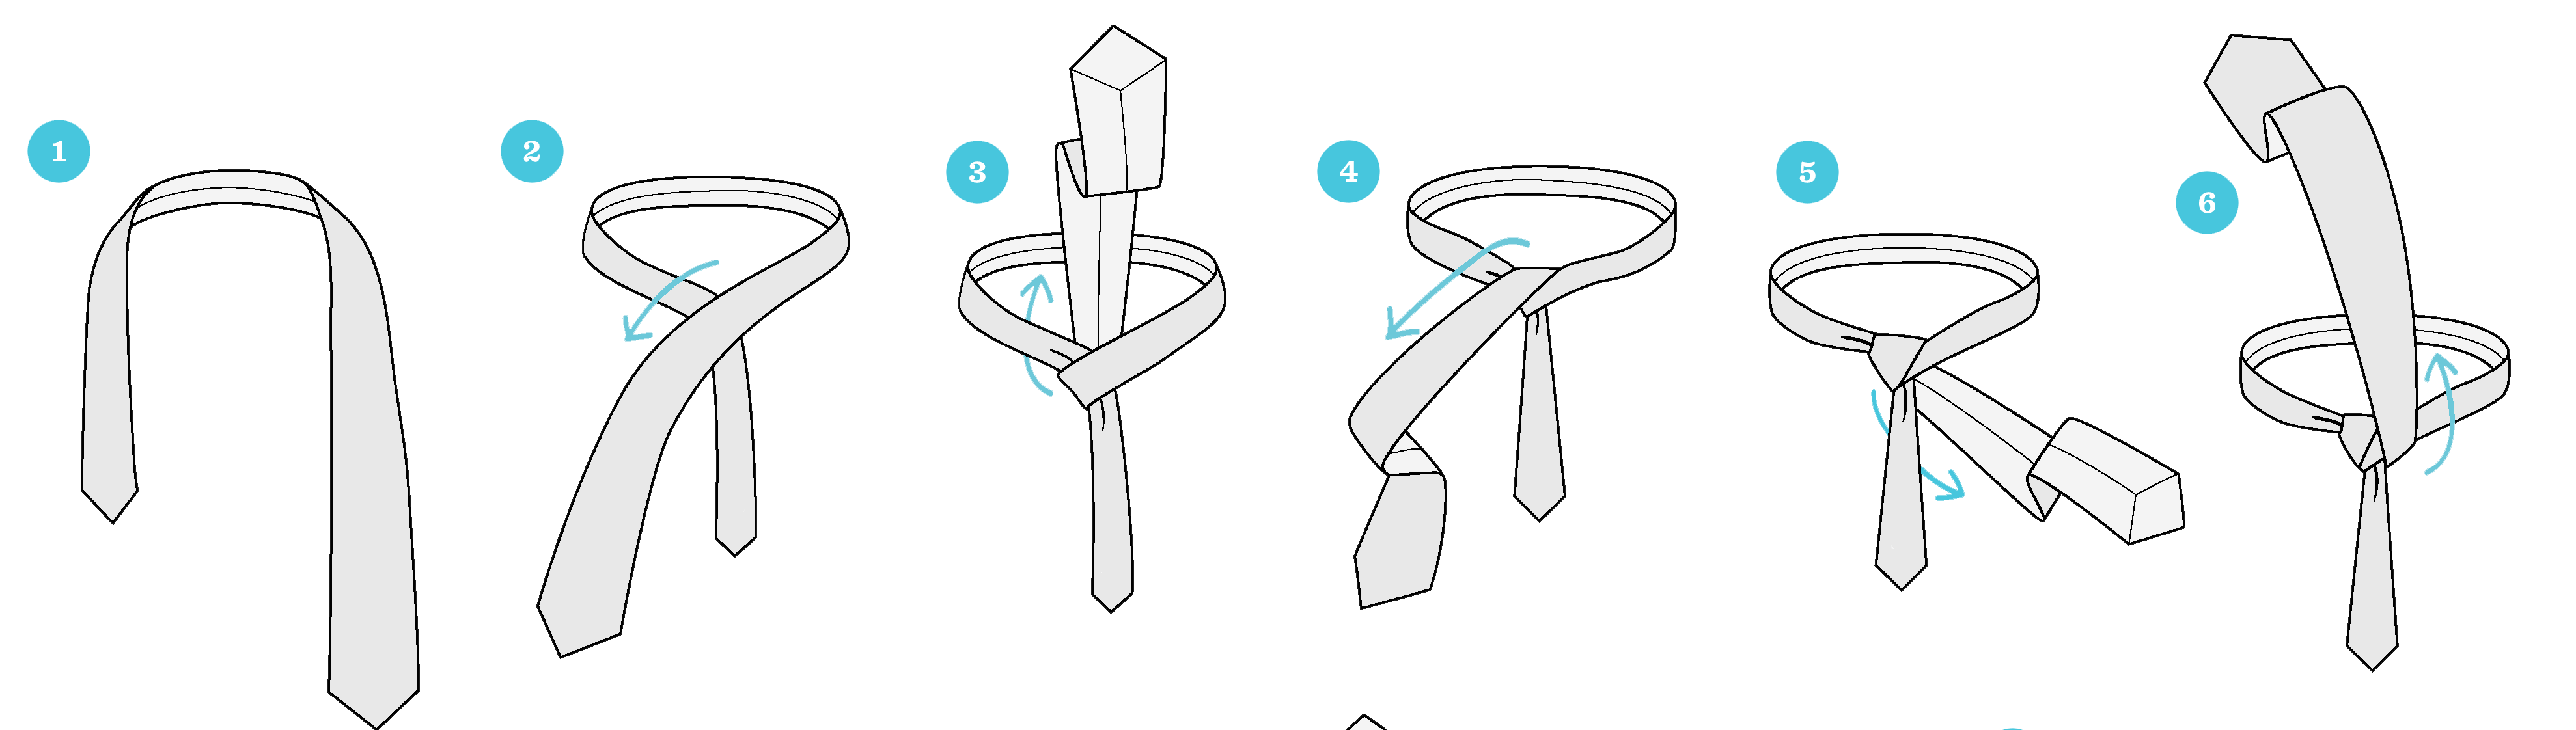
Pause here: Look at what you have. You should see a perfect, symmetrical triangle forming with two "shoulders." You're almost done!
The Final Tuck (Locking it In)
- The Cover: Take the wide end and cross it horizontally over the front of the knot you just built. This is the band that everyone will see.
- The Last Loop: Bring the wide end up through the neck loop one last time (from behind).
- The "Tuck": See that horizontal band you just made? That's your target. Feed the wide end down through that loop.
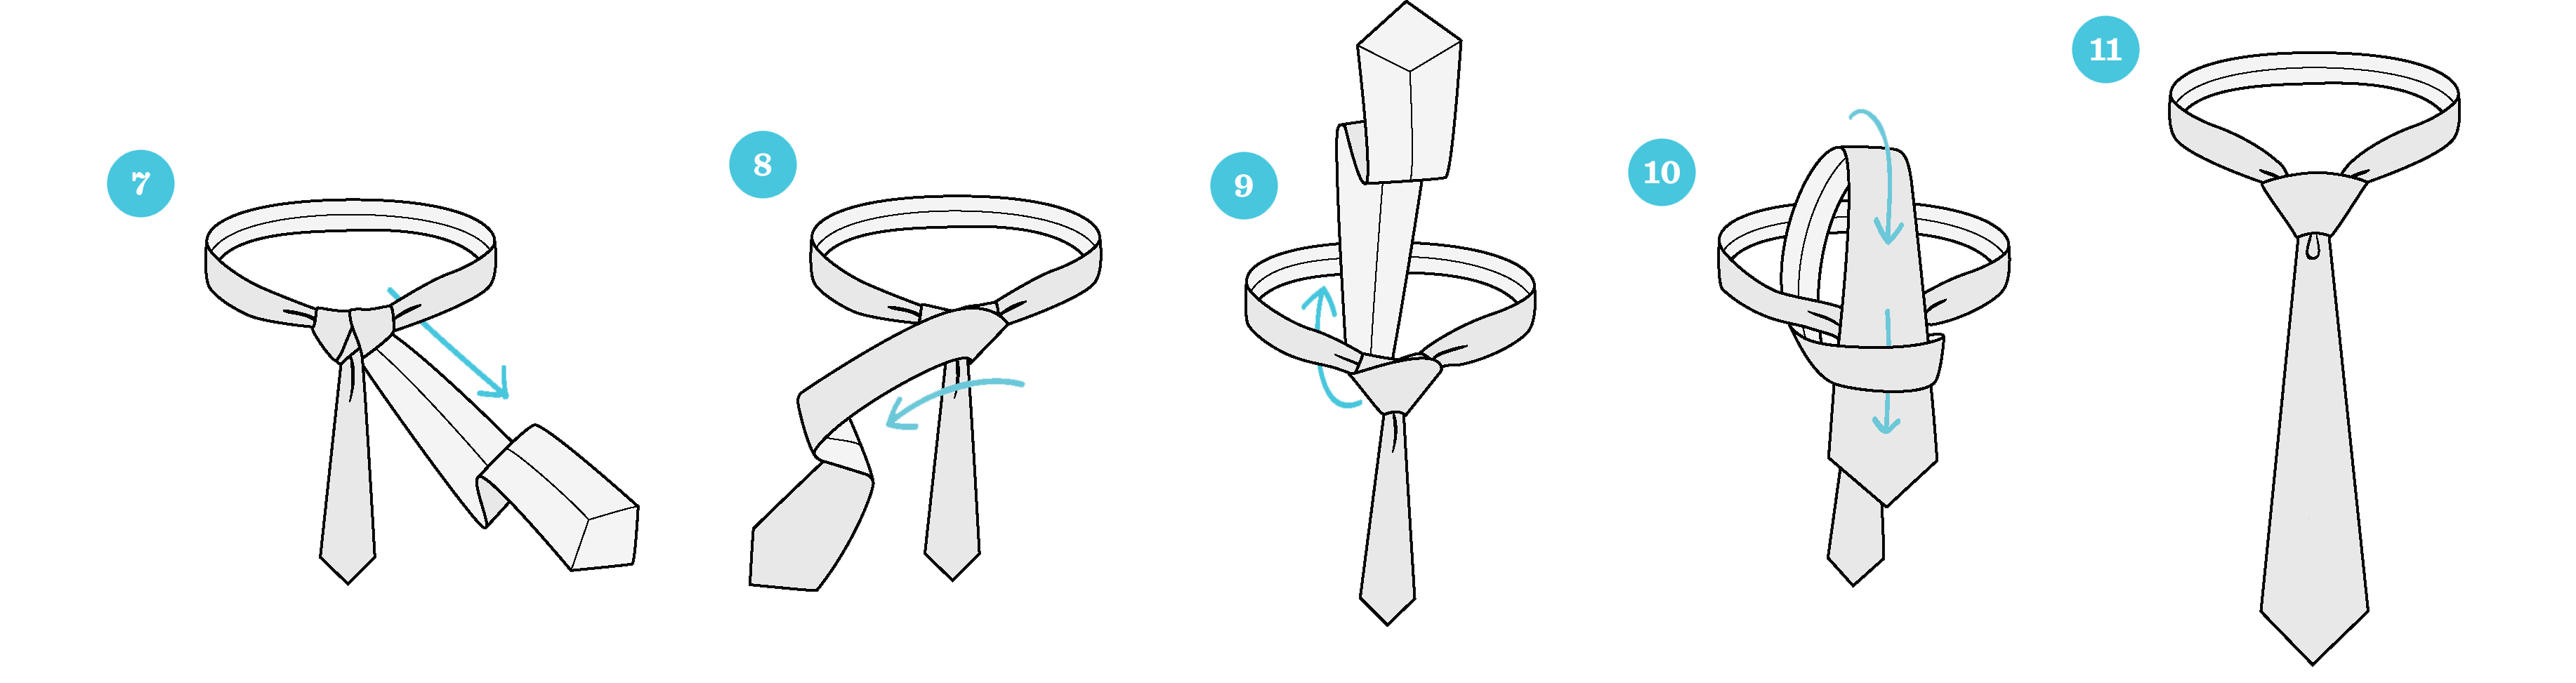
The Finish
You're not done yet! Don't just yank it tight.
- The Cinch: Pull the wide end all the way through the loop.
- The Dimple: This is the pro-move but hard to master. As you're pulling the knot, use your thumb and forefinger to pinch a little "dimple" or fold into the fabric just below the knot.
- The Slide: Hold the knot itself with one hand. With your other hand, pull the thin end to slide the entire knot up to your collar. Keep that dimple in place as you do!
Adjust until it's snug. The tip of your tie should hit right at the middle of your belt buckle. If it's too short or long, just untie and adjust your starting length from the beginning.

You Did It.
Flip your collar down. Look in the mirror.
See? It’s balanced. It’s confident. It’s solid.


Some of my tie / jacket combinations.
It might feel like a lot of steps at first, but after you do it five or six hundred times, it becomes pure muscle memory. I can now do this in the dark light.
Practice it when you're not in a hurry. The next time you have that wedding, that big presentation, or that "this-could-change-things" interview or date, you'll be ready.